1. Using System Center Configuration Manager
Unlike an LTI deployment, the preparation for a ZTI deployment is not optional.
MDT 2010 can provide a zero-touch deployment only because it is able to take
advantage of the capabilities built into Microsoft System Center Configuration
Manager (SCCM) 2007. You therefore must have SCCM 2007 installed on the computer on
which you plan to install MDT 2010.
In a ZTI deployment, SCCM takes over many of the tasks performed by MDT 2010 in an
LTI deployment. You still must create task sequences to install reference computers
and target computers, but in a ZTI deployment, you use the SCCM Configuration Manager
utility to perform all of the tasks of the Deployment Workbench program in an LTI,
except for the management of the MDT database.
1.1. Understanding the Infrastructure Prerequisites
SCCM 2007 is a full-featured network management package that is designed to
perform a wide variety of tasks. Operating system deployment is one of the
product’s major capabilities, but for most network managers, it is not worth the
time, effort, and expense required to install SCCM just for that purpose.
Implementing SCCM on a large network is a
formidable task in itself, before you even consider using it with MDT. The product
requires a substantial software infrastructure, including a variety of Windows
Server roles and features and a SQL Server database. You can distribute the
various services among different computers, but to use a single server to perform
a ZTI deployment, you must install and configure all of the following servers,
roles, features, and other elements:
Windows Server 2008 or Windows Server 2008 R2
Active Directory Domain Services
DNS Server
DHCP Server
Internet Information Services (IIS)
Windows Deployment Services
BITS Server Extensions
Remote Differential Compression
System Center Configuration Manager 2007
SQL Server 2005 SP2 or later
Windows 7 Automated Installation Kit
Microsoft Deployment Toolkit 2010
1.2. Configuring Configuration Manager Integration
After you have installed and configured SCCM 2007 and all of the other software
required to run it, you can install Windows 7 AIK and MDT 2010, just as you would
for an LTI deployment. Then, to enable the interaction between the SCCM
Configuration Manager console and MDT 2010, you must run the Configure ConfigMgr
Integration Wizard, as in the following procedure:
Click Start. Then click All Programs | Microsoft Deployment Toolkit |
Configure ConfigMgr Integration. The Configure ConfigMgr Integration Wizard
appears, displaying the Options page, as shown in Figure 1.
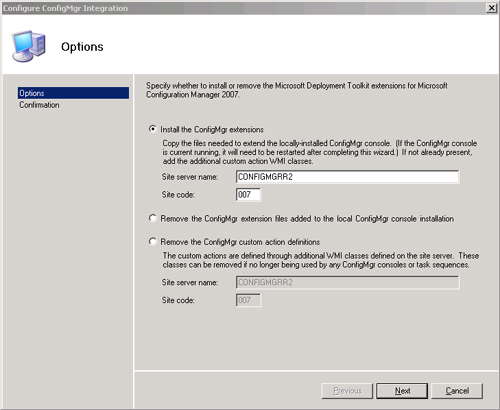
Select the Install The
ConfigMgr Extensions option.
In the Site Server Name text box, type the name of the server on which
SCCM is installed.
In the Site Code text box, type the SCCM server’s site code number and
click Next. The Confirmation page appears.
This wizard copies the MDT integration files to the Configuration Manager root
folder (C:\Program Files\Microsoft System Center Configuration Manager, by
default) and adds new Windows Management Instrumentation (WMI) classes for MDT
functions.
2. Creating Task Sequences Using SCCM
SCCM 2007 uses task sequences to define the activities it performs on clients,
just as MDT 2010 does. In a ZTI deployment, you must create task sequences to deploy
Windows 7 on reference computers and target computers, just as in an LTI deployment.
Although the terminology is the same, the procedure for creating the task sequences
in Configuration Manager is substantially different.
Note:
LTI and ZTI deployments use some of the same terminology for their components,
such as packages and task sequences, but the terms do not always refer to the same
elements. Be careful to distinguish between the LTI and ZTI environments when
reading exam questions.
Software distribution is one of the primary functions of SCCM, which the product
does by creating software packages and transmitting them to clients all over the
network. When you create a task sequence in Configuration Manager, you create a
number of separate packages in the process, containing the various software elements
needed to install the target computer.
The process of creating a task sequence for a ZTI target computer deployment is as
follows:
Click Start. Then click All Programs | Microsoft System Center |
Configuration Manager 2007 | ConfigMgr Console. The Configuration Manager
Console appears, as shown in Figure 2.
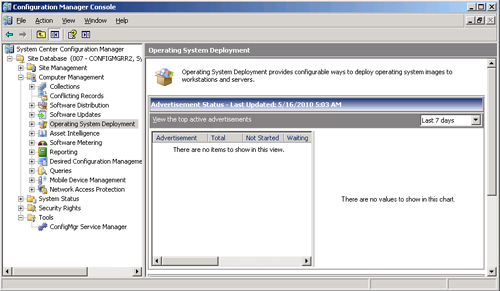
Expand the Computer Management\Operating System Deployment node. Then
right-click Task Sequences and, in the context menu, select Create Microsoft
Deployment Task Sequence. The Create Microsoft Deployment Task Sequence Wizard
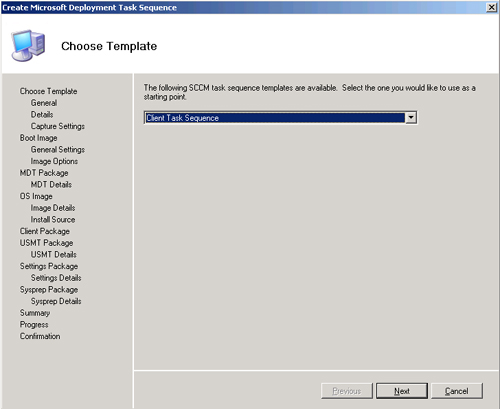
appears, displaying the Choose Template page, as shown in Figure 3.
Note:
CREATING MICROSOFT DEPLOYMENT TASK
SEQUENCES
SCCM 2007 also uses task sequences for operating system deployments
independent of MDT 2010. Therefore, be sure to select Create Microsoft
Deployment Task Sequence from the context menu, and not the New | Task
Sequence option.
Leave the Client Task Sequence template selected and click Next. The General
page appears.
In the Task Sequence Name text box, type a descriptive name, such as
Windows 7 Target Deployment, and click
Next. The Details page appears, as shown in Figure 4.
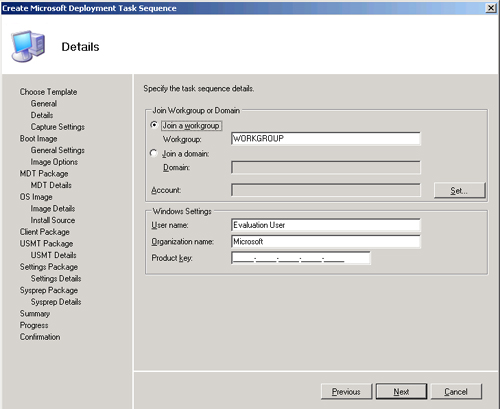
Select the Join A Domain option, and in the Domain text box, type the name
of the domain you want the target computer to join.
Click Set. The Windows User Account dialog box appears.
In the User Name, Password, and Confirm Password text boxes, type the
administrative credentials that the target computer will use to join the
domain. Then click OK.
In the Windows Settings box, type the User Name, Organization Name, and
Product Key values that the target computer should use when installing Windows
7. Then click Next. The Capture Settings page appears.
Leave the option named The Task Sequence Will Never Be Used To Capture An
Image selected and click Next. The Boot Image page appears, as shown in Figure 5.
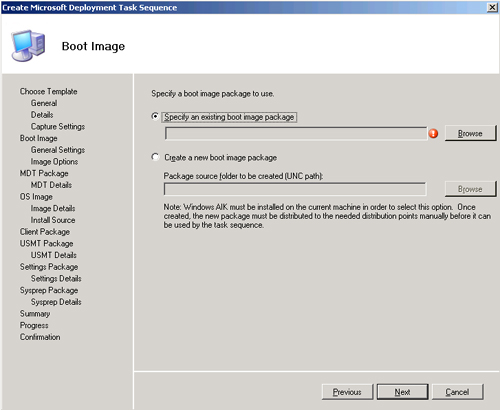
Select the Create A New Boot Image Package option
and in the Package Source Folder To Be Created text box, type the path to a
shared folder where the wizard will create the image. Then click Next. The
General Settings page appears.
Note:
CREATING NEW PACKAGES
If you have already created a boot image package for your reference
computer deployment, you can choose the Specify An Existing Boot Image
Package option and select that same boot image for your target computer
deployment. The same is true for the other packages that the task sequence
offers to create. You can reuse existing packages in as many task sequences
as you want.
In the Name text box, type a name for the boot image and click Next. The
Image Options page appears, as shown in Figure 6.
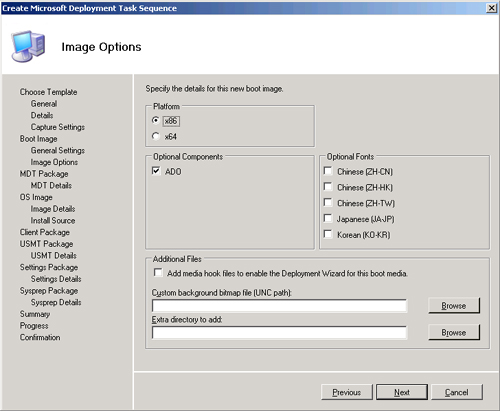
Select the Platform option for the target computer you want to install and
click Next. The MDT Package page appears, as shown in Figure 7.
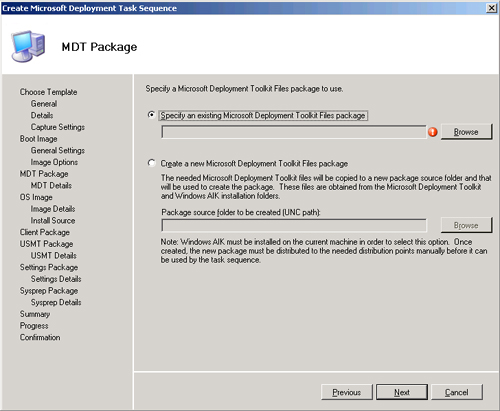
Select the Create A New Microsoft Deployment
Toolkit Files Package option and, in the Package Source Folder To Be Created
text box, type the path to a shared folder where the wizard will create the
package. Then click Next. The MDT Details page appears.
Note:
CREATING A MICROSOFT DEPLOYMENT TOOLKIT FILES
PACKAGE
The Microsoft Deployment Toolkit Files package enables the target
computer to access the MDT 2010 software on the build computer during the
SCCM distribution process.
In the Name text box, type a name for the MDT package and click Next. The OS
Image page appears, as shown in Figure 8.
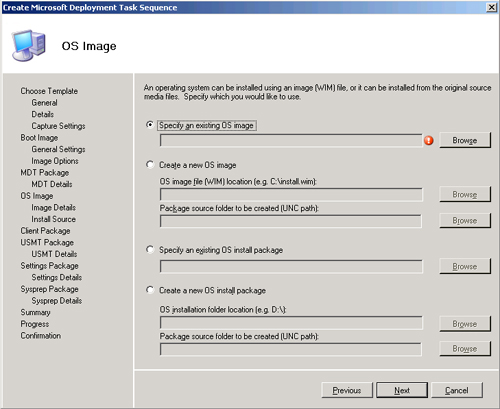
Select the Create A New OS Image option.
In the OS Image File (WIM) Location text box, type the path to the image you
captured from your reference computer.
In the Package Source Folder To Be
Created text box, type the path to a shared folder where the wizard will create
the package. Then click Next. The Install Details page appears.
In the Name text box, type a name for the reference OS image and click Next.
The Client Package page appears, as shown in Figure 9.
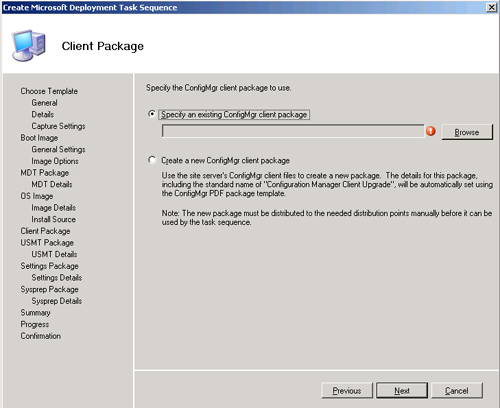
Select the Create A New ConfigMgr Client Package option and click Next. The
USMT Package page appears, as shown in Figure 10.
Note:
INSTALLING THE SCCM CLIENT
The SCCM client package, which will be installed on the target computer
after the operating system, enables administrators to manage the workstation
remotely from the Configuration Manager Console.
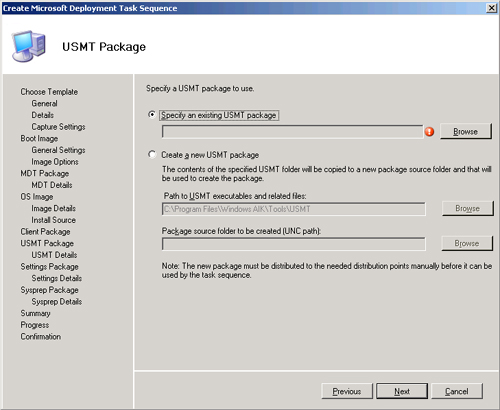
Select
the Create A New USMT Package option.
In the Package Source Folder To Be Created text box, type the path to a
shared folder where the wizard will create the USMT package. Then click Next.
The USMT Details page appears.
Note:
CREATING A USMT PACKAGE
The USMT package provides the target computer with the User State
Migration Tool programs, Savestate.exe and Loadstate.exe, which the system
uses to save and restore user state data.
In the Name text box, type a name for the USMT package and click Next. The
Settings Package page appears, as shown in Figure 11.

Select the Create A New Settings Package
option.
In the Package Source Folder To Be Created text box, type the path to a
shared folder where the wizard will create the Settings package. Then click
Next. The Settings Details page appears.
Note:
CUSTOMIZING SETTINGS
When the Create Microsoft Deployment Task Sequence Wizard is completed,
you will find a CustomSettings.ini file in the folder you specified as the
location for the Settings package. You can modify this file just as you
would in an LTI deployment, to configure elements of the target computer
installation. The Microsoft Deployment Toolkit Reference in the Microsoft
Deployment Toolkit Documentation Library help file indicates which of the
properties you can use in a CustomSettings.ini file are supported in ZTI
deployments.
In the Name text box, type a name for the
Settings package and click Next. The Sysprep Package page appears.
Leave the No Sysprep Package Is Required option selected and click Next. The
Summary page appears.
Click Next. The Progress page appears, as the wizard creates the various
packages.
When the process is completed, the wizard closes and the task sequence
appears in the Task Sequences container.
