Using scheduled tasks in your app
involves creating an agent class and adding an XML fragment to your
WMAppManifest.xml file. This process can be done manually or by using
the Windows Phone Scheduled Task Agent project template that resides
beneath the Windows Phone node of the Add New Project dialog (see Figure 1).
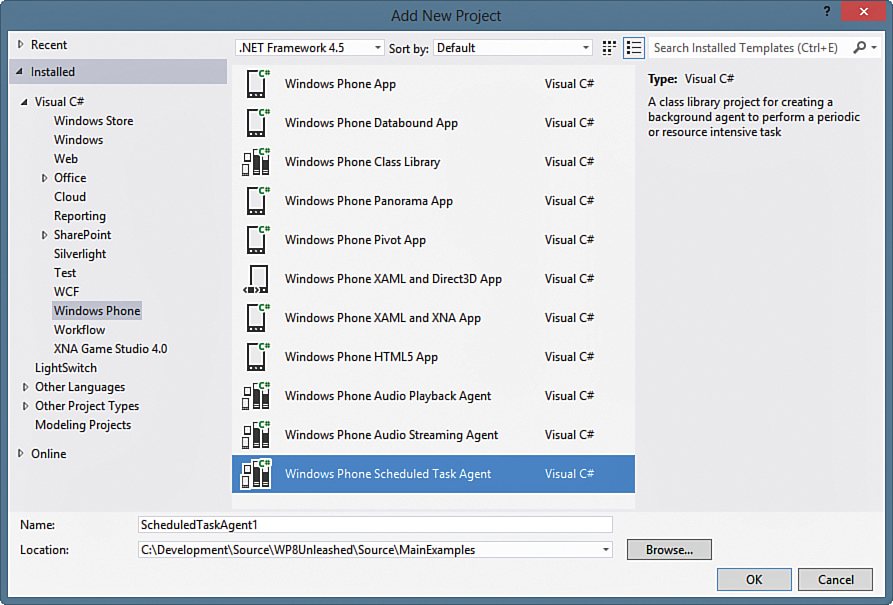
FIGURE 1 Adding a new Windows Phone Scheduled Task Agent project.
The benefit of using
the project template to create a scheduled task agent is seen when you
reference that project from your primary phone project; a required XML
fragment is automatically placed in the WMAppManifest.xml file.
Note
Scheduled tasks have restricted capabilities,
and some APIs are off-limits. Even if your scheduled task does not use
any of the restricted APIs, the mere presence of code that does, in a
referenced assembly, may cause your app to fail the Windows Phone
Marketplace certification process. It is therefore wise to segregate
your scheduled task in a separate project. If there is shared code
between your foreground app and scheduled task projects, it can be
placed in a third project and referenced by both.
A secondary benefit that can arise from using
a separate project for your agent is that it can help to minimize the
size of the assembly that is loaded by the CLR when your agent is
invoked, which may marginally improve the load time of your agent. The
larger an assembly is, the longer it takes the CLR to load it.
The XML fragment placed in the
WMAppManifest.xml file informs the OS of the agent class type so that
it can be resolved and invoked. The XML fragment resembles the
following:
<Tasks>
<DefaultTask Name ="_default" NavigationPage="MainPage.xaml"/>
<ExtendedTask Name="BackgroundTask">
<BackgroundServiceAgent Specifier="ScheduledTaskAgent"
Name="[An identifier]"
Source="[Assembly Name]"
Type="[Class Name]" />
</ExtendedTask>
</Tasks>
Table 1 provides descriptions of the attributes of the BackgroundServiceAgent element.
TABLE 1. BackgroundServiceAgent Attributes

Note
If an attribute of the BackgroundServiceAgent element is incorrect—for example, the type is unresolvable or the Specifier is not a known value—an InvalidOperationException is raised when the OS attempts to invoke the task agent, and not before.
Scheduled Task Agent
When using the Windows Phone Scheduled Task Agent project template, you begin with a class resembling the following:
public class ScheduledAgent : ScheduledTaskAgent
{
protected override void OnInvoke(ScheduledTask task)
{
//TODO: Add code to perform your task in background
NotifyComplete();
}
}
Your agent’s OnInvoke method is called by the OS. In this method, your app can determine the type of ScheduledTask that triggered the invocation of the agent and perform actions accordingly. The task passed to the OnInvoke method is either a PeriodicTask or a ResourceIntensiveTask. To branch according to the type of task, something like the following can be used:
if (task is PeriodicTask)
{
ProcessPeriodicTask();
}
else
{
ProcessResourceIntensiveTask();
}
The NotifyComplete
method of the base class informs the background task system that your
task has finished its activities and signals that it is okay for the
process to be terminated.
Note
Call NotifyComplete
only when your agent has finished everything it needs to do, or your
agent may be terminated along with any child threads spawned along the
way.
If your agent is unable to perform its work because of an unavailable resource—a cloud service, for example—call the Abort method instead of the NotifyComplete method. Abort has the same effect on task termination, but causes the task’s IsScheduled property to be set to false, which can then be detected and dealt with appropriately by your foreground app. If IsScheduled is false, you know that Abort was called.
Note
To maximize the number of dormant
applications, each scheduled task agent is limited to 6MB of RAM. If
your agent exceeds that amount, the agent is terminated. Two
consecutive violations result in schedule suspension.
Be mindful, however, that this limitation is not enforced while debugging.
The amount of memory available to your agent can be measured like so:
long usedBytes
= Microsoft.Phone.Info.DeviceStatus.ApplicationCurrentMemoryUsage;
long limitBytes
= Microsoft.Phone.Info.DeviceStatus.ApplicationMemoryUsageLimit;
if ((usedBytes + 1048576) < limitBytes) // 1 048 576 = 1 MB
{
/* Do work with 1 MB. */
}
Scheduled Task Registration
Registering a task is achieved from your foreground app.
Note
ScheduledAction objects can be registered only when your app is in the foreground, and not from a background agent. Attempting to register ScheduledAction in a background agent raises an InvalidOperationException.
The following shows how to create a new PeriodicTask:
string taskName = "a unique name";
PeriodicTask periodicTask = new PeriodicTask(taskName)
{
/* Description is required. */
Description = "A description for the task"
};
All ScheduledAction objects added to the ScheduledActionService
must be named uniquely. Therefore, you should test whether the task has
already been added to the scheduled action service. The task may then
be added to the service as shown:
if (ScheduledActionService.Find(taskName) != null)
{
ScheduledActionService.Remove(taskName);
}
/* This can only be called when the application
* is running in the foreground. */
ScheduledActionService.Add(periodicTask);
Note
Tasks expire after a maximum of 14 days. If the task’s ExpirationTime property is not set, it defaults to 14 days.
Tasks can be renewed by removing them, re-creating them, and then adding them back to the ScheduledActionService.
However, this can be done only from a foreground app, which means that
if the user does not launch your app, you have no way to prevent your
tasks from expiring after the default expiration period of 14 days.
