Given the wide variety of ready-made reports
Microsoft provides, it is generally easier to clone a report that is
close to what you need and modify it than to create a new report from
scratch. There might be times, however, when you want to start with a
blank slate and create an entirely new report. The next sections discuss
how to create new reports both in classic reporting and in SRS.
Creating Classic Reports
To create a new classic report, perform the following steps:
1. | Expand
the Configuration Manager console tree to System Center Configuration
Manager -> Site Database -> Computer Management -> Reporting
-> Reports. Right-click the Reports node and choose New -> Report.
|
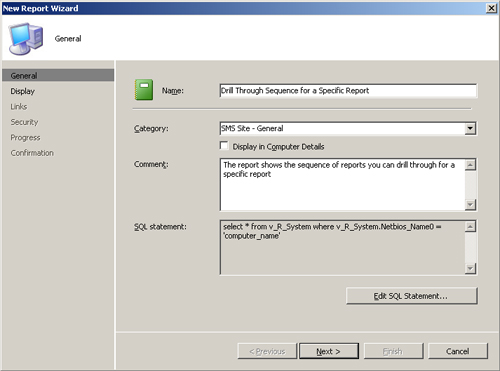
2. | On the New Report Wizard General page, enter the name, category, and an optional comment for your report. Figure 1 shows the New Report Wizard General page for the report named Drill Through Sequence for a Specific Report,
created using this wizard. This report displays a sequence of reports
you can open through links, beginning with an initial report selected by
the user.
|
3. | Click Edit SQL Statement to launch the Query Builder dialog box, and enter the following SQL statement for the report:
select R1.Name AS [Initial Report Name], R2.Name AS [First Linked Report],
									R3.Name AS [Second Linked Report], R4.Name AS [Third Linked Report],
									R5.Name AS [Fourth Linked Report]
									FROM v_Report R1 left join  v_Report
									R2 ON R1.DrillThroughReportID =  R2.ReportID
									left join v_Report R3 ON R2.DrillThroughReportID = R3.ReportID
									left join  v_Report R4 ON R3.DrillThroughReportID = R4.ReportID
									left join  v_Report R5 ON R4.DrillThroughReportID = R5.ReportID
  WHERE R1.Name = @ReportName
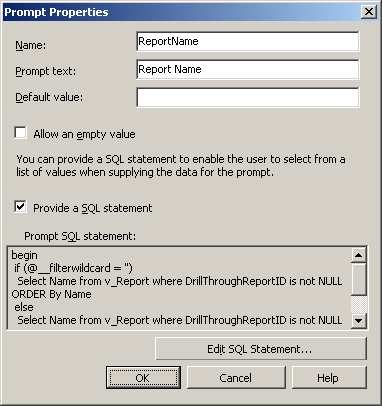
The user is prompted at run time to supply the value of the
@ReportName parameter. To define the properties for the prompt, select
Prompts to launch the prompts dialog box, and then click the New Prompt
(starburst) icon to access the Prompt Properties page shown in Figure 2.
|
4. | On the Prompt Properties page, enter the prompt name to use in the report SQL statement (ReportName
in this example) and the prompt text you want displayed to users. Click
the Edit SQL Statement button to launch the Query Builder dialog box,
and enter the SQL statement used to provide the list of available values
to the user:
begin
									if (@__filterwildcard = '')
									Select Name from v_Report where DrillThroughReportID is not NULL ORDER By   Name
									else
									Select Name from v_Report where DrillThroughReportID is not NULL
									and Name like @__filterwildcard
									ORDER By Name
									end
|
5. | After
completing the SQL Statement dialog boxes, click Next to complete the
wizard’s General page and again to accept the defaults on the Display,
Links, and Security pages. When you receive confirmation that the report
creation was successful, click Close to complete the wizard.
|
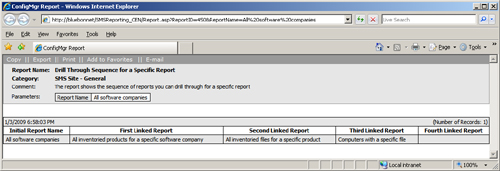
Figure 3 shows the Drill Through Sequence for a Specific Report showing the sequence of linked reports beginning with the All Software Companies report.
Creating SQL Reporting Services Reports
Perform the following steps to create a new ConfigMgr 2007 R2 SQL Reporting Services based report:
1. | Expand
the Configuration Manager console tree to System Center Configuration
Manager -> Site Database -> Computer Management -> Reporting
-> Reporting Services. Right-click on the report server name and
choose Create Report.
|
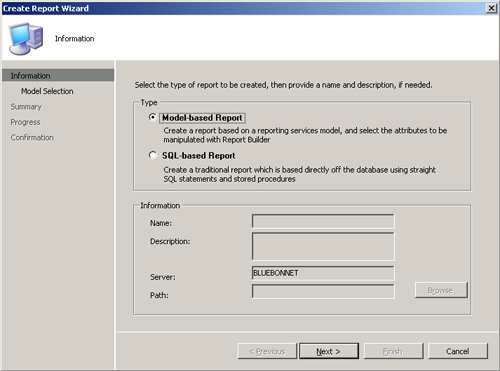
2. | The
Create Report Wizard Information page allows you to select either a
model-based report or a SQL-based report. SQL–based reports allow you to
enter SQL statements directly, as in the previous example in the “Creating Classic Reports” section. Figure 4 displays choosing to create a model–based report.
|
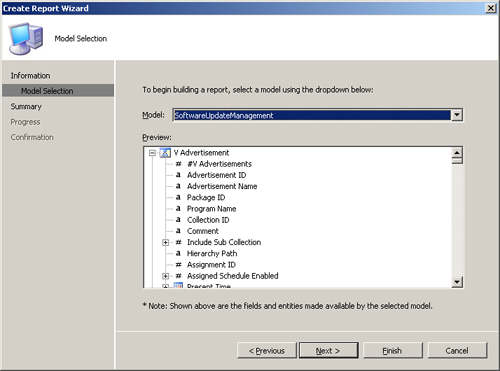
3. | Microsoft provides the ClientStatusReporting and SoftwareUpdateManagement reporting models for Configuration Manager. Figure 5
shows the Model Selection page with the SoftwareUpdateManagement model
selected. Click Finish to complete the wizard, or if you prefer to view a
summary page and confirm your selections click Next, and then click
Next on the Summary page and Close on the Confirmation page.
|
4. | When
the Create Report Wizard finishes, the Microsoft Report Builder
launches automatically. The Report Builder is a graphical development
environment that allows you to create, edit, and test SRS reports. |
