Logo
programming4us
programming4us
programming4us
programming4us
Home
programming4us
XP
programming4us
Windows Vista
programming4us
Windows 7
programming4us
Windows Azure
programming4us
Windows Server
programming4us
Windows Phone
 
programming4us
Windows 7

Microsoft Excel 2010 : Protecting and Securing a Workbook - Protecting a Worksheet - Apply a Password to a Worksheet

- Free product key for windows 10
- Free Product Key for Microsoft office 365
- Malwarebytes Premium 3.7.1 Serial Keys (LifeTime) 2019
5/27/2014 12:59:44 AM
To preserve all your hard work—particularly if others use your files—protect it with a password. You can protect a sheet or an entire workbook. In each case, you’ll be asked to supply a password, and then enter it again when you want to work on the file. Passwords are case sensitive, so be sure to supply your password as it was first entered. If you forget a password, there is no way to open the file, so it’s very important to remember or write down your password(s). Keep your password in a safe place. Avoid obvious passwords such as your name, your company, or your favorite pet.

Apply a Password to a Worksheet

1. Click the Review tab.

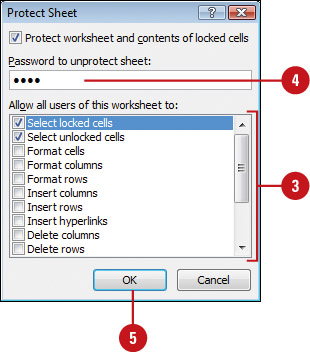
2. Click the Protect Sheet button.

3. Select the check boxes for the options you want protected in the worksheet.

4. Type a password.

5. Click OK.

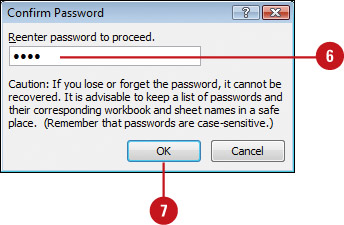
6. Retype the password.

7. Click OK.

Did You Know?

You can protect workbook elements. Click the Review tab, click the Protect Workbook button, and then select or clear the Structure or Windows check boxes. Select the Structure check box to prevent users from viewing, copying, moving, or inserting worksheets. It also prevents users from recording new macros, displaying data from PivotTable reports, using analysis tools, or creating scenario summary reports. Select the Windows check box to prevent users from moving, resizing, or closing windows.


Apply a Password to Edit Parts of a Worksheet

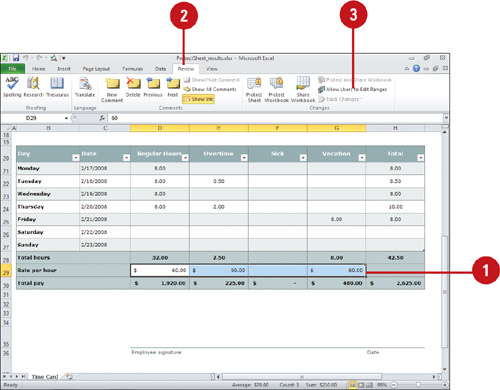
1. Select the range in which you want to apply a password.

2. Click the Review tab.

3. Click the Allow Users to Edit Ranges button.
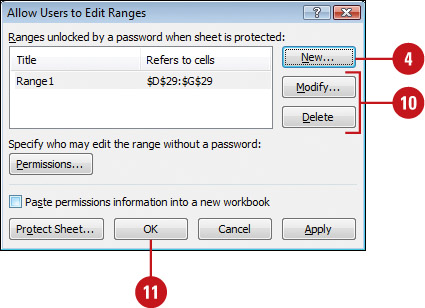
4. Click New.

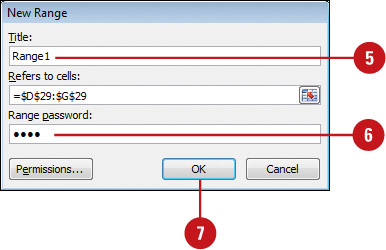
5. If you want, type a range title.

6. Type a range password.

7. Click OK.

8. Retype the password.

9. Click OK.

10. To modify or delete a range, click a range, and then click Modify or Delete.

11. Click OK.

Did You Know?

You can quickly unprotect a worksheet or workbook. Click the Review tab, click the Unprotect Worksheet or Unprotect Workbook button, type the password, and then click OK.

Other -----------------
- Microsoft Excel 2010 : Protecting and Securing a Workbook - Inspecting Workbooks
- Working in the Background : WORKING WITH THE NETWORK LIST MANAGER
- Working in the Background : IMPLEMENTING APPLICATION RESTART AND RECOVERY
- Working in the Background : PROVIDING POWER MANAGEMENT (part 2) - Detecting a Change in Monitor State
- Working in the Background : PROVIDING POWER MANAGEMENT (part 1) - Getting the Power Management State
- Automating Windows 7 Installation : Customizing Images Using Deployment Image Servicing and Management (part 3) - Servicing the Operating System in an Image , Committing an Image
- Automating Windows 7 Installation : Customizing Images Using Deployment Image Servicing and Management (part 2) - Mounting an Image , Servicing Drivers in an Image
- Automating Windows 7 Installation : Customizing Images Using Deployment Image Servicing and Management (part 1) - Viewing Information about an Image with DISM
- Automating Windows 7 Installation : Applying an Image Using ImageX
- Automating Windows 7 Installation : Capturing an Image Using ImageX
 
 
Top 10
- Microsoft Visio 2013 : Adding Structure to Your Diagrams - Finding containers and lists in Visio (part 2) - Wireframes,Legends
- Microsoft Visio 2013 : Adding Structure to Your Diagrams - Finding containers and lists in Visio (part 1) - Swimlanes
- Microsoft Visio 2013 : Adding Structure to Your Diagrams - Formatting and sizing lists
- Microsoft Visio 2013 : Adding Structure to Your Diagrams - Adding shapes to lists
- Microsoft Visio 2013 : Adding Structure to Your Diagrams - Sizing containers
- Microsoft Access 2010 : Control Properties and Why to Use Them (part 3) - The Other Properties of a Control
- Microsoft Access 2010 : Control Properties and Why to Use Them (part 2) - The Data Properties of a Control
- Microsoft Access 2010 : Control Properties and Why to Use Them (part 1) - The Format Properties of a Control
- Microsoft Access 2010 : Form Properties and Why Should You Use Them - Working with the Properties Window
- Microsoft Visio 2013 : Using the Organization Chart Wizard with new data
 
programming4us
Windows Vista
programming4us
Windows 7
programming4us
Windows Azure
programming4us
Windows Server