One
handy tool found in any workshop is a bubble level, also called a
spirit level. A little bubble always floats to the top of a liquid, so
it visually indicates whether something is parallel or orthogonal to the
earth, or tilted in some way.
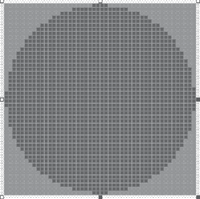
The XnaAccelerometer project includes a 48-by-48 pixel bitmap named Bubble.bmp that consists of a red circle:

The magenta on the corners makes those areas of the bitmap transparent when XNA renders it.
As with the Silverlight program, you’ll need a reference to the Microsoft.Devices.Sensors library and a using directive for the Microsoft.Devices.Sensors namespace.
The fields in the Game1 class mostly involve variables necessary to position that bitmap on the screen:
Example 1. XNA Project: XnaAccelerometer File: Game1.cs (excerpt showing fields)
public class Game1 : Microsoft.Xna.Framework.Game
{
    const float BUBBLE_RADIUS_MAX = 25;
    const float BUBBLE_RADIUS_MIN = 12;

    GraphicsDeviceManager graphics;
    SpriteBatch spriteBatch;

    Vector2 screenCenter;
    float screenRadius;     // less BUBBLE_RADIUS_MAX

    Texture2D bubbleTexture;
    Vector2 bubbleCenter;
    Vector2 bubblePosition;
    float bubbleScale;

    Vector3 accelerometerVector;
    object accelerometerVectorLock = new object();
     ...
}
|
Towards the bottom you’ll see a field named acclerometerVector of type Vector3. The OnAccelerometerReadingChanged event handler will store a new value in that field, and the Update method will utilize the value in calculating a position for a bitmap.
OnAccelerometerReadingChanged and Update
run in separate threads. One is setting the field; the other is
accessing the field. This is no problem if the field is set or accessed
in a single machine code instruction. That would be the case if Vector3 were a class, which is a reference type and basically referenced with something akin to a pointer. But Vector3 is a structure (a value type) consisting of three properties of type float, each of which occupies four bytes, for a total of 12 bytes or 96 bits. Setting or accessing this Vector3 field requires this many bits to be transferred.
A Windows Phone 7 device contains at least a 32-bit ARM
processor, and a brief glance at the ARM instruction set does not
reveal any machine code that would perform a 12-byte memory transfer in
one instruction. This means that the accelerometer thread storing a new Vector3 value could be interrupted midway in the process by the Update method in the program’s main thread when it retrieves that value. The resultant value might have X, Y, and Z values mixed up from two readings.
While that could hardly be classified as a catastrophe in this program, let’s play it entirely safe and use the C# lock statement to make sure the Vector3 value is stored and retrieved by the two threads without interruption. That’s the purpose of the accelerometerVectorLock variable among the fields.
I chose to create the Accelerometer object and set the event handler in the Initialize method:
Example 2. XNA Project: XnaAccelerometer File: Game1.cs (excerpt)
protected override void Initialize()
{
    Accelerometer accelerometer = new Accelerometer();
    accelerometer.ReadingChanged += OnAccelerometerReadingChanged;

    try
    {
        accelerometer.Start();
    }
    catch
    {
    }

    base.Initialize();
}

void OnAccelerometerReadingChanged(object sender, AccelerometerReadingEventArgs args)
{
    lock (accelerometerVectorLock)
    {
        accelerometerVector = new Vector3((float)args.X, (float)args.Y, (float)
args.Z);
    }
}
|
Notice that the event handler uses the lock statement to set the accelerometerVector field. That prevents code in the Update method from accessing the field during this short duration.
The LoadContent method loads the bitmap used for the bubble and initializes several variables used for positioning the bitmap:
Example 3. XNA Project: XnaAccelerometer File: Game1.cs (excerpt)
protected override void LoadContent()
{
    spriteBatch = new SpriteBatch(GraphicsDevice);

    Viewport viewport = this.GraphicsDevice.Viewport;
    screenCenter = new Vector2(viewport.Width / 2, viewport.Height / 2);
    screenRadius = Math.Min(screenCenter.X, screenCenter.Y) - BUBBLE_RADIUS_MAX;

    bubbleTexture = this.Content.Load<Texture2D>("Bubble");
    bubbleCenter = new Vector2(bubbleTexture.Width / 2, bubbleTexture.Height / 2);
}
|
When the X and Y properties of accelerometer are zero, the bubble is displayed in the center of the screen. That’s the reason for both screenCenter and bubbleCenter. The screenRadius value is the distance from the center when the magnitude of the X and Y components is 1.
The Update method safely access the accelerometerVector field and calculates bubblePosition based on the X and Y components. It might seem like I’ve mixed up the X and Y
components in the calculation, but that’s because the default screen
orientation is portrait in XNA, so it’s opposite the coordinates of the
acceleration vector. Because both landscape modes are supported by
default, it’s also necessary to multiply the acceleration vector values
by –1 when the phone has been tilted into the LandscapeRight mode:
Example 4. XNA Project: XnaAccelerometer File: Game1.cs (excerpt)
protected override void Update(GameTime gameTime) {
// Allows the game to exit
if (GamePad.GetState(PlayerIndex.One).Buttons.Back == ButtonState.Pressed)
this.Exit();
Vector3 accVector;
lock (accelerometerVectorLock)
{
accVector = accelerometerVector;
}
int sign = this.Window.CurrentOrientation ==
DisplayOrientation.LandscapeLeft ? 1 : -1;
bubblePosition = new Vector2(screenCenter.X + sign * screenRadius * accVector.Y,
screenCenter.Y + sign * screenRadius * accVector.X);
float bubbleRadius = BUBBLE_RADIUS_MIN + (1 - accVector.Z) / 2 *
(BUBBLE_RADIUS_MAX - BUBBLE_RADIUS_MIN);
bubbleScale = bubbleRadius / (bubbleTexture.Width / 2);
base.Update(gameTime);
}
|
In addition, a bubbleScale factor is calculated based on the Z
component of the vector. The idea is that the bubble is largest when
the screen is facing up and smallest when the screen is facing down, as
if the screen is really one side of a rectangular pool of liquid that
extends below the phone, and the size of the bubble indicates how far it
is from the surface.
The Draw override uses a long version of the Draw method of SpriteBatch.
Example 5. XNA Project: XnaAccelerometer File: Game1.cs (excerpt)
protected override void Draw(GameTime gameTime)
{
    GraphicsDevice.Clear(Color.Navy);

    spriteBatch.Begin();
    spriteBatch.Draw(bubbleTexture, bubblePosition, null, Color.White, 0,
                     bubbleCenter, bubbleScale, SpriteEffects.None, 0);
    spriteBatch.End();
    base.Draw(gameTime);
}
|
Notice the bubbleScale argument, which scales the bitmap to a particular size. The center of scaling is provided by the previous argument to the method, bubbleCenter. That point is also aligned with the bubblePosition value relative to the screen.
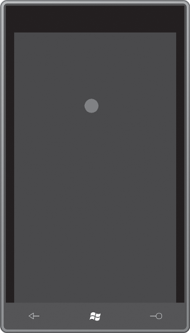
The program doesn’t look like
much, and is even more boring running on the emulator. Here’s an
indication that the phone is roughly upright and tilted back a bit:

You’ll discover that the accelerometer is very jittery and cries out for some data smoothing.