Now that you’re up and
running, you’re ready to get into some serious development. Before we
start looking at each of the functional areas in depth, let’s spend a
bit of time getting to know the fundamentals of the Server Object Model
and the SharePoint product in general.
Creating a Web Application
On the SharePoint platform, sites are provisioned on a farm according to a hierarchy. At the top level of the hierarchy is the web application.
A web application is a web site in Internet Information Services 7
(IIS7), and web applications are automatically provisioned on all
front-end servers within a farm. SharePoint content is stored in a
content database, and when attached at the web application level,
multiple content databases can exist within a single web application.
Within a SharePoint farm, most farm level
configuration is performed using a Central Administration web site. As
part of the SharePoint 2010 installation process, this web application
will be provisioned using a random port number. However, to make it easy
to find, a shortcut will be placed in the Start menu in the Microsoft
SharePoint 2010 Product folder.
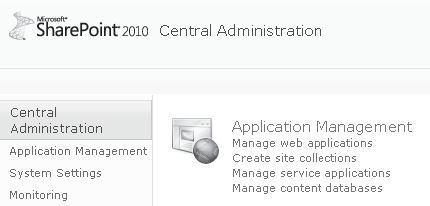
Click the SharePoint 2010 Central Administration link to open the Central Administration site.
From the Application Management section, select Manage Web Applications, as shown here:
In the Contribute section of the Web Applications tab, select New to create a new web application.
In the Create New Web Application dialog, select Create A New IIS Web Site and type SP2010Dev
in the Name field. Accept the defaults for all other settings, and then
click OK at the bottom of the page to create the web application.
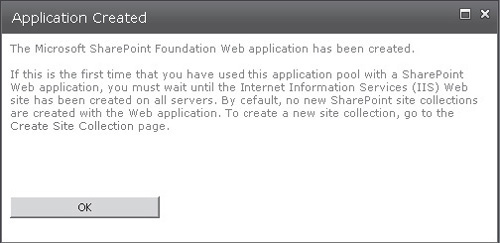
After the new web application has been created, a dialog confirming success appears, as shown. Click OK to close the dialog.
Creating a Site Collection
The next step in the site provisioning hierarchy is the site collection.
This collection of sites exists mainly as an administrative container.
Each site collection can make use of a single content database, although
more than one site collection can exist in the same content database.
As a result, each web application can contain many site collections
spread across a number of content databases. From a backup and restore
perspective, the site collection is the lowest level of granularity.
Follow these steps to create a site collection:
Navigate
to the home page of the Central Administration site. In the Application
Management section, select Create Site Collections.
In
the Web Application drop-down, ensure that the SP2010Dev web
application is selected. (This will appear as
http://<servername>:<portNumber>.)
Type SharePoint 2010 Demo
as the title, and then select Blank Site as the site template. Add an
appropriate username in the Primary Site Collection Administrator box.
Generally, this will be the username you use to log in to the server
that provides full administrative privileges on all sites within the
site collection.
Click
OK to complete the process. A confirmation message will be displayed
when the process has completed. Take note of the URL that is displayed
for our new site collection, because you’ll need it in the next example.
New in 2010—Although
we’ve set out to create a site collection, we’ve also selected a site
template and named our web site. Each site collection must have at least
one root site; when we’re creating a new site collection, we must also
specify the details for this site. In some situations, however, the
details of the root site are unknown; in such situations, you can create
a site collection and allow the type of root site to be determined when
the first administrative user connects. To achieve this, select the
Select Template Later option in the Custom tab of the Template Selection
section, as shown here:

Creating a Site
The final item in the provisioning hierarchy is the site.
When creating a site collection, one or more sites are automatically
provisioned. Each site collection must have a root site, but you can add
more sites to a site collection if they are required. Furthermore,
sites can also contain child sites.
Although the site collection is the lowest level of
granularity in terms of backup and restore functionality, you can import
or export an individual site. While import/export appears
to achieve the same results as backup/restore, there are differences
between these options, and backup/restore is the recommended approach
when it comes to handling a significant volume of data.
Although we use the Central Administration web site
to create web applications and site collections, creating web sites is
performed from the root site of a site collection or via SharePoint
Designer.
Connect to the URL of the site collection that we created earlier.
In the upper-left corner of the page, click the Site Actions menu, and then select New Site:
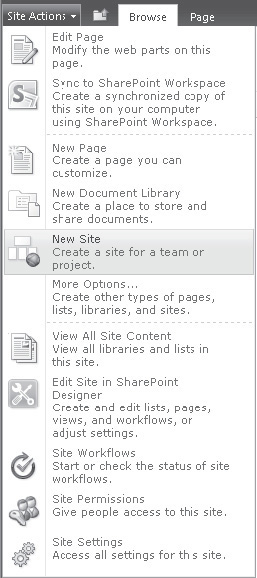
The
Create dialog displays a number of different templates from which we can
choose when creating our new site. For the purposes of our
demonstration, select Team Site and type the Title as Team Site and the URL as TeamSite, as shown:
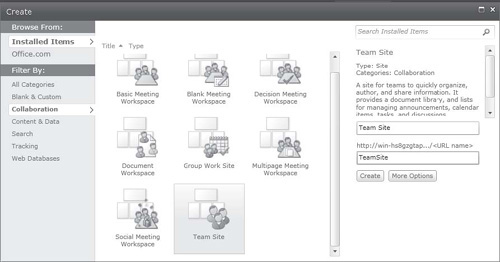
Click the Create button to provision the new site.
Our new site is created as a child of our site
collection root site. We can add more child sites to our team site,
allowing us to build a hierarchy of sites all contained within the same
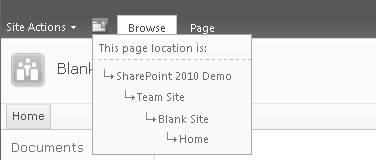
site collection. Next to the Site Actions button is a folder icon, and
by clicking this we can view a navigation control that shows where we
are within our site collection: