The old model of Exchange
clustering, where two nodes have shared resources that hold the Exchange
databases and logs, is still available in Exchange Server 2007. This
model is now called the Single Copy Cluster (SCC).
Requirements of SCC
Single copy clustering is the method of
clustering where two or more nodes have the ability to control a single
set of media that holds the application data. In the case of Exchange
Server 2007, this refers to a cluster where there is only a single copy
of the logs and databases but there are two nodes available to control
that data.
This means that to run a Single Copy Cluster,
you need to provide the cluster with shared media. The most common ways
to provide this are via storage area networks (SAN), network attached
storage (NAS), or dual-connected SCSI.
To set up an SCC, you need the following:
Two servers running Windows Server 2003, Enterprise Edition
Two network interfaces per server
Two shared hard drives (Logs/Databases)
One local hard drive per server (OS)
Preparing the Operating System
Creating a Single Copy Cluster starts out as a
standard installation of Windows Server 2003, x64 Enterprise Edition.
Follow these steps to build the operating system:
1. | Install Windows 2003 x64 normally.
|
2. | Join the nodes to the domain that will host the Exchange servers.
|
3. | Create
a heartbeat network between the two nodes by addressing a NIC on a
different IP space from the production network. Isolate these heartbeat
NICs to an isolated VLAN or a separate network switch. This is the
network that will be used by the cluster nodes to communicate with each
other.
|
4. | Install IIS on each node via the following process:
- a. Click Start, Control Panel, Add or Remove programs.
- b. Click Add/Remove Windows Components.
- c. When the menu appears, highlight Application Server, and click Details.
- d. Select Internet Information Services (IIS), and click OK.
- e. Click Next and then click Finish.
- f. Close the Add/Remove Programs interface.
|
5. | Install the updated msdaps.dll for use with 64-bit Windows:
- a. Open a web browser and go to http://go.microsoft.com/fwlink/?linkid=55328.
- b. Download the update.
- c. When the security warning appears, click Run.
- d. When the second warning appears, click Run.
- e. When the Setup Wizard appears, click Next.
- f. When the license agreement appears, click I Agree, and then click Next.
- g. When the installation is completed, click Finish.
|
6. | Install the updated mountmgr.sys for use with 64-bit Windows:
- a. Open a web browser and go to http://go.microsoft.com/fwlink/?linkid=3052&kbid=898790.
- b. Download the update.
- c. Follow the installation instructions to complete the installation of the hotfix.
|
Configuring the Shared Storage
In the case of a two-node active/passive shared
storage cluster, you need to configure several drives that will be
accessible by both nodes. These would include the quorum drive, the
Microsoft Distributed Transaction Coordinator (MSDTC) distributed
transaction coordinator drive, the log drive, and the database drive.
You can generally accomplish this shared storage in three ways:
Network attached storage— Usually connected to the server via Internet SCSI (iSCSI) or Virtual Logical Disk drivers
Storage area network— Connected by Fibre Channel
Shared SCSI— Connected via a separate SCSI controller and attached to a dual-termination enclosure
Note
If using storage area networks to attach the
shared resources, be sure to zone the LUNs (virtual partitions or
volumes) such that only the potential owner nodes and the disks are
present in that zone. If another Windows system were to see the LUN, it
might try to write its own signature to the “disk” and that would break
the access from the point of view of the cluster nodes.
Creating the Cluster
Now that the nodes are prepared and the shared
storage is created, the cluster can be formed. Be sure to have the
following items ready for the cluster configuration:
Unique names for each node
Unique name for the cluster identity
Unique name for the Exchange virtual server
Unique IP addresses for each of the names created previously
Note
All the IPs listed must be from the same network range.
With these items ready, complete the following steps to create the cluster:
1. | Right-click My Computer, and choose Manage.
|
2. | Click the Disk Management icon.
|
3. | When the Initialize and Convert Wizard appears, click Next.
|
4. | Click
Next twice to initialize but not convert the disks, which results in a
screen that shows Basic disks similar to the one shown in Figure 1.
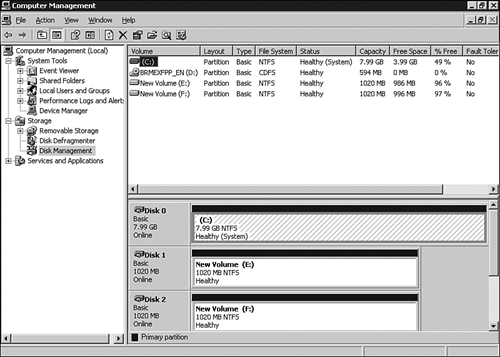
Note
Disks made available to a cluster must be configured as Basic disks. A Windows 2003 cluster can’t access a Dynamic disk.
|
5. | Click Finish.
|
6. | Right-click
each disk that is currently not partitioned and create a partition in
the size you need. Be sure to create them as primary partitions and
format them as NTFS.
|
7. | From the Start menu, click Program Files, Administrative Tools, Cluster Administrator.
|
8. | Under Action, choose Create New Cluster, and click OK.
|
9. | The Setup Wizard launches. Click Next.
|
10. | Choose
the domain that will host the cluster in the drop-down menu, and enter
the name of the cluster. This is the name of the cluster itself and
doesn’t affect the Exchange virtual name. Click Next.
|
11. | Enter the name of the first node that will participate in the cluster. Click Next.
|
12. | The Setup Wizard analyzes the node to see if it can become a cluster node. Click Next.
|
13. | Enter the IP address that will be used to manage the cluster. This needs to be a unique and reachable IP address. Click Next.
|
14. | Enter
the name and password of the account under which the cluster service
will run. This account needs to have local Administrator rights to each
node of the cluster. Click Next.
|
15. | At
the Proposed Cluster Configuration screen, click Quorum, and select the
shared disk that was created to host the quorum. Click OK and then
click Next.
|
16. | When the Setup Wizard completes its tasks, click Next, and then click Finish.
|
Adding the Second Node
Now that the cluster has been established by the
first node, you can join the second node to the cluster. To do this,
perform the following steps:
1. | Right-click NodeA in the left pane of the Cluster Administrator.
|
2. | Click New and then click Node.
|
3. | When the Setup Wizard launches, click Next.
|
4. | Type the name of the second node, click Add, and then click Next.
|
5. | The analysis runs to see if the node selected is a viable cluster node. When it completes, click Next.
|
6. | Type the password of the Cluster Service Account, and click Next.
|
7. | Review the Proposed Cluster Configuration, and if it is correct, click Next.
|
8. | When the Add Nodes Wizard is complete, click Next, and then click Finish.
|
9. | Close the Cluster Administrator.
|
Creating the Distributed Transaction Coordinator
To create the MSDTC resource, perform the following steps:
1. | Click Start, Program Files, Administrative Tools, Cluster Administrator.
|
2. | Right-click the cluster resource, choose New, and then click Resource.
|
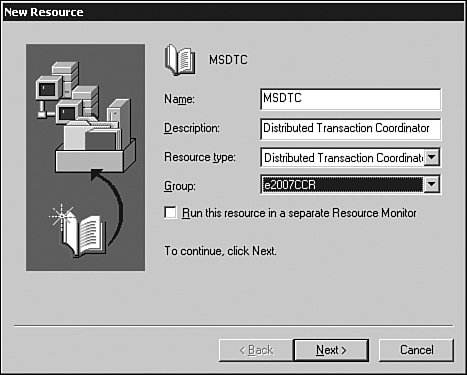
3. | In
the New Resource dialog box, enter Microsoft Distributed Transaction
Coordinator for the name, select a resource type of Distributed
Transaction Coordinator, and assign it to the cluster group similar to
what is shown in Figure 2. Click Next.
|
4. | Verify that all nodes are listed as potential owners, and click Next.
|
5. | Add
the storage resource that will host the Distributed Transaction
Coordinator (DTC), and choose the options to add the storage resource as
a dependency as well as the cluster network name. Click Next.
|
6. | Click OK when the successful status window appears. |
