Microsoft Dynamics GP provides an option for each
user to identify required fields on any form. By activating this
setting, users can get an obvious visual cue indicating the minimum
required fields on any form. This recipe shows how to set required
fields to bold red and what the end result will look like.
Getting ready
Prior to changing the
appearance of required fields the feature Show Required Fields needs to
be turned on. To activate this feature:
1.
Click on the Help icon (the white question mark on a blue background in
the upper-right corner) on the Home page of Dynamics GP.
2. Ensure that Show Required Fields has a checkmark next to it. If it does not, click on the Show Required Fields item to turn this option on.
How to do it...
To improve visibility of required fields, follow these steps:
1. The Shortcut Bar is the vertical bar on the top left-hand side of the screen and appears when the Home button is selected on the left. From the Shortcut Bar, click on User Preferences. Then, click on the Display button to open the User Display Preferences window.
2. In the bottom right, under the heading Required Fields, set Font Color to Red and Font Style to Bold:

3. Click on OK to accept the changes and close the window. Then, click on OK to close the User Preferences
window. Now, any window that allows data entry will show the required
fields in bold red, such as the one in the following screenshot:

How it works...
Dynamics GP contains
identifiers behind the scenes to mark fields as required. Dynamics GP
uses these identifiers to change the color of the field label.
Highlighting required fields provides a quick visual cue to ensure that
at least the minimum amount of data is entered prior to saving a form.
This will save hours of time by preventing annoying messages indicating
that required fields have not been completed, especially as there is no
indicator as to what field is missing.
There's more...
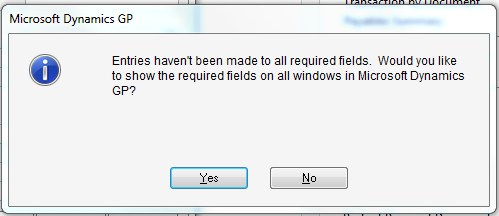
By default, activating Show Required Fields
simply sets the required fields to black and regular font. That is, it
doesn't distinguish these at all. This is important because if Show Required Fields is off completely, Dynamics GP 2010 will prompt users to turn it on. However, it won't appear to have any effect:
There are some areas in
Dynamics GP where required fields are not marked in red and bold despite
this feature being enabled. In almost all cases these fields occur in
the grid section of a transaction entry form. This area of a form has a
heading at the top and a grid that allows multiple entries under one
heading. The nature of the programming behind the grid format prevents
Dynamics GP from properly highlighting these fields.
When a user receives a
warning that a required field is missing, but all required fields appear
to be correctly filled in, they should examine the fields in the grid
for missing information. The most common culprits are the Unit of
Measure (U of M) and Site ID fields.
Modifier with VBA
With the available Modifier
with VBA utility for Dynamics GP, an administrator or developer can
mark additional fields as required; and in most cases Dynamics GP will
apply the red and bold formatting automatically. More information on
Modifier with VBA is available from the manuals in Dynamics GP or from
an authorized Microsoft Dynamics partner.
