1. | Open the ADMT MMC snap-in (Start, All Programs, Administrative Tools, Active Directory Migration Tool).
|
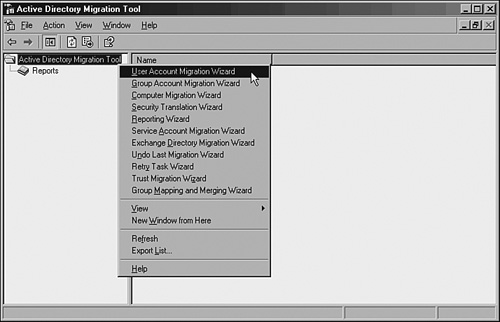
2. | Right-click Active Directory Migration Tool, and choose User Account Migration Wizard, as indicated in Figure 9.
|
3. | Click Next at the welcome screen.
|
4. | The
next screen offers the option to test the migration before actually
performing it. As previously mentioned, this process is recommended, so
for this example, perform the full migration. Select Migrate Now and
then click Next.
|
5. | Select the source and target domains on the subsequent screen, and click Next to continue.
|
6. | The
following screen allows you to choose user accounts for migration. Just
click the Add button and select the user accounts to be migrated. After
you select all the user accounts, click Next to continue.
|
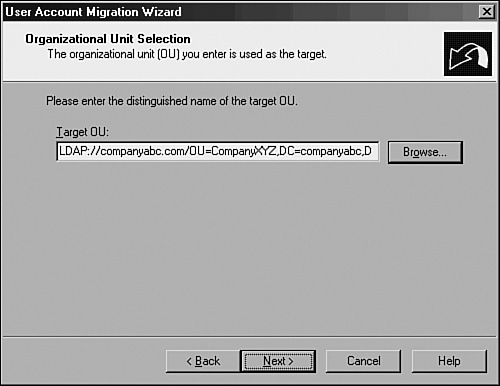
7. | The next screen, shown in Figure 10,
allows you to choose a target OU for all created users. Choose the OU
by clicking the Browse button. After you select it, click Next to
continue.
|
8. | The
new password migration functionality of ADMT is enacted through the
following screen. Select Migrate Passwords and then select the server
in the source domain in which the Password Migration DLL was installed. Click Next to continue.
Note
Depending
on if other wizards have already been run, there might be additional
steps at this point that happen one time only to set up proper Registry
settings, reboot domain controllers, and create special groups.
|
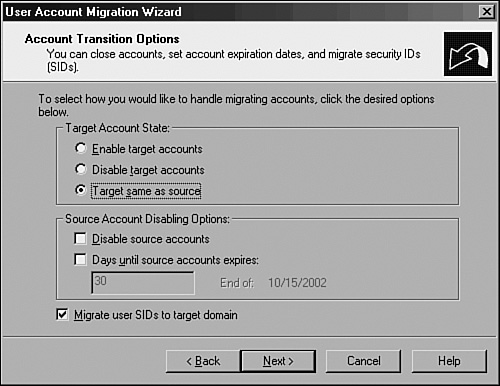
9. | The
subsequent screen deals with security settings in relation to the
migrated users. Click Help for an overview of each option. In this
example, select the settings shown in Figure 11. Then click Next to continue.
|
10. | Enter
the username, password, and domain of an account that has Domain Admin
rights in the source domain. Click Next to continue.
|
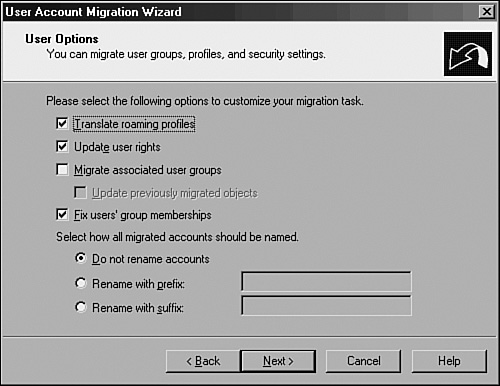
11. | Several
migration options are presented as part of the next screen. As before,
clicking Help elaborates on some of these features. In this example,
select the options shown in Figure 12. Click Next to continue.
|
12. | The
next screen is for setting exclusions. Specify any property of the user
object that should not be migrated here. In this example, no exclusions
are set. Click Next to continue.
|
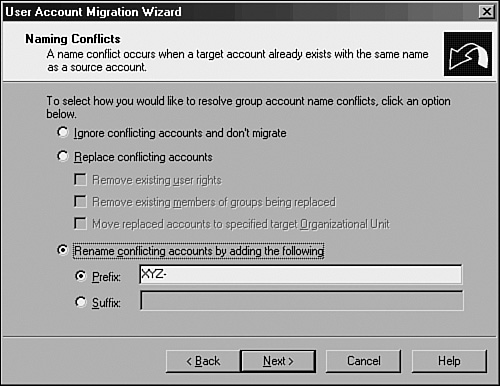
13. | Naming
conflicts for user accounts are common. Designate a procedure for
dealing with duplicate accounts in advance and enter such information
in the next wizard screen, as shown in Figure 13. Select the appropriate options for duplicate accounts, and click Next to continue.
|
14. | The
following verification screen presents a summary of the procedure that
will take place. This is the last screen before changes are written to
the target domain. Verify the settings and click Next to continue. |
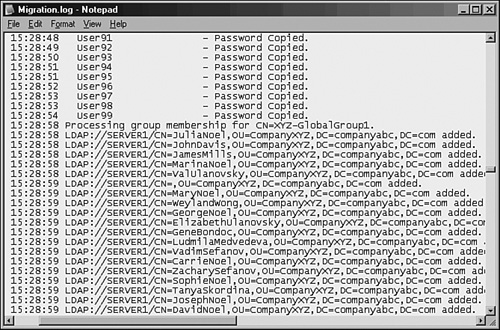
15. | The
Migration Progress status box displays the migration process as it
occurs, indicating the number of successful and unsuccessful accounts
created. When the process is complete, review the log by clicking View
Log and verify the integrity of the procedure. A sample log file from a
user migration is shown in Figure 14. Click Close when you are finished.
|