Scenario/Problem:
You want to create a subsite under an existing site. For example, you
want to create a site for a team, or a blog site for a certain person,
or a wiki site for a specific topic.
Solution: The following section explains how to create a site in general and then gives examples of creating three types of sites.
To create a subsite under an existing Microsoft SharePoint 2013 site, open the Site Contents page .
At the bottom of that page you will find a list of the existing
subsites of the current site, and a New Subsite button. Clicking on that
button opens the New SharePoint Site page shown in Figure 1.
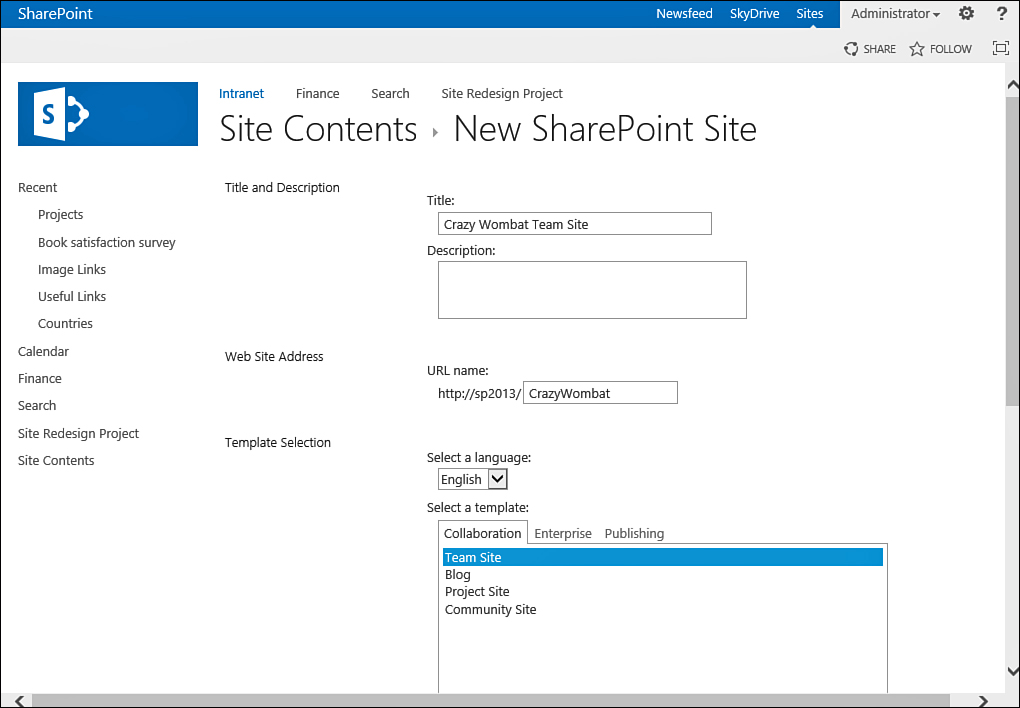
FIGURE 1 The New SharePoint Site page.
At the top of the page,
type the title for the new site. The title is displayed on the top of
the site and in the navigation links pointing to the site. You can
change this title at any time from the site settings.
Next, choose and type the URL name for the
site. This name determines how the link to the site will look.
Considering this name carefully is recommended because, although you can
change it after the site is created, if it changes, shortcuts that your
users have created and links that point to that site break (without
considerable work by the SharePoint administrator). Keep this text as
short as possible, and you shouldn’t use spaces and special characters
in the URL name of a site.
You can also set a description for the site.
This information is usually displayed as a pop-up dialog next to the
site’s title in most site templates, where users can click a small
button next to the site’s title to see the description.
In the Template Selection section of this page
you can choose the kind of site you want to create from the list of
available templates (this list might be different from site to site). To
choose the template, click on the tabs for the template categories, and
then choose a template from the list of available templates shown here.
For example, under the Collaboration tab shown in Figure 1,
you can choose the Team Site template to create a team site, or switch
to the Publishing tab to choose the Publishing Site template or the
Enterprise Wiki template.
Next, in the dialog, choose options in the Permissions section shown in Figure 2.
You can define whether the site will have the same permission set as
its parent site (the site you are currently on) or unique permissions.
If you are happy with the new site having the same permissions as the
current site, you can leave the default setting, Use Same Permissions as
Parent Site. If you choose Use Unique Permissions, you must set
permissions on the site after it has been created. You can modify the
permissions of the site at any time.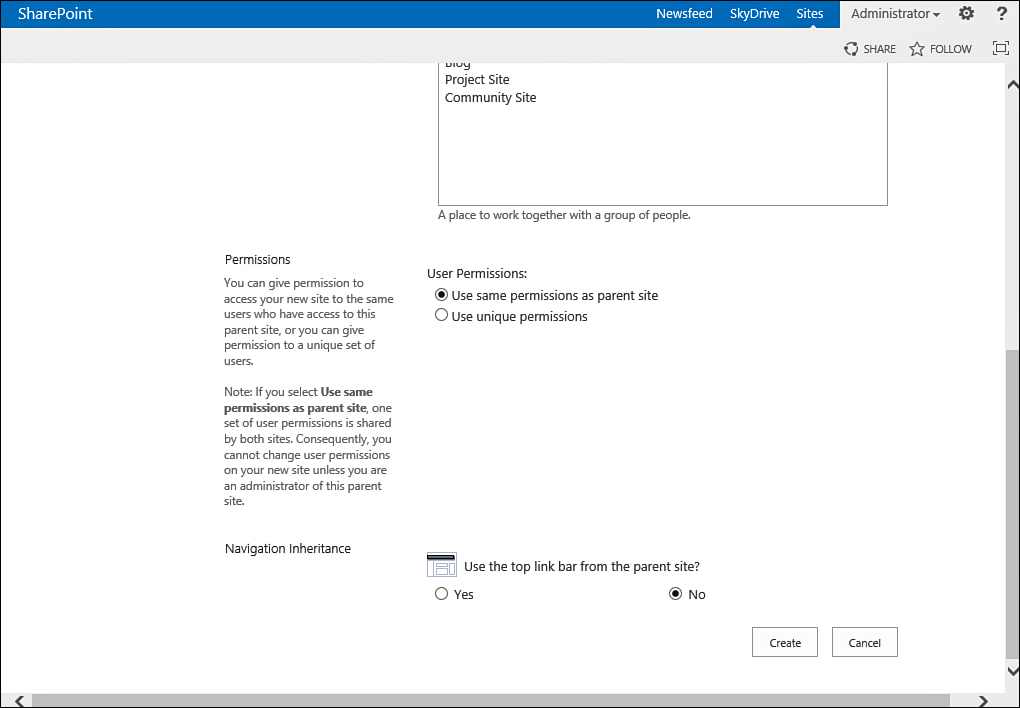
FIGURE 2 The Permissions and Navigation sections of the New SharePoint Site page.
Finally, choose in the Navigation Inheritance
section whether the site should have the same top navigation bar as the
parent site or whether it should have a navigation bar of its own. This
section lets you create subsites that look either like part of the top
site or like separate sites altogether.
Tip
For consistency, usually it is recommended
that subsites inherit the navigation from their parent site, which
allows the users of the site to orient themselves quickly. Usually, the
left navigation shows navigation that is unique to the current site.
When you are finished
setting the options for the new site, click the Create button to create
the site. The new site opens unless you have chosen to have unique
permissions for the site. In that case, the permissions setting page for
the site opens first (see Figure 3).
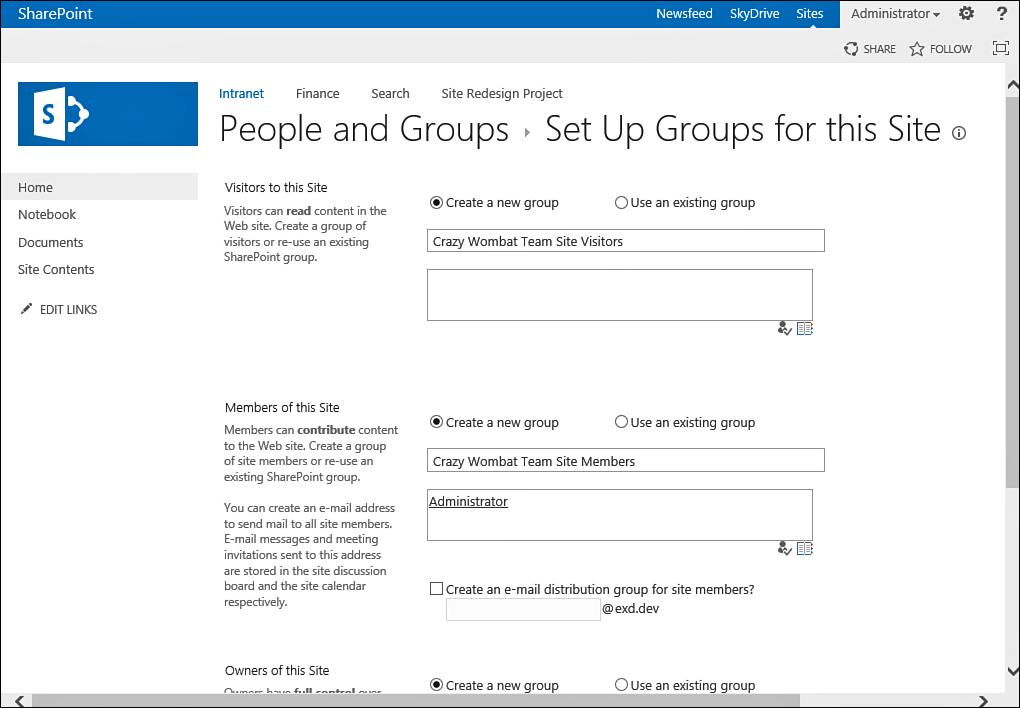
FIGURE 3 Setting up groups and permissions for a new site with unique permissions.
