From the perspective of a
client system involved in OSD, Windows PE is the initial engine of the
entire process, making its delivery to a client system critical. Windows
PE is contained in the boot images and delivered to a client system in
one of three ways:
The next sections discuss these delivery methods.
PXE Booting
PXE booting is typically used for bare-metal or
new hardware installations when the system does not have a ConfigMgr
client agent installed. Using PXE booting requires meeting the following
list of criteria:
A DHCP server must be available for use.
The
network must allow the PXE broadcast packets to reach the PXE server.
PXE and DHCP use BOOTP (Bootstrap Protocol), which is a broadcast based
protocol. Layer 3 network devices do not pass broadcast traffic by
default; the PXE server must be on the same network segment as the
client attempting to PXE boot, or you must configure the Layer 3 network
devices to forward the broadcasts to the PXE server.
Most
organizations already have BOOTP broadcasts forwarded on their Layer 3
devices to support DHCP; configuring them to forward BOOTP broadcasts to
support PXE is a nearly identical process with the only difference
being a different destination server.
You
must install the boot images on the PXE distribution point. This is a
commonly forgotten and misunderstood step. When you add a PXE service
point to your hierarchy, ConfigMgr takes over the installation of WDS on
the PXE service point system. When installed, the PXE service point
then registers an additional PXE-based distribution point, listed along
with the other DPs in the hierarchy.
Removable Media
Typically, you use removable media for
bare-metal installation of new hardware where PXE booting is not
feasible. This includes the following situations:
Over a WAN because the network will not forward the PXE broadcasts.
Unavailable
because the target system does not support it. (It has been a long time
since network cards did not support network boot using PXE, but it is
possible.)
When you want to be absolutely
certain that a system does not connect to the network prior to being
fully loaded and fully patched to a designated baseline.
The target system is in a protected subnet such as a DMZ (demilitarized zone, also referred to as a perimeter network) and cannot communicate back to the site system.
You can create images for removable media by
right-clicking a task sequence and choosing Create Task Sequence Media.
This launches the straightforward Task Sequence Media Wizard, allowing
you to choose which type of media to create. You can burn the resulting
image to a CD or DVD or place it on a bootable USB device.
You can create three types of task sequence media:
Stand-alone—
Creates a self-contained image that contains Windows PE and all the
packages and information specific to a task sequence—except for software
updates. Using stand-alone media allows you to run a task sequence on a
target system without connectivity to a ConfigMgr site system.
When
you create a stand-alone image, the system prompts for a distribution
point from which to copy packages. You can set task sequence variables
specific to this media image, allowing you to customize the task
sequence while knowing that it will not connect to the site server
during installation.
The system also prompts you
to choose a media size during the creation of the image: 650MB (CD),
4.6GB (DVD), or 8.5GB (DL-DVD). Depending on the size of packages
included in the task sequence, there may be multiple images created;
choosing the CD image size of 650MB guarantees multiple images. When you
boot a system to stand-alone media, it acts as if the task sequence
used to create the media was advertised to the system with a mandatory
advertisement.
Bootable—
Creates a burnable image of the chosen boot image. This allows the
target system to boot into Windows PE as if you delivered the Windows PE
image using PXE. You can also initiate the task sequence in a bootable
media image from within Windows using the autorun feature of the image.
This allows the bootable image to behave as if delivered using a
ConfigMgr software distribution.
A new ConfigMgr
R2 option in the Task Sequence Media Wizard relevant to bootable media
is to enable unknown computer support. This enables the new unknown
computer support functionality of R2.
Capture—
Creates a CD that allows you to capture a reference system outside of a
task sequence; the image is not bootable, and you must initiate it from
within an installed operating system using the Autoplay function.
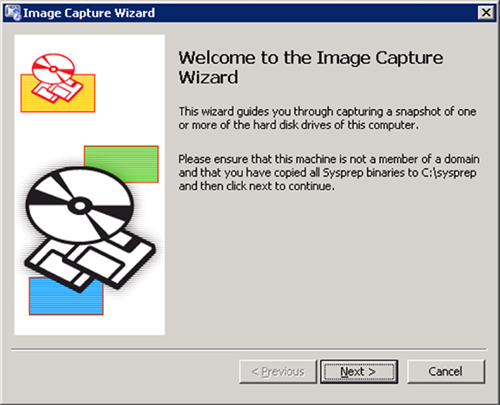
The
capture media option launches a wizard that copies Windows PE to a
hidden, bootable, file-based partition. It syspreps the system and then
reboots into Windows PE where it captures an image of the system. Note
that the proper sysprep files must already exist on the target system.
The wizard also prompts for a target location, filename, and
credentials. Figure 1 shows the first screen of the Image Capture Wizard.
The
capture media can be useful in a variety of circumstances, such as if
you already have a perfect reference system or a perfect process for
creating the reference system. Another use of the capture media would be
to import an image from a competitive imaging system; you would first
deploy the image to a suitable reference system and then recapture it
into a WIM format using the image capture media.
Using a Distribution Point
The final method of delivering Windows PE is
through ConfigMgr itself! If a system already has a ConfigMgr client
agent installed and an OSD task sequence is advertised to the client and
initiated, ConfigMgr downloads the boot image containing Windows PE to a
special pseudo-partition on the hard drive. This pseudo-partition is
then set to be the active partition. An automatic reboot is initiated,
and the system is booted into the Windows PE image contained in the
active pseudo-partition.
Incorporating Windows PE
Each
of the methods just described in the previous sections causes the
target system to boot into a boot image containing Windows PE. When in
Windows PE, an advertised task sequence is initiated or continued. The primary reason for using Windows PE is to perform those tasks on the
system you cannot perform while the host operating system runs, such as
deploying or capturing an image. Windows PE is a robust environment
that supports most things available in Windows Vista, including advanced
techniques and tools such as scripting and plug-and-play driver
detection.
Network access is critical to the success of the
task sequence in Windows PE (except for the stand-alone media option).
For Windows PE to connect to the network, it must have the proper
network drivers installed. OSD uses Windows PE 2.0 (ConfigMgr 2007 RTM)
or Windows PE 2.1 (ConfigMgr 2007 Service Pack 1); both versions are
based on Windows Vista and use Windows Vista drivers. Integrating new
drivers into the boot images is straightforward, and you can accomplish
this in several different ways:
- The Import Driver Wizard includes a page allowing you to add drivers to selected boot images.
- You can right-click an already imported driver and choose Add to Boot Image from the context menu.
- The
properties of each boot image include a Windows PE page, which contains
a list box for drivers. You can click the starburst button at the top
to add drivers, as shown in Figure 2.
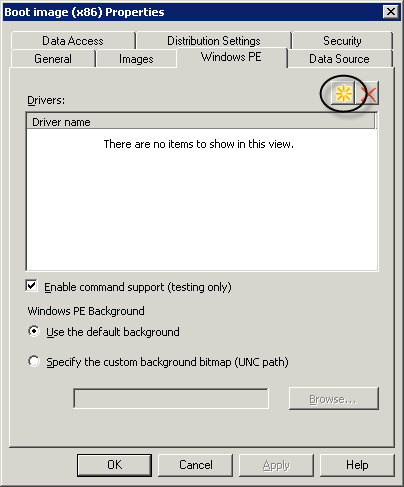
This last method is difficult to use because it only lists simple
driver names and not versions or other identifying information.
