1. Preparing for a Disaster
As Ben Franklin was known to say, “Failure to prepare is
preparing to fail.” This is truer than ever with modern operating
systems, and although SBS includes a number of exceptionally useful
recovery modes and tools, you still need to prepare for potential
problems.
1.1. Setting Up A Fault-Tolerant System
A fault-tolerant system is one that is prepared to continue
operating in the event of key component failures. It’s very useful
for servers running critical applications. Here are a few of the
many ways to ensure fault tolerance in a system:
Use one or more RAID arrays for system and data storage,
protecting you from hard-disk failure. If a hard disk in the
array fails, only that disk needs to be replaced—and no data is
lost.
Use multiple disk array controllers to provide redundancy
if a controller fails.
Use an uninterruptible power supply (UPS) to allow the
server to shut down gracefully in the event of a power
failure.
Use multiples of everything that is likely to fail,
including power supplies and network cards.
Keep key spares available to quickly recover by replacing
a failed part. If you have only a single power supply and it
fails, you’ll be back online a lot faster
if you swap out a failed power supply yourself and then call
your hardware vendor for a replacement for the failed
one.
1.2. Backups
Having a backup of your critical system
files is nice. Having backups of your data is nice. But having a
tested backup of both of them is critical to a successful restore
experience. By tested, we mean that you’ve actually restored the
files in the backup and that you were able to read and use
them.
Not every single backup will get tested for your ability to
restore. That’s not realistic, and there’s no point even pretending
it’s going to happen. But you should have a regular schedule of
testing backups to know you can restore from them. We like to do ours at least once a week. We
pick a couple of key subdirectories and restore them to a temporary
location on the server.
Image backups, such as those done by Windows Server Backup,
pose additional testing issues. It’s a really good idea to test full
system restores to ensure that your recovery scenario for a full
hardware failure is viable—especially if you intend to do restores
to dissimilar hardware, which is something not directly contemplated
by Windows Server 2008 R2 Backup. If you want to be able to do a
restore to dissimilar hardware, you’re probably going to need to use
a third-party backup utility, such as Acronis True Image for
Microsoft Windows Small Business Server (http://www.acronis.com) or StorageCraft ShadowProtect
Server (http://www.storagecraft.com). Both of
these products are designed to allow you to do backup and restore to
dissimilar hardware, including physical to virtual (P2V).
2. Restoring from Backup
The process of restoring your SBS server from backup is
something you should test and do before you find yourself in the
middle of a disaster. And yes, we know, we’re repeating ourselves. But
it’s really important. One last time and then we’ll let it go: The
only good backup is a fully tested backup. And the only reliable way
to test a backup is to restore it.
When disaster strikes your SBS network and you have to restore
an entire server, you’ll need the following:
Your backup.
Hardware to restore the backup to. If you’re using the
native Windows Server 2008 R2 Backup that is part of SBS, it needs
to be quite similar hardware to the server you’re
replacing.
The original disk 1 from your SBS 2011 installation media,
or another Windows Server 2008 R2 Standard DVD.
Any drivers required for Windows Server 2008 R2 to “see”
your hard disks, or your backup media. These should be on a USB
key or other media that the target server can read.
After you have all the requirements together, you’re ready to
restore your server by following these steps:
Insert the first disk of the SBS 2011 installation media,
and turn on the server.
If the BIOS needs to be changed to allow the DVD drive to be
the first boot device, go into the server’s BIOS and make the
change, and then restart the server.
If prompted, press any key to boot from the DVD drive to bring up the initial
localization page of the Windows Small Business Server 2011
Standard installation, as shown in Figure 1.
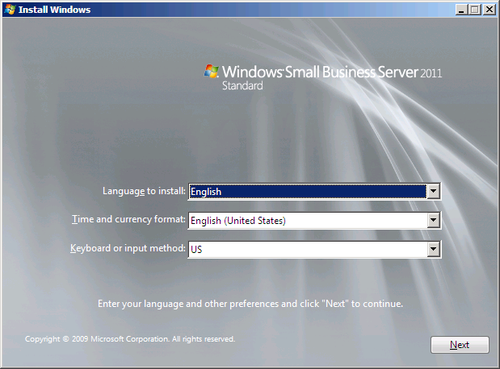
Set the localization options, and then click Next to open
the Install Now page.
Click Repair Your Computer to open the System Recovery
Options dialog box shown in Figure 2. If you’re
restoring to a bare system, no operating system is shown, as in
the figure.
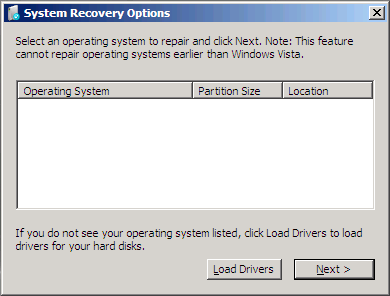
Click Load Drivers if you need to load drivers for your hard
disks, and follow the prompts to provide the necessary
drivers.
Click Next to open the System Recovery Options dialog box
shown in Figure 3.
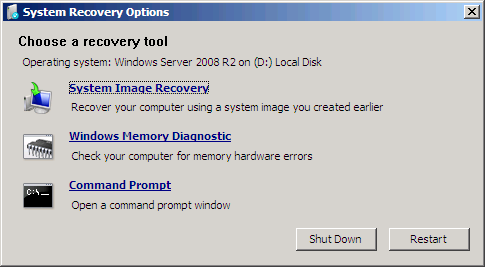
Click System Image Recovery. Windows will search for
attached backups and present the Select A System Image Backup
page of the Re-Image Your Computer Wizard if it locates a backup,
as shown in Figure 4. The most
recent backup identified on the backup disk will be
highlighted.
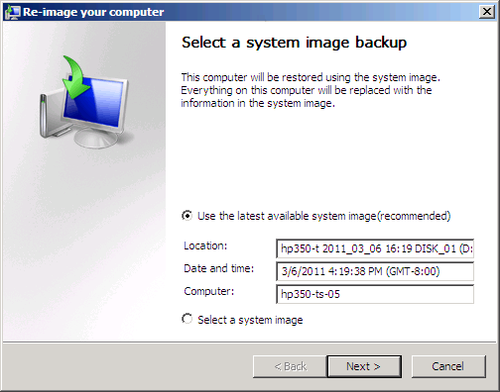
Note:
If a backup isn’t located, you will be offered an
opportunity to attach a USB disk, or to point to the location of
the backup.
Click Next to open the Choose Additional Restore Options
page, shown in Figure 5. If your
disks are identically sized and not yet partitioned, you won’t
have an option to format them and repartition.
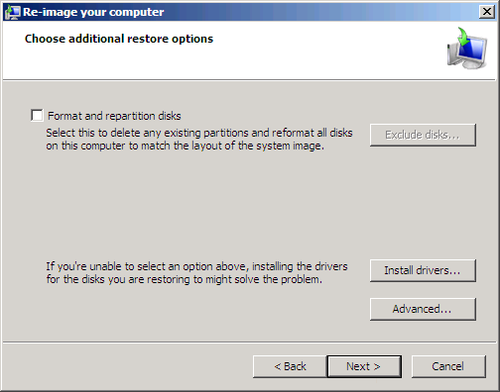
Select Format And Repartition Disks to completely remove any
existing partitions and create new partitions that match those on
the original server.
Click Exclude Disks to not reformat and repartition disks
that you want to protect, as shown in Figure 6.
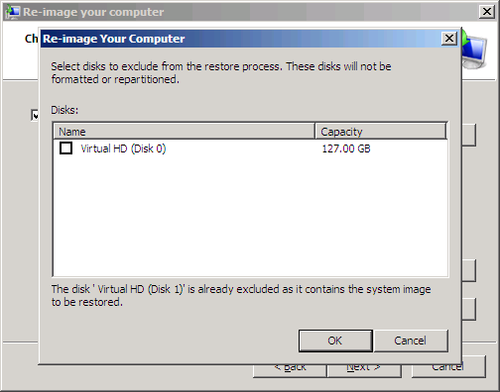
Click OK when you have selected disks to exclude, click Next
to move to the confirmation page, and then click Finish.
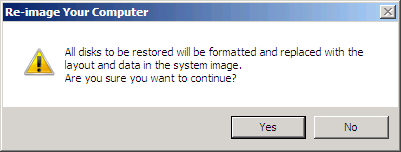
Re-Image Your Computer requires a final confirmation before
restoring, as shown in Figure 7. Select the
confirmation check box, and click OK.
After the restore is complete, you’ll be prompted to restart
the server.
