If you’ve ever wondered why RAW images look good on
your camera’s LCD, but look flat when you open them in Camera Raw, it’s
because what you see on your LCD is a JPEG preview (even though you’re
shooting in RAW), and your camera automatically adds color correction,
sharpening, etc., to them. When you shoot in RAW, you’re telling the
camera, “Turn all that color enhancement and sharpening off—just leave
it untouched, and I’ll process it myself.” But, if you’d like that
JPEG-processed look as a starting place for your RAW photo editing,
camera profiles can get you close.
Step One. | Click
on the Camera Calibration icon (the third icon from the right) near the
top of the Panel area, and in the Camera Profile section,
click-and-hold on the Name popup menu, and you’ll see a list of camera
profiles available for your particular camera (it reads the embedded
EXIF data, so it knows which brand of camera you use). For example, if
you shoot Nikon, you’ll see a list of the in-camera picture styles you
could have applied to your image if you had taken the shot in JPEG mode,
as seen here (if you shoot in RAW, Camera Raw ignores those in-camera
profiles, as explained above). If you shoot Canon, you’ll see a slightly
different list, but it does the same type of thing.
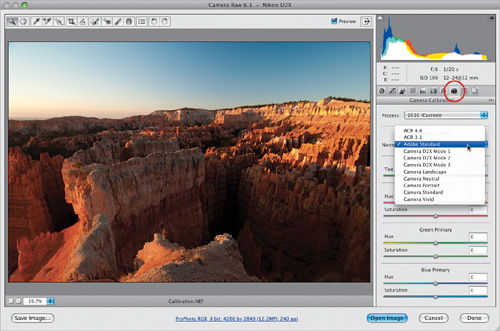 | Step Two. | The
default profile will be Adobe Standard. Now, ask yourself this: “Does
the word ‘Standard’ ever mean ‘Kick Butt?’” Not usually, which is why I
suggest you try out the different profiles in this list and see which
ones you like. At the very least, I would change it to Camera Standard, which I think usually gives you a better starting place (as seen here).
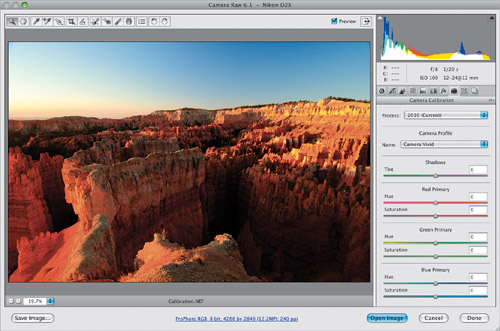
 | Step Three. | Depending
on the individual photo you’re editing, Camera Standard might not be
the right choice, but as the photographer, this is a call you have to
make (in other words, it’s up to you to choose which one looks best to
you). I usually wind up using either Camera Standard, Camera Landscape,
or Camera Vivid for images taken with a Nikon camera, because I think
Landscape and Vivid look the most like the JPEGs I see on the back of my
camera. But again, if you’re not shooting Nikon, Landscape or Vivid
won’t be one of the available choices (Nikons have eight picture styles
and Canons have six). If you don’t shoot Canon or Nikon, then you’ll
only have Adobe Standard, and possibly Camera Standard, to choose from,
but you can create your own custom profiles using Adobe’s free DNG
Profile Editor utility, available from Adobe at http://labs.adobe.com.
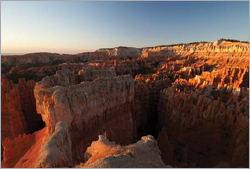
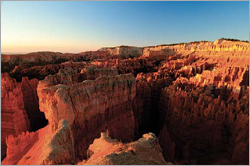
 | Step Four. | Here’s
a before/after with only one thing done to this photo: I chose Camera
Vivid (as shown in the pop-up menu in Step Three). Again, this is
designed to replicate the color looks you could have chosen in the
camera, so if you want to have Camera Raw give you a similar look as a
starting point, give this a try. Also, since Camera Raw allows you to
open more than one image at a time (in fact, you can open hundreds at a
time), you could open a few hundred images, then click the Select All
button that will appear at the top-left corner of the window, change the
camera profile for the first-selected image, and then all the other
images will have that same profile automatically applied. Now, you can
just click the Done button.
Before: Using the default Adobe Standard profile
After: Using the Camera Vivid profile
|
|
