Adding AIR events
Fireworks supports four AIR
mouse events: Close, Drag, Minimize, and Maximize. Just like rollovers
or links, AIR events must be attached to a web object (a slice or a
hotspot). If the area being used as an AIR event doesn’t require a
rollover, you can use a hotspot. If you do need a rollover effect (as is
the case with our Close button), you’ve got to use a slice to enable
image swapping. You will add hotspots and mouse events to various parts
of the console so users can drag the prototype around on their desktop.
You will also add a mouse event to the Close button.
You will now add an AIR mouse event to the Close button.
1. | Choose the home page from the Pages panel.
|
2. | Click Show Slices And Hotspots in the Tools panel if the slices and hotspots are not visible.
|
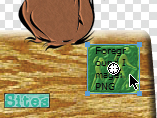
3. | Select the slice that covers the Close button (the pictogram of the hikers).
|
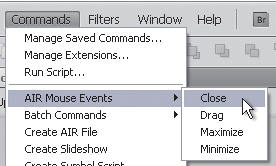
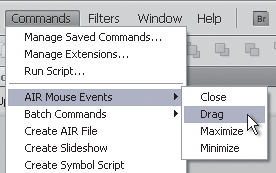
4. | Choose Commands > AIR Mouse Events > Close.
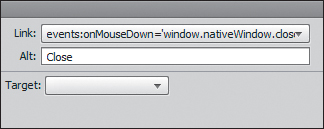
Nothing changes in the slice, but if you look
down to the Properties panel, you will see that some JavaScript has been
added, along with some alt text.
This AIR event has already been added to the other pages, using a shared Web layer.
|
5. | Switch
to the sites page, and select the slice over the Close button. The
Properties panel displays the same JavaScript code and alt text.
|
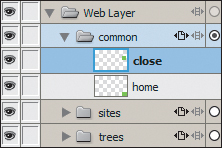
6. | Expand the Web layer in the Layers panel.
|
7. | Expand the common web sublayer. It stores the slices for both the close and home slices.
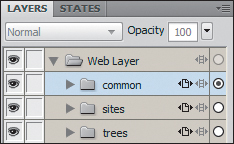
The common sublayer was not shared to the home page because there was no need to have a home link on that page.
|
8. | Select the main Web layer in the Layers panel again.
|
9. | Choose New Sub Layer from the Layers panel menu.

|
10. | Name this new Web layer drag events. Note that even web sublayers are shared across states.
|
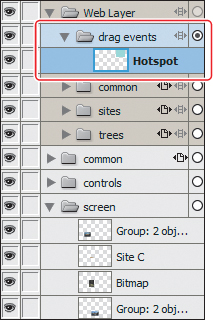
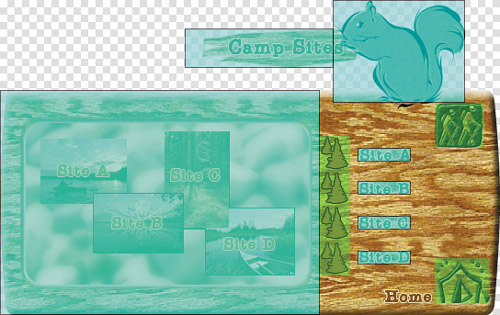
11. | Right-click (Windows) or Control-click (Mac) on the squirrel illustration, and choose Insert Hotspot.
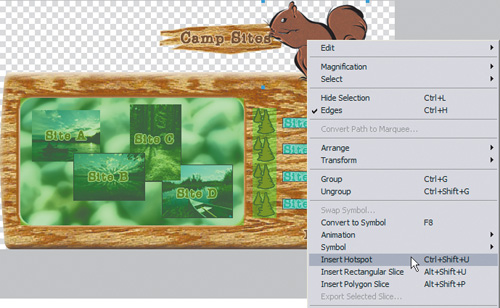 |
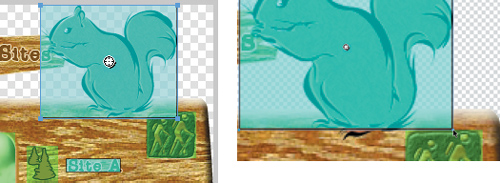
12. | Use the Pointer tool to resize the hotspot so it doesn’t overlap the Close button.
|
13. | Check
the Layers panel. The new hotspot might not be nested in the drag
events sublayer. If the hotspot is not in the sublayer, move it there
now by cutting and pasting the hotspot or by dragging the layer to the
correct position in the Layers panel.
Not inside the drag events layer
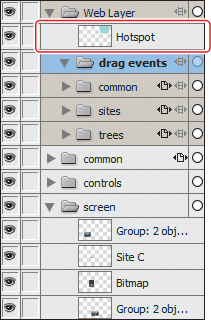
Inside the drag events layer
|
14. | Make
sure the new hotspot is selected. This will force additional hotspots
to be created above the current one, but they will still be nested in
the drag events sublayer.
|
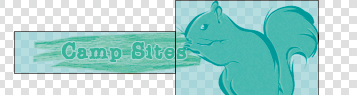
15. | On the canvas, draw a rectangular hotspot around the Camp Sites sign, without overlapping the squirrel.
|
16. | Draw one more hotspot, covering the entire console from the left corner to just before the tree rollover slices.
|
17. | Select all three hotspots, and then choose Commands > AIR Mouse Events > Drag.
|
18. | Right-click
(or Control-click) on the drag events sublayer, and choose Share Layer
To All Pages, as we want this shared with every page in our mockup.
|
19. | Save the file.
|
You
can attach specific mouse events to hotspots or slices in your AIR
mockup. Select the web element (slice or hotspot), and then choose
Commands > AIR Mouse Events. You can choose from four options:
Close. Closes the application.
Drag. Applied to a web object, this option lets the user drag the application around the desktop.
Maximize. Maximizes the application.
Minimize. Minimizes the application.
