Follow these steps to install Windows 7:
1. | Insert the Windows 7 installation disc into the computer’s DVD drive, turn on your computer, and then do one of the following:
If you want to
replace your computer’s existing operating system with Windows 7 and you
don’t need to adjust your disk partitions, go to step 2. If
your computer doesn’t have an operating system installed, or you want
to install Windows 7 on another disk partition, restart your computer
with the installation disc inserted in your CD or DVD drive. If you’re
asked to press a key to boot from DVD or CD, press any key. If the
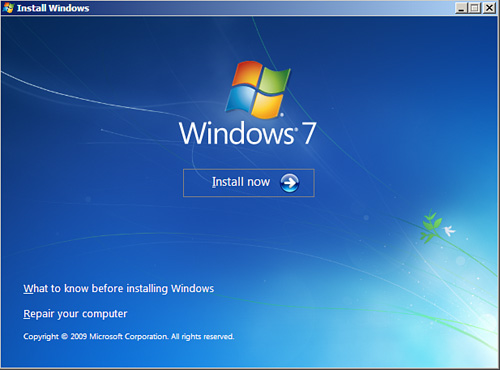
Install Windows page appears as shown in Figure 1, go to step 2.
|
If
the Install Windows page doesn’t appear and you’re not asked to press a
key to start from DVD, you might have to specify that your computer use
its DVD drive as the startup device. You’ll need to restart your
computer, press the indicated key to enter your system BIOS (usually
either F2 or DEL), find the appropriate section in the BIOS to specify
your system’s boot order, and then specify your DVD drive as the startup
device. Unless you know what you are doing, do not change any other
settings while doing this—this is a surefire way to render your system
unusable. Once you have changed the boot order setting to allow you to
boot from your DVD drive, save the settings and exit BIOS. This will
restart your system again, and you should then be able to start Windows
from the Windows 7 installation DVD as described previously. See your
computer’s documentation for entering the BIOS setup (this varies from
computer to computer). Or, watch closely while your computer is booting.
Before the Windows 7 splash screen appears, several lines of text
appear quickly on your screen. In the text, you should see directions,
such as “Press F2 to Enter BIOS Setup.” Press whatever key is specified.
Once the BIOS Setup appears, you will need to scan around and look for
boot drive options and set yours to look in your DVD drive first for a
bootable DVD. Be careful with the BIOS settings and if you make changes
that you are certain aren’t correct, exit the BIOS without saving. If
you are sure that you have changed the boot order correctly, be sure to
choose the exit and save option. It’s nearly impossible to give specific
directions for this procedure because it varies from BIOS to BIOS. If
you are uncertain what to do, we suggest contacting your computer’s
manufacturer.
|
|
Computer
hard disks are defined both by their physical capabilities and by the
logical breakdown of those capabilities. The logical breakdown is
referred to as partitioning and involves creating logical “drives” that
your computer recognizes as separate disk drives. The best analogy is to
think of your house—the physical drive is the building, while each
logical drive would be a separate room.
That being said, for
almost all normal users, there is no real reason to create multiple
partitions on your hard disk, other than those that your Windows 7
system installation requires (such as a separate recovery partition).
The reason for this is that virtually anything that can be done with a
partition, you can also do with folders, which are less of an issue to
manage. Thus, using the default partitioning scheme that the Windows 7
installer creates is probably your best approach.
If, however, you know
what you are doing with regard to disk partitioning, feel free to adjust
the partition tables as appropriate to your system requirements. Some
more advanced users do create separate partitions for their Windows
operating system and data files (music, photos, documents, and so on).
Doing so allows you to reinstall a good Windows installation gone bad
without needing to back up and restore all of your data files.
For a short discussion of disk partitioning, and some of its benefits, see http://en.wikipedia.org/wiki/Disk_partitioning.
|
| 2. | When the Install Windows page appears, click Install Now.
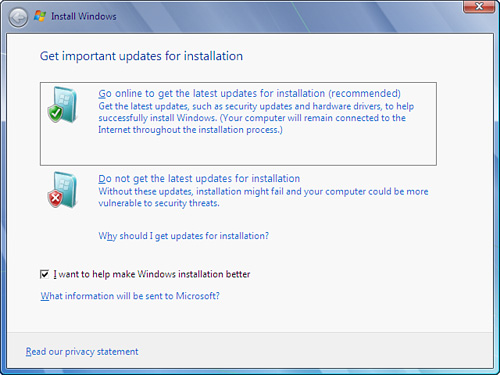
| 3. | When the Get Important Updates for Installation page appears, click Get the Latest Updates (as shown in Figure 2). Among other things, the latest updates help protect your computer from recently detected security problems.
| 4. | After
the updates are complete, resume the Windows 7 installation by clicking
the Continue button. Click I Accept the License Terms (you must accept
to continue the installation) and click Next.
|
How to Perform a Custom (Clean) Installation
Use the following steps to perform a clean installation:
1. | When the Which Type of Installation Do You Want? page appears, click Custom.
| 2. | When the Where Do You Want to Install Windows? page appears, choose one of the following options:
If you don’t
want to specify a specific partition where you want to install Windows
or to create partitions on your hard disk, click Next. If
you already have an existing partition where you want to install
Windows 7 to create a multiple boot configuration (meaning that you want
to be able to run Windows Vista or Windows 7), select that partition
and click Next to begin the installation. (Be sure to install Windows 7
on a different partition from where your current version of Windows
Vista is installed.) If
you want to create, extend, delete, or format a partition, click Drive
Options (Advanced), select the option you want, and follow the
instructions. Click Next to begin the installation.
Note
If the Drive Options
(Advanced) option is disabled, it means that you started the
installation of Windows 7 while your current version of Windows Vista
was running; to alter partitions, you need to stop the installation,
power down your computer, insert the Windows 7 disc into the drive, and
restart using the Windows 7 disc.
Tip
You might see a
window that indicates the partition you selected contains files from a
previous Windows installation. If you want to proceed, these files will
be moved to a folder called Windows.old and will be accessible but not
used to run Windows 7.
| 3. | After you are done setting up partitions, click OK.
|
How to Perform an Upgrade Installation
Use the following steps to upgrade your existing Windows Vista installation to Windows 7.
Caution
IMPORTANT: Before
you begin the upgrade process, you must have downloaded and installed
either Vista Service Pack 1 and Service Pack 2. The upgrade software
will not work unless the Service Pack has been installed.
1. | With your current version of Windows Vista running, insert the Windows 7 installation disk into your computer’s DVD drive.
| 2. | The Install Windows page appears; click Install Now.
| 3. | The screen displays questions about running Setup; click the Setup option.
| 4. | The
Get Important Updates for Installation page appears; click Get the
Latest Updates. This may take a while. Note that if you have not
included the Service Pack 1 or 2 upgrades, you’ll be directed to
download and install the upgrades. If you don’t do it now, the installer
program will bug you again shortly, so you might as well do it now.
It’s important!
| 5. | The
Please Read the License Terms page appears. Click I Accept the License
Terms (you must accept to continue the installation) and click Next.
| 6. | The Which Type of Installation Do You Want? page appears; click Upgrade.
| 7. | If
you haven’t upgraded your version of Vista to include Service Pack 1,
you’ll see a compatibility report and a request to use Windows 7 Upgrade
Advisor. Click the Download button.
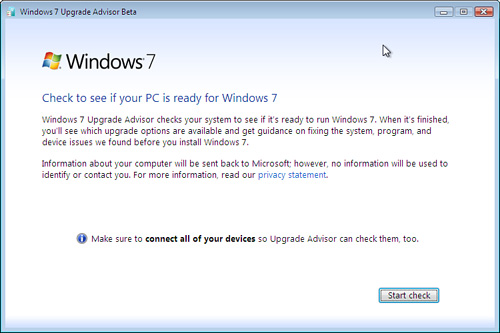
| 8. | Double-click the Windows 7 Upgrade Advisor button to open the program (see Figure 3).
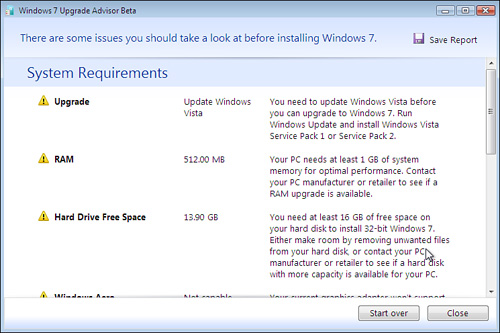
| 9. | When
asked to check if your PC is ready for Windows 7, click the Start Check
button. The Upgrade Advisor will check for compatibility issues. The
Upgrade Advisor will report any unmet system requirements or
incompatibility issues. This report will list both mandated and optional
upgrades, such as upgrading your copy of Windows 7 to Windows 7
Professional, Ultimate, or Enterprise (see Figure 4). Click the appropriate links to deal with these issues.
Tip
If
the Upgrade Advisor reports multiple optional issues—meaning issues
that won’t prevent you from running Windows 7, but could affect your
overall usability or enjoyment—click the Save Report icon to store the
report so you can go back later and deal with the reported items.
| 10. | Click
the Close button to continue. If you minimized the Windows 7 Upgrade
Advisor, maximize it again. When asked if you want to continue, click
the Continue button.
Note
If you have paused (for
instance, overnight) in your upgrade of Vista to include Service Pack 1
or 2, you might be asked to check again for recent upgrades. Follow the
instructions to download and install the upgrades. Your computer might
need to shut down and restart during this process. DO NOT turn off your
computer during this process. The activity LEDs on your computer will
tell you that your machine is still running, even if the screen is
black.
| 11. | When
asked if you want to Run or Save the Windows 7 Upgrade Advisor, click
Run unless you want to save the Advisor and run it later. (You might
want to do an installation now and get back later to the non-critical
items identified by the Upgrade Advisor, in which case you will want to
click the Save the Windows 7 Upgrade option.)
|
Finishing the Installation
If you’ve gotten past the Upgrade Advisor, you’re now ready to finish installing Windows 7.
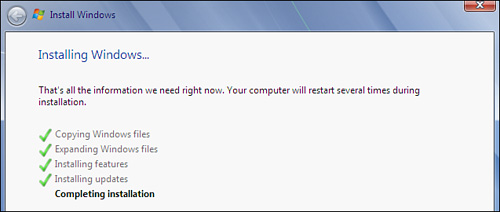
If you’ve clicked
the Run button, your computer will begin installing the Windows 7 files
and might stop and restart several times (see Figure 5).
You can see that the system is busy when an ellipse (...) appears after
the phrase describing its current action. This step can take a long
time (25 minutes is not unreasonable for certain configurations) and
depends on the speed of your CPU, the speed of your DVD reader, and
several other factors.
When installation has completed, you’ll see the new Windows 7 desktop. Your desktop will appear with the defaults you selected:
1. | When the Installation Complete window appears, click the Close button.
| 2. | Eventually
your computer will begin installing the Windows 7 files and may stop
and start several times. You can see that the system is busy when an
ellipse (...) appears after the phrase describing its current action.
Note
The installation of
Windows 7 can take a long time (25 minutes is not unreasonable for
certain configurations) and depends on the speed of your CPU, the speed
of your DVD reader, and several other factors.
| 3. | When
prompted, enter your Windows Product Key. This will either be in the
product box or on the case in which the DVD came. You will need to enter
a combination of letters and numbers like this:
XXXX-XXXX-XXXX-XXXX-XXXX
| 4. | When
asked, choose the security setting option you want. To get started
immediately, select Ask Me Later. If you want to set your security
options now, click one of the buttons shown in Figure 6:
- Use Recommended Settings—
Choose this option if you want to use the default security settings.
These settings are ones that most users will want. You can change your
security settings later after installation.
- Install Important Updates Only—
Choose this option if you want to install only the most important
updates from the list that the Upgrade Advisor identified. These can
affect system performance and might include critical updates to your
system software. Other updates will be identified as not as critical,
meaning that you can install them later, if you choose.
- Ask Me Later— Choose this option if you feel it’s important to proceed with installation immediately.
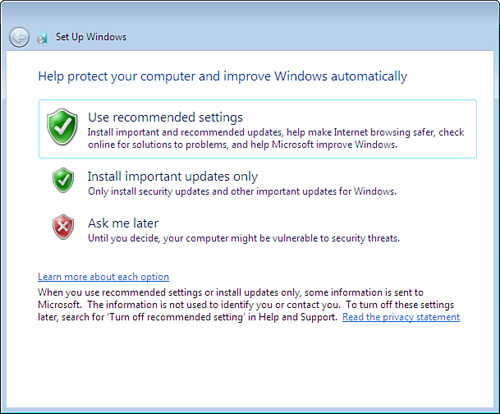
Caution
Choose this option only
if you’ve already looked at the list of updates from Upgrade Advisor and
have determined that none of them are critical. If there are critical
updates and you don’t install them, you might leave your system open to
attack from the outside during the installation process.
| 15. | When
asked about what kind of network you are using, choose either Home or
Work. The difference is largely related to what servers and other
devices are expected to be available as you use Windows 7.
- Home— A home network generally consists of one or two computers connected to a printer.
- Work—
A work network generally means that there are one or more servers to
which one or more computers are connected. These servers are usually
responsible for files not stored on the individual computers, for
handling printing, or for handling email.
| 16. | Finally,
you’ll see a message indicating Windows 7 is ready for you to use, and
to tailor as you see fit. Your screen will look something like that
shown in Figure 7.

|
|
