4. Servicing the Operating System in an Image
You can add and remove features and packages from an image. Packages come as cabinet (.cab) files or Microsoft Windows Update Standalone Installer (.msu) files. Table 3 shows common commands you can use to work on packages and features with an offline image.
Table 3. DISM operating system command-line options
| Switch | Description | Example |
|---|
| /Get-Packages | Displays information about installed packages. | dism /image:c:\mountwin7 /get-packages
|
| /Get-PackageInfo | Displays
detailed information on a specific package. You can identify the
package using the Package Identity label displayed with the /Get-Packages command. | dism /image:c:\mountwin7 /get-packageinfo
/PackageName:<package identity>
dism /image:c:\mountwin7 /get-packageinfo
/PackageName:Microsoft-Windows-LocalPack-ZA-
Package~ 31bf3856ad364e35~x86~~6.1.7600.16385
|
| /Add-Package | Adds
a package to the offline image. You can use this switch to add any CAB
or MSU file to the image. The example adds the KB 958559 package to
install Windows Virtual PC used for Windows XP Mode. | dism /image:c:\mountwin7 /add-package
PackagePath:<package path>~LBdism /image:c:\
mountwin7 /add-package /PackagePath:C:\pkg\
windows6.1-kb958559-x86.msu
|
| /Remove-Package | Removes installed cabinet (.cab) packages. Updates (.msu packages) can't be removed this way. You can identify the package using the Package Identity displayed with the /Get-Packages command. | dism /image:c:\mountwin7 /remove-package
PackageName:<package identity>~LBdism /
image:c:\mountwin7 /remove-package /
PackageName:Microsoft-Windows-LocalPack-ZA-
Package~ 31bf3856ad364e35~x86~~6.1.7600.16385
|
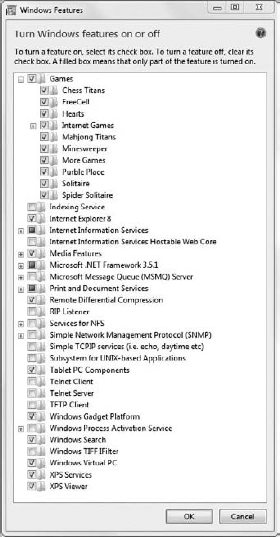
When you boot into Windows 7, you can enable and disable installed features via the Control Panel. Figure 3 shows the Windows Features dialog box. You can access this by selecting Control Panel => Programs => Turn Windows Features On Or Off.
You can also manipulate these features in an offline image using DISM. Table 4
shows some of the available commands. This is one of the few times when
using uppercase and lowercase matters at the command prompt.
Specifically, the features must be entered exactly as shown in the /Get-Features output.
Table 4. DISM features' command-line options Switch description
| Switch | Description | Example |
|---|
| /Get-Features | Displays a list of available features within the image. It also shows whether the feature is enabled or disabled. | dism /image:c:\mountwin7 /
get-features
|
| /Get-FeatureInfo | Provides detailed information on a feature. Note that features must be entered using exact case as shown in the /Get-Features output. If you enter Chess as chess, it will not be recognized. | dism /image:c:\mountwin7
/get-featureinfo /
featurename:Chess
|
| /Enable-Feature | Enables a feature using the feature name. The feature name must be entered using exact case as shown in the /Get-Features output. | dism /image:c:\mountwin7
/enable-feature /
featurename:Chess
|
| /Disable-Feature | Disables a feature using the feature name. The feature name must be entered using exact case as shown in the /Get-Features output. | dism /image:c:\mountwin7
/disable-feature /
featurename:Chess
|
5. Committing an Image
Committing an image applies all the changes you've
made to the mounted image to the original WIM file. For example, if you
mounted an image from the win7.wim file into the C:\mountwin7 folder, you can use the following command to commit the changes:
dism /unmount-wim /Mountdir:c:\MountWin7 /commit
Deployment Image Servicing and Management tool
Version: 6.1.7600.16385

Saving image
[==========================100.0%==========================]
Unmounting image
[==========================100.0%==========================]
The operation completed successfully.
The /unmount switch also removes the files within the mounted folder. In other words, if the image was mounted to the C:\MountWin7
folder, after unmounting it all of the files within this folder will be
deleted. If you decide you don't want to save the changes, you can
unmount the image with the /discard switch instead of the /commit switch as follows:
dism /unmount-wim /Mountdir:c:\MountWin7 /discard
DISM will not dedicate system resources to unmounted
images. However, if you don't unmount an image, DISM continues to track
the image even through reboots of your system. It's best to unmount the
image when you're done with it. You can verify that you don't have any
mounted images with the following command:
dism /get-mountedwiminfo

Deployment Image Servicing and Management tool
Version: 6.1.7600.16385

Mounted images:

No mounted images found.

The operation completed successfully.
Ideally, it will show No mounted images found. If it identifies mounted images you aren't working with, you should investigate them and unmount them if they aren't needed.
