Building a Report Based on a One-to-Many Query
A popular method of building a one-to-many report is
from a one-to-many query. A one-to-many report built in this way is
constructed as though it were based on the data within a single table.
First, you build the query that will underlie the report (see Figure 7).
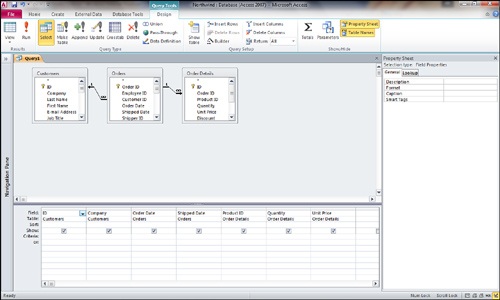
When you have finished the query, you can select it
rather than select each individual table (as done in the previous
section). After you select the query, you follow the same process to
create the report as described in the preceding section.
Build a One-to-Many Report with the SubReport Wizard
You can build a one-to-many report by building the
parent report and then adding a SubReport control. This is often the
method used to create reports such as invoices that show the report’s
data in a one-to-many relationship rather than in a denormalized
format. If you want to use the SubReport Wizard, you must make sure
that you select the Control Wizards tool before you add the SubReport
control to the main report. Here is the process:
1. | Click to select the SubForm/SubReport control tool.
|
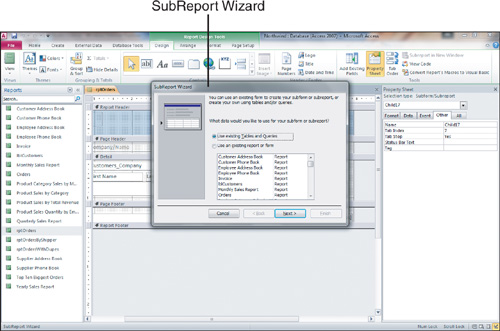
2. | Click
and drag to place the SubForm/SubReport control on the main report. You
usually place the SubForm/SubReport control in the report’s Detail
section. When you place the SubForm/SubReport control on the report,
the SubReport Wizard is invoked (see Figure 8).
|
3. | Indicate
whether you want to base the subreport on an existing form or report or
whether you want to build a new subreport based on a query or table.
Click Next.
|
4. | If
you select Table or Query, you have to select the table or query on
which you will base the subreport. You can then select the fields you
want to include on the subreport. You can even select fields from more
than one table or query. When you have finished making selections,
click Next.
|
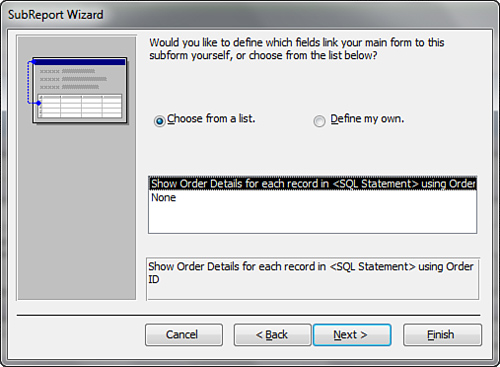
5. | The next step of the SubReport Wizard suggests a relationship between the main report and the subreport (see Figure 9). You can accept the selected relationship, or you can define your own. When you have finished, click Next.
|
6. | The final step of the SubReport Wizard asks you to name the subreport. Click Finish when you’re done.
|
|
To follow standards, the name should begin with the prefix rsub.
|
As you can see in Figure 9, the one-to-many relationship between two tables is clearly highlighted by this type of report. In the example in Figure 10,
each order is listed. All the detail records reflecting the order
details for each order are listed immediately following each order’s
data.
