To help you create reports, Access provides
the Report Wizard. The Report Wizard asks questions about the report and
then creates the report based on your answers.
Using the AutoReport Feature
Using the AutoReport feature is the quickest and
easiest way to create a report. Access creates a report via the
AutoReport feature without asking you any questions. Although you can
create this type of report effortlessly, as you will see, it is not very
flexible in that it does not ask you any questions.
Create a Report with AutoReport
Here’s how AutoReport works:
1. | Select Tables or Queries in the list of objects in the Navigation Pane.
|
2. | Select the table or query on which you want to base the report.
|
3. | Click the Create tab (see Figure 1).

|
4. | Select Report. Access creates a report based on the selected table or query.
|
Create a Report by Using the Report Wizard
Although the AutoReport feature is great at producing
a quick report, it does not offer much in terms of flexibility. The
Report Wizard asks a series of questions and then better customizes the
report to your needs. Let’s take a look at how it works:
1. | Select the Create tab.
|
2. | Click the Report Wizard tool in the Reports group.
|
3. | In the first step of the wizard, you select the table or query on which you want to base the report.
|
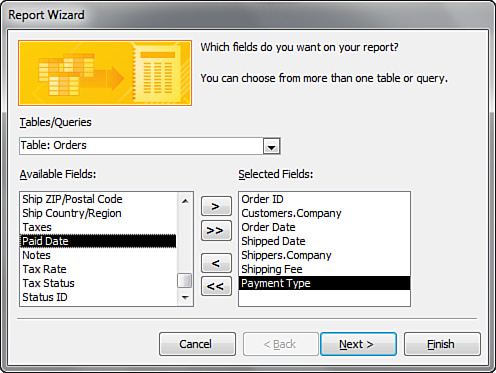
4. | Select the fields you want to include in the report (see Figure 2).
You can add any type of field to a report. You can also add as many
fields or as few fields as you’d like. In fact, you can even include
fields from more than one table! Click Next.
|
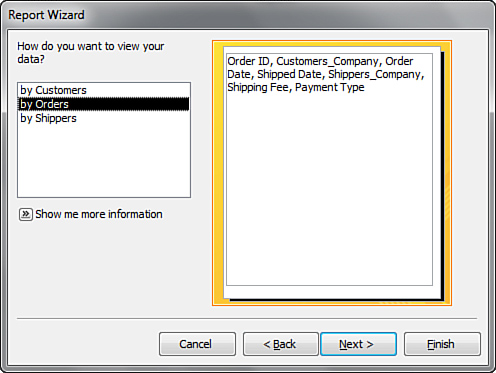
5. | If
you base the report on data from more than one table, the second step
of the wizard prompts you to designate how you want to view your data
(see Figure 3).
|
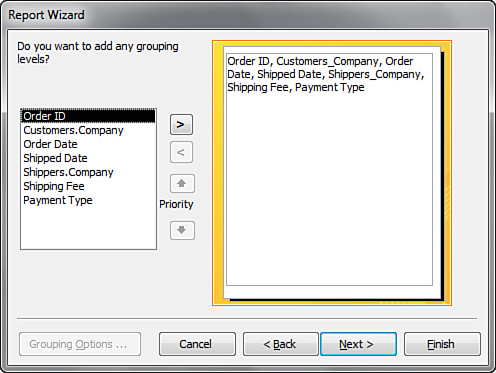
6. | In the third step the wizard prompts you to select any fields that you want to group by (see Figure 4). Click Next.
|
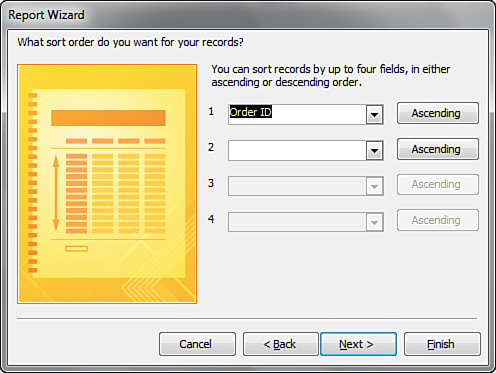
7. | In the fourth step of the wizard you select the desired sort order (see Figure 4.10). You can select either ascending or descending. In Figure 5, I selected ascending. Click Next.
|
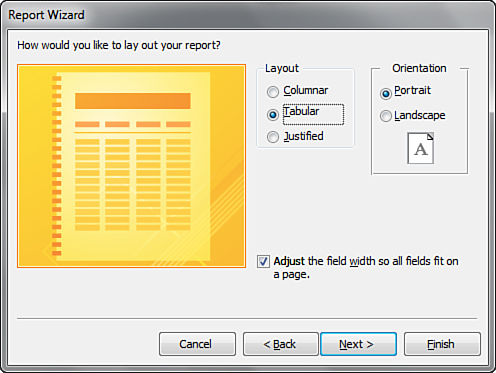
8. | In the fifth step of the wizard you select the desired layout for the report (see Figure 6).
The layout you select is a matter of personal preference, and which
layout will work best with the data you selected for the report. Click
Next.
|
9. | The sixth step of the wizard prompts you to type the report title.
|
10. | Click the Finish button. Access creates the report and places you in Preview mode.
|
As you can see, the Report Wizard offers
quite a bit more flexibility than the AutoReport feature. Using the
Report Wizard, you can designate the fields you want to include on the
report, the data groupings you want to add to the report, the sort order
for the report, the layout for the report, and a style for the report. I
find that the Report Wizard can generally do most of the work for me.
It’s then up to me to add those finishing touches.
