Creating Calculations in a Table
You
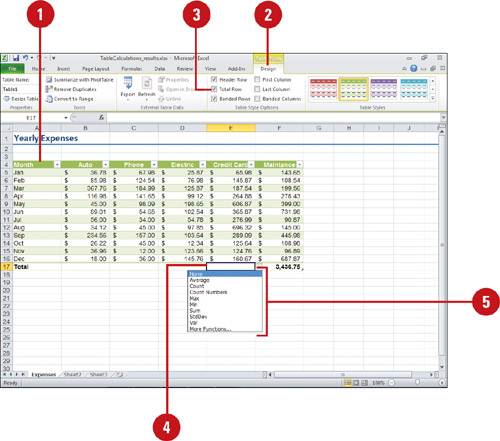
can quickly total data in a table using the Total Row option. When you
display a total row at the end of the table, a drop-down list appears
for each total cell along with the word Total
in the leftmost cell. The drop-down list allows you to select a
function to perform a calculation. If the function you want is not
available in the drop-down list, you can enter any formula you want in a
total row cell. If you’re not using a total function, you can delete
the word Total.
Total the Data in a Table
 Click a cell in a table.
 Click the Design tab under Table Tools.
 Select the Total Row check box.
The total row appears as the last row in the table and displays the word Total in the leftmost cell.
 Click the cell in the column for which you want to calculate a total, and then click the drop-down list arrow.
 From the drop-down list, select the function you want to use to calculate the total.
Timesaver
Enter a formula in the row directly below a table without a total row to create a total row without the word Total.
You can create a calculated column.
A calculated column uses a single formula that adjusts for each row in a
table. To create a calculated column, click a cell in a blank table
column, and then type a formula. The formula is automatically filled
into all cells of the column. Not every cell in a calculated column
needs to be the same. You can enter a different formula or data to
create an exception.
Working with Tables
After
you create a table, you can sort the entries, add new entries, and
display totals. You can insert rows anywhere in a table or add rows at
the bottom of the table. To add a blank row at the end of the table,
select any cell in the last row of the table, and then press Enter, or
press Tab in the last cell of the last row. If you no longer need the
data in table form, you can convert the list back to normal Excel data.
Selecting table rows and columns is different than selecting worksheet
rows and columns. Selecting cells is the same.
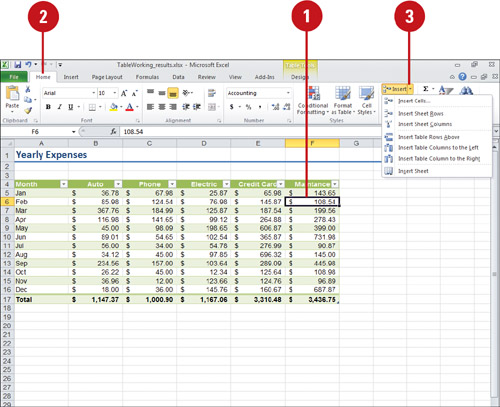
Insert a Row or Column
-
Click a cell in the table where you want to insert a row or column. To
insert multiple rows or columns, select more than one row or column.
- Click the Home tab.
- Click the Insert button arrow, and then do one of the following:
- Rows. Click Insert Table Rows Above or Insert Table Rows Below.
- Columns. Click Insert Table Columns to the Left or Insert Table Columns to the Right.
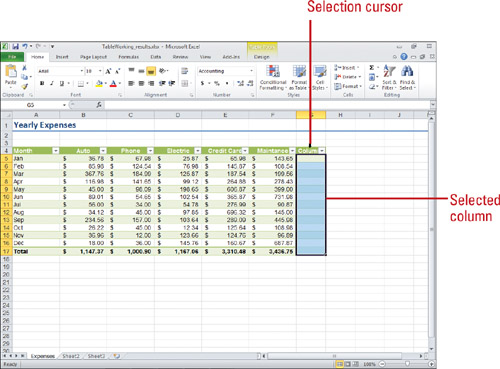
Select Rows and Columns
- Column.
Click the top edge of the column header or the column in the table to
select column data (press Ctrl+Spacebar). Double-click the top edge to
select the entire column (press Ctrl+Spacebar twice).
- Row. Click the left border of the row.
- Entire Table.
Click the upper-left corner of the table to select table data (press
Ctrl+A). Double-click the upper-left corner to select the entire table
(press Ctrl+A twice).
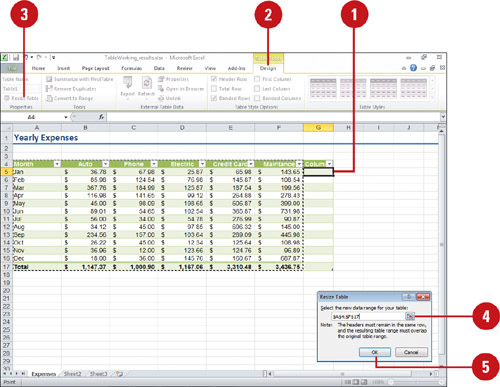
Resize a Table
- Click a cell in the table.
- Click the Design tab under Table Tools.
- Click the Resize Table button.
- Type the range you want to use for the table.
You can click the Collapse Dialog button, select the range you want, and then click the Expand Dialog button.
Timesaver
To
resize the table using the mouse, drag the triangular resize handle at
the lower-right corner of the table to select the range you want.
- Click OK.
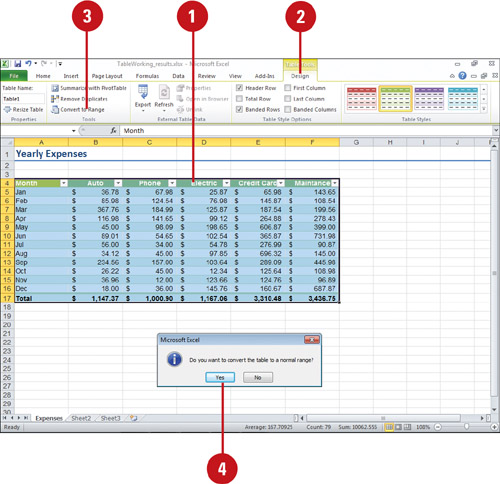
Convert a Table to a Range
- Click a cell in the table.
- Click the Design tab under Table Tools.
- Click the Convert to Range button.
- Click Yes to confirm the change.