It's now possible to tell Windows that you want your application to automatically restart if it fails. In this case, restart means to start the application over again, not to do anything else. You can also tell Windows to start your application in a recover
mode. The recover mode calls a special method in your application to
recover any data that the application was working on when it failed.
The restart and recover features are completely
independent. There isn't any reason you can't simply implement a
recover mode if so desired. The recovery will simply take place when
the user restarts the application at some time in the future. Likewise,
if your data isn't performing any data manipulation (it might simply be
a status indicator), then you can define restart only.
The Code Pack examples show a relatively complex application that implements both restart and recover modes in the \CodePack\Samples\AppRestartRecoveryDemo
folder. The example can be a little hard to digest in one big chunk.
The example in this section takes just the first step; it demonstrates
how to implement a restart feature. After you see how the Application
Restart example works, you'll likely want to spend time looking at the
Code Pack example to get a better idea of precisely how you could
implement both features in your application.
1. Configuring the Application Restart Example
This example begins with a Windows Forms application. You'll need to add a Crash button (btnCrash) to cause the application to crash unexpectedly. Unlike most examples, you'll want to set the btnCrash.Enabled property to false because you can't click Crash immediately after starting the application. In addition, you'll need to add a reference to Microsoft.WindowsAPICodePack.DLL and provide the following using statement:
using Microsoft.WindowsAPICodePack.ApplicationServices;
2. Writing the Application Restart Example Code
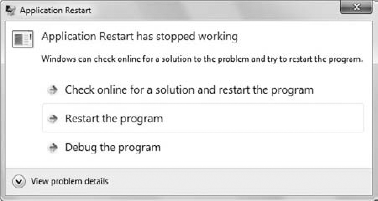
The Application Restart example performs a basic task — it crashes. When a user clicks btnCrash,
the application simply stops working. At that point, the user sees a
somewhat familiar dialog box, the restart dialog box shown in Figure 1.
This dialog box is specific to Application Restart, but a number of
applications on a Windows 7 system display the same dialog box. When
the user clicks Restart, the application restarts. The example
application knows it has restarted and displays a dialog box saying so.
While all this sounds simple, it wasn't simple at all to implement
until Windows 7.
Windows 7 won't display the restart dialog box for
an application that crashes before it has run for 60 seconds. Microsoft
hasn't stated why it placed this particular limit on the restart
mechanism, but you need to work around it for the example application.
To make this task easier, the example displays a countdown timer on btnCrash. You can see the time tick down, and then the code enables the Crash button so you can click it. Listing 1 shows the supporting code to perform this task.
Example 1. Defining the timer
// Define a countdown variable.
private Int32 Countdown;

// Define a timer to use for the countdown.
System.Timers.Timer WaitToCrash;

// A delegate to update the btnCrash.Text property.
private delegate void SetTextCallback(String Value);

// The method called to perform the actual update.
private void SetText(String Value)
{
    btnCrash.Text = Value;
}

// A delegate to update the btnCrash.Enabled property.
private delegate void SetEnabledCallback(Boolean Value);

// A method called to enable the button.
private void SetEnabled(Boolean Value)
{
    btnCrash.Enabled = Value;
}

// A delegate to disable the counter.
private delegate void SetCounterCallback(Boolean Value);

// A method called to disable the counter.
private void SetCounter(Boolean Value)
{
    WaitToCrash.Enabled = Value;
}

void WaitToCrash_Elapsed(object sender, System.Timers.ElapsedEventArgs e)
{
    // Check the countdown.
    if (Countdown == 0)
    {
        // Modify the enabled state using a thread-safe method.
        SetEnabledCallback Enable = new SetEnabledCallback(SetEnabled);
        this.Invoke(Enable, new Object[] { true });

        // Modify the caption using a thread-safe method.
        SetTextCallback Update = new SetTextCallback(SetText);
        this.Invoke(Update, new Object[] { "&Crash" });

        // Disable the counter.
        SetCounterCallback NoCount = new SetCounterCallback(SetCounter);
        this.Invoke(NoCount, new Object[] { false });

        // Display a message.
        MessageBox.Show("Time to crash the system!");
    }
else
    {
        // Change the countdown value.
        Countdown--;

        // Modify the text using a thread-safe method.
        SetTextCallback Update = new SetTextCallback(SetText);
        this.Invoke(Update, new object[] { Countdown.ToString() });
    }
}
|
The code begins by defining an Int32 value, Countdown, which maintains the current countdown value, starting with 60 seconds. The actual timer is a System.Timers.Timer object, WaitToCrash.
The example has to change three properties during the process of displaying the countdown timer. It has to update btnCrash.Text with the latest counter value (so you can see it count down), set btnCrash.Enabled to true when the countdown reaches 0 (so you can click the button), and disable the counter by setting WaitToCrash.Enabled to false.
If you try to change any of these values directly, the system will
complain. The code creates a delegate and event handler for each
property change to handle the changes in a code-safe manner.
The WaitToCrash_Elapsed() event handler processes each WaitToCrash tick event. Normally, the event handler will decrement Countdown and display the new value on btnCrash by invoking its thread-safe SetText() event handler. When Countdown reaches 0, the code enables btnCrash, sets its Text property to &Crash, and disables the counter. The user also sees a message box saying it's time to crash the application.
Now it's time to look at the restart code. The
application needs to tell Windows to offer to restart the application
when it crashes and place limits on when a restart occurs. In this
case, it also requires some method of crashing the application. Listing 2 shows the required code.
Example 2. Restarting an application
public frmMain()
{
    // Perform the standard initialization.
    InitializeComponent();

    // Register the application for restart. We don't want to restart
    // the application if it failed as the result of a reboot or a
    // patch.
    ApplicationRestartRecoveryManager.RegisterForApplicationRestart(
        new RestartSettings("/Restart",
            RestartRestrictions.NotOnReboot |
            RestartRestrictions.NotOnPatch));

    // Set the countdown.
    Countdown = 60;

    // The application can't crash immediately. The system won't restart an
    // application that crashes within 60 seconds of starting. Set a timer
// to alert the user to the ability of the system to crash.
    WaitToCrash = new System.Timers.Timer(1000);
    WaitToCrash.Elapsed +=
        new System.Timers.ElapsedEventHandler(WaitToCrash_Elapsed);
    WaitToCrash.Enabled = true;

    // Display a message when the system has restarted the application,
    // rather than starting from scratch.
    if (System.Environment.GetCommandLineArgs().Length > 1 &&
        System.Environment.GetCommandLineArgs()[1] == "/Restart")
        MessageBox.Show("Application is restarted!");
}

private void btnCrash_Click(object sender, EventArgs e)
{
    // Cause the application to crash.
    Environment.FailFast("Application Restart example has crashed!");
}
|
The code begins with the form constructor, frmMain(). Registering the application for restart comes first, with a call to ApplicationRestartRecoveryManager.RegisterForApplicationRestart(). Part of registering the application is to tell Windows how and when to restart it. The RestartSettings()
constructor accepts two arguments. The first is a string that defines
the command line arguments you want passed to the application during a
restart. The second is a list of RestartRestrictions
enumeration values that defines situations where you don't want the
application restarted, such as after a reboot or after someone patches
the system.
The next few steps initialize the timer. The code sets Countdown to 60 seconds and configures WaitToCrash. The System.Timers.Timer() accepts an interval in milliseconds — a value of 1,000 configures the timer for one-second intervals.
The last part of frmMain() is potentially
the most interesting. Normally, the application won't receive any
command line arguments (or, if it does, you'll need to handle them
appropriately). Checking for a command line argument with the System.Environment.GetCommandLineArgs().Length property is the first step. When there's a command line argument to process, the application verifies that it's /Restart, which is the command line argument passed as part of the RestartSettings()
constructor. When both conditions are satisfied, the application can
perform any required restart tasks, such as recovering any data that
could have been lost when the application crashed. In this case, the
application simply displays a message box.
The btnCrash_Click() event handler sets all the restart events in motion. When the user clicks btnCrash, the code calls Environment.FailFast(),
which causes the application to crash. Because the debugger will try to
catch and handle this situation, you can't test the application using
the debugger. Instead, you must choose Debug => Start Without Debugging or press Ctrl+F5 to start the application.
