When you create a new Windows Phone
project, the project contains all the files you need to get started
building a phone application. There are several key files, but let’s
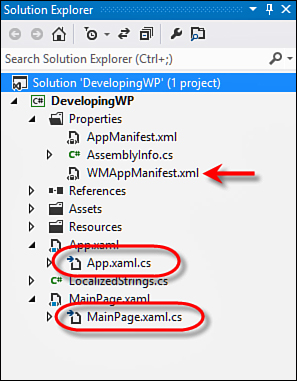
start with the XAML files. As you can see in Figure 1,
the App.xaml and MainPage.xaml files have code files associated with
them (they have a “.cs” extension because this project is a C# project).

FIGURE 1 Important files in a new project
These code files represent the code that goes with the main page and the application class, respectively. The App.xaml file is where we can store application-wide resources. The
class that goes with the App.xaml file represents the application
itself. In fact, when your application is started it is this file (not MainPage.xaml’s class) that starts up first. This class is called the App class, and it derives from the Application class:
public partial class App : Application
{
// ...
}
This class is used to store application-wide code/data. For example, the App class stores the main frame for your entire application. This RootFrame property exposes the frame in which all your pages will display:
public partial class App : Application
{
/// <summary>
/// Provides easy access to the root frame
/// of the Phone Application.
/// </summary>
/// <returns>The root frame of the Phone Application.</returns>
public PhoneApplicationFrame RootFrame { get; private set; }
// ...
}
Although the App class represents your running application, it is exposed as a singleton via the Application class’s Current property. For example, to get at the current application class anywhere in your code, you would call the static Current property on the App class:
Application theApplication = App.Current;
You should notice that the Current property returns an instance of the Application class (the base class). If you want to access properties on the App class instance itself, you must cast it to the App class, like so:
App theApplication = (App)App.Current;
var frame = theApplication.RootFrame;
// ...or...
frame = ((App)App.Current).RootFrame;
During initialization of the App class, the RootFrame is created and shown to the user of the phone. But if you look through the code for the App class, it might not seem obvious how the MainPage.xaml is actually shown. The trick is in the third file I highlighted in Figure 1: WMAppManifest.xml.
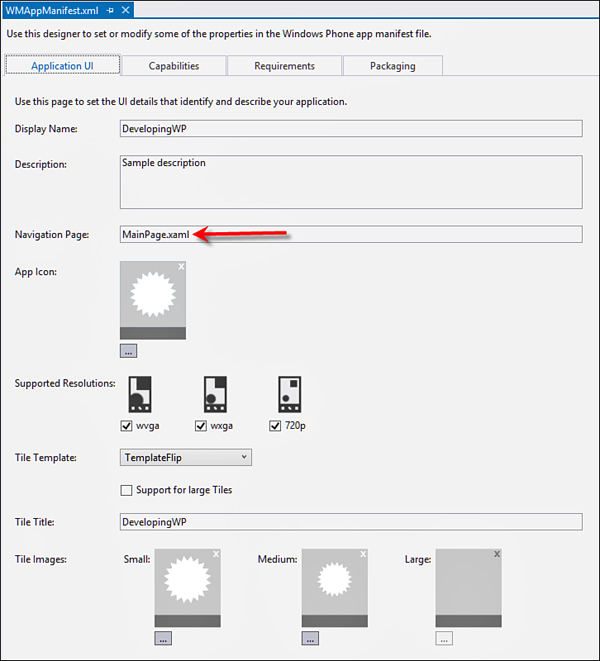
When you open the WMAppManifest.xml file (by
double-clicking it), it opens an editor that enables you to change
information about the phone app. You can see this editor shown in Figure 2.

FIGURE 2 The WMAppManifest.xml Editor
Highlighted in Figure 2
is the item called Navigation Page; this is the URI to the starting
page of your application. The manifest file contains a variety of
settings that help the phone (and the Marketplace) determine information
about your application.
After an instance of the App class
is created and initialized, the application is told to navigate to the
page in the Navigation Page element of the WMAppManifest.xml file. This
is how your MainPage.xaml is shown.
Using a mix of the application class
and the manifest file, your application gracefully starts up with your
first page being shown. This is similar to how running a typical desktop
application starts as well, but the lifecycle of your phone application
is actually much different from that.