Deleting Email
To delete a message while it’s not open, simply
highlight the email to be deleted and either press the Delete key or
click the black X Delete button on the toolbar.
To delete more than one message at a time, press
and hold the Ctrl key and click each message being selected,
highlighting all the selected messages. After all have been highlighted,
click the X button or press Delete.
To choose multiple consecutive messages, press
and hold the Shift key and click the top message; while still holding
down the Shift key, click the bottom message of the group you want to
select. When all are highlighted, delete the messages, using one of the
two methods listed previously.
To delete an email while it’s open, click the black X Delete button in the open email message.
Configuring Message Options: Importance, Sensitivity, and Tracking Options
Certain options are available that can be applied to the current email message being created.
To access the options while the message is open,
click the Options button in the toolbar of the message. The Message
Options dialog box opens, as shown in Figure 5.
Here, message sensitivity and tracking options for this particular
message can be configured. Click OK when the options for the message are
completed.
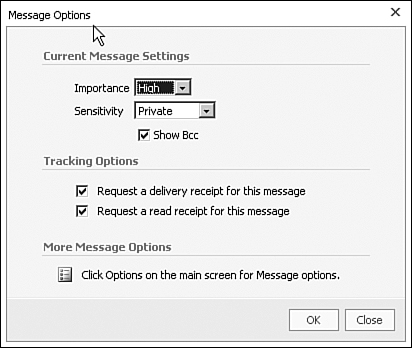
Importance
Importance can be configured as Low, Normal, or
High. By default, messages are marked as Normal. Configuring a message
as Low Importance causes a down-pointing blue arrow icon to appear to
the left of the message when the recipient receives the message.
Configuring an email message as High Importance
attaches a red exclamation mark (!) icon to the message that appears in
the message list when the user receives the message. These choices
don’t actually speed up the delivery of the message, but provide a
visual clue as to the message importance.
Sensitivity
Setting sensitivity options is a simple way for
the sender to provide information about the message to any recipient
receiving the message. Note that this option adds no security to the
email message. When set, a visual clue appears at the top of the message
(above the To and From boxes), suggesting the extra security assigned
by the sender. The sensitivity setting also appears in the reading pane
when the message is highlighted and is displayed in the Infobar when
highlighted.
The choices for sensitivity settings are Normal, Personal, Private, and Confidential:
Normal— Normal is the default setting for sensitivity: No message appears.
Personal— The message reads: Please treat this as Personal.
Private— The message reads: Please treat this as Private.
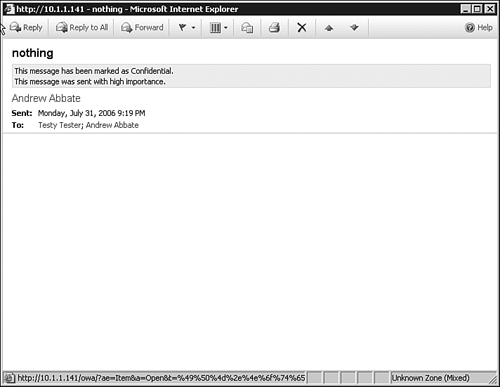
Confidential— The message reads: Please treat this as Confidential.
Figure 6 is an example of a message that was marked Confidential and received.
Tracking Options
Tracking options enable you to determine when
the message has been delivered to a mailbox (which usually happens
immediately) and request a read receipt be sent to the sender when the
recipient(s) has read the message. If you enable these options, you
receive a message when each recipient receives and/or opens the message.
However, the recipient also has the choice of
whether to send a read receipt confirmation message. If the recipient
chooses not to send the receipt, the sender does not receive a
notification that the message was read.
In addition, if the recipient deletes an email
configured with a read receipt without opening it, the sender receives a
message stating that the message was deleted without being read.
If the recipient reads the message via the reading pane in OWA, the client does not send a read receipt.
Changing the Look of the Text in an Email Message
The
look of the text in an email can be easily changed and formatted. The
choices for manipulating text include changing the font, font size, and
font color; applying formatting, such as spacing, indentation and
bullets, paragraph left/right, show paragraph markers, indent, and
underline; and applying styles.
To manipulate the text while the Create Message
dialog box is open, highlight the text to be changed. Choose any of the
options found on the Formatting toolbar below the Attachments area.
There is no need to click an Apply or OK button because these types of
changes are immediately applied to the highlighted text.
Note
Unless the message is created in OWA as a
Hypertext Markup Language (HTML) message, you cannot access many of the
font or formatting options. More specifically, if the message is set as
Plain Text, the formatting toolbar is not present.
