If you need to install Windows 7 on multiple
computers, you could manually install the operating system on each
computer. However, automating the deployment process
will make your job easier, more efficient, and more cost effective if
you have a large number of client computers to install.
Windows 7 comes with
several utilities that can be used for deploying and automating the
Windows 7 installation. With access to multiple utilities with different
functionality, administrators have increased flexibility in determining
how to best deploy Windows 7 within a large corporate environment.
The following sections
contain overviews of the automated deployment options, which will help
you choose which solution is best for your requirements and environment.
Each utility will then be
covered in more detail throughout this article. The options for
automated deployment of Windows 7 are as follows:
Microsoft Deployment Toolkit (MDT) 2010
Unattended installation, or unattended setup, which uses Setup.exe
Windows Automated Installation Kit (WAIK)
WDS, which requires Windows Server 2008 for deployment
System Preparation Tool (Sysprep.exe), which is used to create and deploy disk imaging or cloning
1. An Overview of the Microsoft Deployment Toolkit (MDT) 2010
Microsoft had released a new beta program called the Microsoft Deployment Toolkit (MDT) 2010. It is used to automate desktop and server deployment. The MDT allows an administrator to have some of the following benefits:
Administrative tools that allow for the deployment of desktops and servers through the use of a common console (see Figure 1)
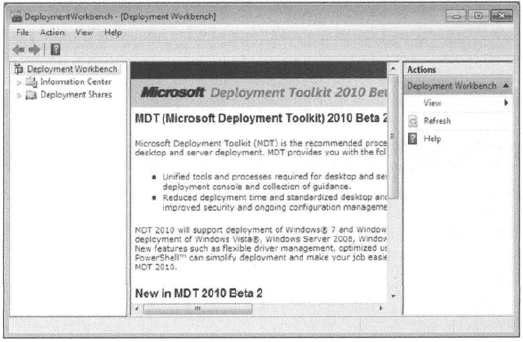
Quicker deployments and the capabilities of having standardized desktop and server images and security
Zero touch deployments of Windows 7, Windows Server 2008, Windows Vista, Windows Server 2003, and Windows XP
To install the MDT 2010
package onto your computer (regardless of the operating system being
deployed), you must first meet the minimum requirements of MDT. These
requirements need to be installed only on the computer where MDT 2010 is
being installed:
Microsoft Management Console (MMC) 3.0
Microsoft .NET Framework 2.0 or higher
Windows PowerShell command-line interface, version 1.0 or 2.0 Community Technology Preview (CTP) 3 (or higher)
Windows Automated Installation Kit (Windows AIK) for Windows 7
NOTE
You can install M DT 2010
without installing WAIK first, but you will not be able to use the
package fully until WAIK is installed.
For Zero Touch deployments, MDT 2010 requires certain components.
If you're
deploying Windows 7 or Windows Server 2008, Microsoft System Center
Configuration Manager 2007 Service Pack 2 (SP2) is required.
If
you want to deploy previous versions of Windows using MDT 2010, System
Center Configuration Manager 2007 Service Pack 1 (SP1) can be used but
you cannot use Deployment Workbench in this configuration to maintain an
MDT database. If you are using an MDT database with System Center
Configuration Manager, you should use System Center Configuration
Manager 2007 SP2.
In Exercise 1,
you will download and install MDT 2010. You can install MDT 2010 on the
Windows 7 operating system machine .
If you decide to install the MDT onto a server or production machine, I
recommend that you perform a full backup before completing Exercise 1. Installing MDT 2010 will replace any previous version of MDT that the machine may currently being using.
To download and install MDT 2010, follow these steps: Download the MDT 2010 utility from Microsoft's website. Double-click
on the Micro soft Deployment Tool kit_x86.exe to start the
installation. If you downloaded the 64-bit version, click on that
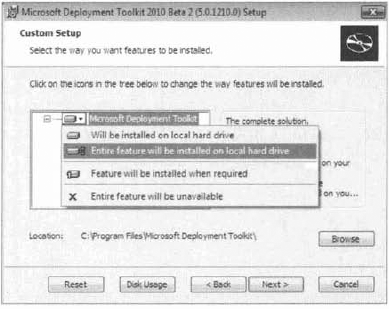
version. At the Welcome screen, click Next. At the License screen, click the I Accept The Terms In The License Agreement radio button and click Next. At
the Custom Setup screen, click the down arrow next to Microsoft
Deployment Toolkit and choose Entire Feature Will Be Installed On Local
Hard Drive. Click Next.
At the Ready To Install screen, click the Install button. When the installation completes, click the Finish button.
|
Now that you have installed MDT 2010, you are going to configure the package. In Exercise 2, you will configure MDT 2010 and set up a distribution share and database.
|
To configure MDT 2010, follow these steps:
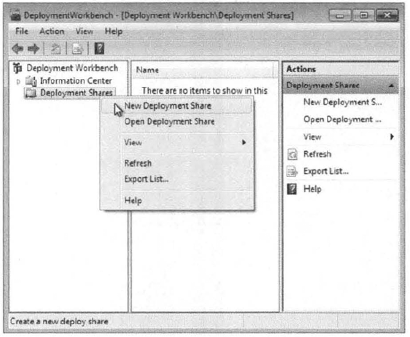
Create a shared folder on your network called Distribution and give the Everyone group full control for this exercise. Open the MDT workbench by choosing Start => All Programs => Microsoft Development Toolkit => Deployment Workbench. If the User Account Control box appears, click Yes. In the left-hand pane, click Deployment Shares and then right-click on the deployment shares and choose New Deployment Share.
The
New Deployment Share Wizard begins. At the first screen, you will
choose the directory where the deployments will be stored. Click the
Browse button and choose the Distribution share that you created in step
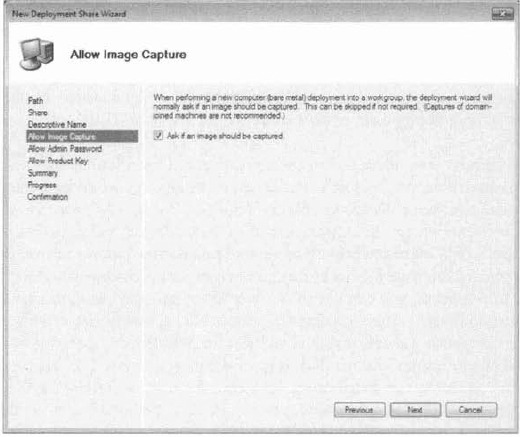
1. Then click Next. At the Share Name screen, accept the default. Distribution. Click Next. At the Deployment Share Description screen, accept the default description name and click Next. At
the Allow Image Capture screen, make sure the check box labeled Ask If
An Image Should Be Captured is checked. Images can be captured after
they are deployed to a domain. Checking this box gives you the option to
either capture or not capture the image after deployment. Click Next.
At
the Allow Admin Password screen, check the box that allows the user to
set the admin password for the local machine. If this box is checked,
the user can set the local 3dmin password. If the box is not checked,
you can preset the password before deployment. At
the Allow Product Key screen, check the Ask Users To Enter A Product
Key At Time Of Installation box. You can also preset the product key and
then the user would not be required to supply the product key. Many
organizations have site licenses and the user would not be required to
enter a product key. Click Next. At the Summary screen, verify all of your settings and click Next. After the installation is complete, a confirmation screen will appear. Click Finish. Close the MDT workbench.
|
Now that you have seen how to
install the MDT 2010 utility, let's take a look at some other ways to
automatically install Windows 7.
