You can create background pages manually and assign
them to selected foreground pages. You can also take advantage of
several Visio features that automatically create and assign background
pages. In this exercise, you will do both.
Take
a look at the drawing you just opened to see that it contains four
pages, each of which has a collection of identical or similar shapes. In
addition, each page name reflects the contents of the page. The shapes
on each page exist so you can quickly tell one page from another as you
complete the steps in this exercise. Notice, also, that the drawing for
this exercise was created using the metric template. At the bottom center of the drawing page, move the slider to the right to make more space to display page names.

Blank Page

On the Insert tab, in the Pages group, click the Blank Page arrow (not the button), and then click Background Page. The
same Page Setup dialog box that you saw in the previous exercise opens
to the Page Properties tab. Notice that the Type is preset to Background
and that the default page name is Background-1.
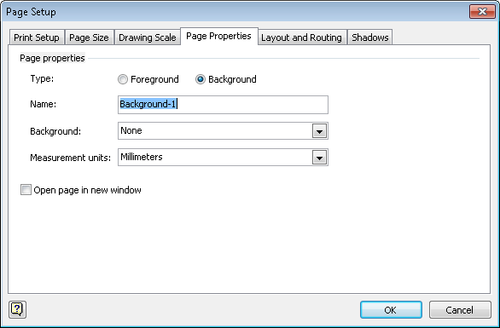
Click OK. Visio creates the background page.

Tip:
Remember that the
attributes of the active page determine the attributes of each new page.
If your drawing contains pages with different orientations or settings,
activate the page that is like, or most like, your desired background
page before creating the new page.
Picture

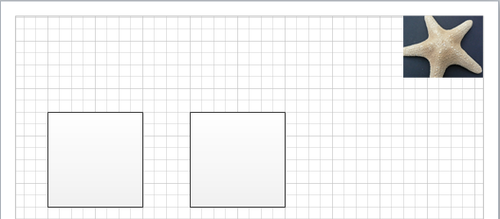
On the Insert tab, in the Illustrations group, click the Picture button, navigate to the Starfish.jpg, and then click Open. Visio inserts the picture into the center of the drawing window. You will use this picture as a stand-in for a company logo. Drag the starfish picture to the upper-right corner of the page, and then resize it so it is approximately 25 mm (1 inch) wide.
Tip:
Remember that when you
have selected a shape, its current width and height are displayed in the
status bar at the bottom of the Visio window. As you drag the corner
resize handle, the status bar updates dynamically to show the current
size.

Tip:
You can include “Company Confidential” or other text on the pages in your diagram by adding a text box to the background page.
Now that you’ve created a background page, you can apply it to one or more foreground pages. Right-click on the Squares page name tab, and then click Page Setup. The Page Setup dialog box opens to the Page Properties tab. Use the Background list, select the name of the background page, Background-1, and then click OK. The Squares page now includes the “logo” and any other objects or text you placed on that page. Three important notes: Because
the starfish is on a background page, you cannot select, change, or
relocate it on this page. You must go to the background page to make
changes. Applying
background pages is done per page. If you navigate to the Circles or
Triangles pages, you’ll see that they do not show the background. If
you create a new page from an active page that includes a background
page, the new page will also include the background page.
Go to the Circles page. Notice that the background was not applied to this page.
Borders & Titles

On the Design tab, in the Background group, click the Borders & Titles button. The
Borders & Titles gallery opens, giving you a preview of each
gallery selection. If you point to any thumbnail image in the gallery,
you will see its name. Be sure to notice that there is a scroll bar at
the right giving you access to additional selections.
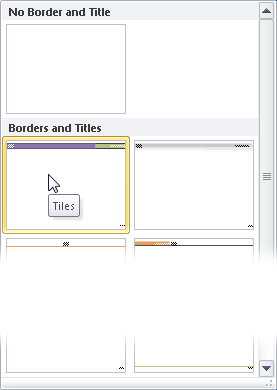
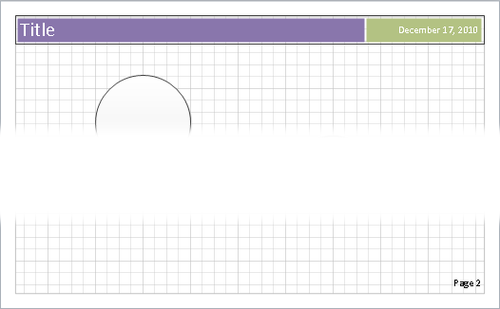
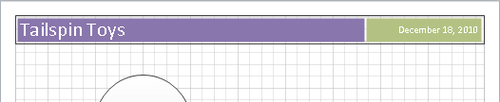
Click the Tiles thumbnail, which should be toward the upper left. Visio
creates a background page containing the title shapes and applies it to
the Circles page. Most of the title box you see across the top of the
page is reserved for the document title but the right portion contains
today’s date. There is also a page number in the lower-right corner.
Tip:
The page number will be updated dynamically if you add, delete, or reorder pages.
Tip:
The automatically generated background page is called VBackground-1. Visio includes the letter V to distinguish the background page it created from the one you created manually.

Go to VBackground-1, double-click in the Title text box, and then type Tailspin Toys. Go to Circles. The Circles foreground page reflects the change you made on the background page.
Go to the Triangles page.
Backgrounds

On the Design tab, in the Background group, click the Backgrounds button. The Backgrounds gallery provides a preview of available backgrounds, and if you point to any background, you will see its name. Click once on the Verve background. Visio creates a new background page called VBackground-2, and applies it to Triangles.

Go to the Arrows page. Note that it does not include any of the backgrounds you’ve created for other pages in the drawing. Right-click on the Arrows page name tab, and then select Page Setup. In the Background list, select Vbackground-2, and then click OK. You have now assigned the same background page to both Triangles and Arrows.
Note:
Save your changes to the Background Exercises drawing, and then close it.
To look at examples of
finished diagrams that use background pages, click the File tab, and
then click New. In the Other Ways To Get Started section, click Sample
Diagrams, and then double-click IT Asset Management, Process
Improvement, Project Timeline, or Sales Summary. All have one or more
background pages.
Four final thoughts about background pages:
Changes you make to a background page appear on all pages using that page. Background
pages can have background pages. It is possible, therefore, to build a
set of foreground pages that all display shapes from a common background
page. (Think of it as the “deep background” page.) Those same
foreground pages can also display the contents of other background pages
that are unique to an individual page or to a group of pages. If
you have foreground pages with different orientations or sizes, you are
likely to need multiple background pages with matching attributes. The page name tabs for background pages always appear to the right of all foreground pages and cannot be reordered.
|
