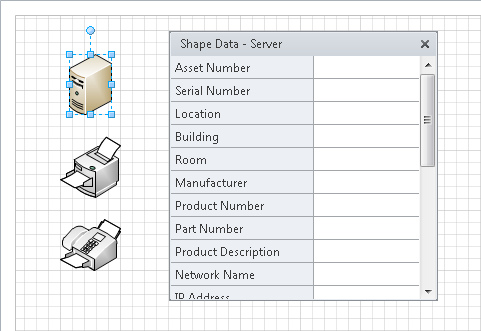
A significant part of what gives Visio diagrams uniqueness and value is the data that resides inside Visio shapes. Called shape data in Visio 2010 and Visio 2007, data fields were known as custom properties in previous versions of Visio.
Many of the masters in the
built-in Visio stencils already contain shape data fields. In this
exercise, you will work with existing data fields.
In this exercise, you will add and edit values in computer and network shapes.
Note:
Click the File tab, and then click New. In the Template Categories
section, click Network, and then double-click the Basic Network Diagram
thumbnail. Save the drawing as Shape Data.
In the Network and Peripherals stencil, drag a Server, a Printer, and a Fax shape onto the page, arranging them from top to bottom on the page.
Click once on the server to select it.
Task Panes

On the View tab, in the Show group, click the Task Panes button, and then click Shape Data.
The
Shape Data window appears and displays the names and current values, if
any, for data fields that are contained within the server shape.

Tip:
The Shape Data window can
appear anywhere on the screen but you can relocate it by dragging the
gray window header. The graphic shows a floating window. If you drag the
Shape Data window close to the edges of the drawing window, it will
attach to the edge of the drawing window or dock itself in a fixed
location. If this happens, but you want the window to be somewhere else,
you can drag the header bar to relocate it. You can also resize the
window to show a larger or smaller number of data fields.
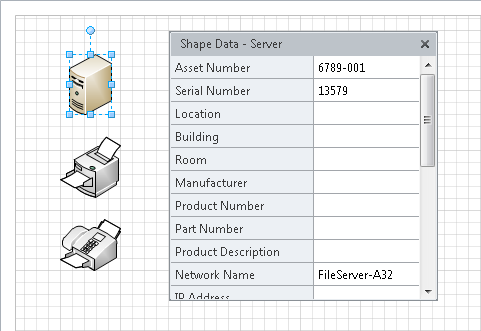
Click in the Asset Number field, and type 6789-001.
Click in the Serial Number field, and type 13579.
Click in the Network Name field, and type FileServer-A32.

Tip:
Note
the scroll bar on the right side of the Shape Data window. This shape
has additional data fields that are not visible in the graphic.
Click once on the printer to select it. Notice that the Shape Data window now shows the fields that are defined for the printer.
Click in the Asset Number field, and type 6449-001.
Click in the Network Name field, and type HR-Printer6.
Click once on the fax to select it. Notice that there are fewer fields defined for the fax machine.
Click in the Manufacturer field, and type Contoso.
Click in the Product Number field, and type FX351.
Note:
Save your changes to the Shape Data drawing but leave it open if you are continuing with the next exercise.