In some drawings, you want to provide your reader
with additional information that doesn’t need to be visible at all
times. Visio provides two convenient options with very different
characteristics:
ScreenTips
display pop-up text when you point to a shape but they are otherwise
invisible. Indeed, there is no way to know that a ScreenTip exists
unless you point to a shape containing one and a pop-up appears.
Warning:
Important
ScreenTips are part of a shape. Consequently, they move with a shape and are deleted when you delete a shape.
Comments
provide a visible indication of their presence but require you to click
on them to see the text of the comment. The comment indicator displays
the initials of the person who created the comment, along with a unique
sequence number. Each comment also stores and displays the name of the
comment author and the date on which it was created.
Warning:
Important
It is important to
understand that comments, unlike ScreenTips, are attached to the drawing
page and not to specific shapes. Consequently, they may appear near
shapes in some circumstances but they bear no relationship to, and
operate independently from, Visio shapes. You will see evidence of this
in the exercise in this section.
In general, use
ScreenTips to provide useful but noncritical information about a shape.
You should make the assumption that the reader may happen upon a
ScreenTip but also may not. Use comments when it is vital that the
reader know that they exist and when it is important to know who created
the comment and when.
In this exercise, you will add a ScreenTip to a shape. You will also add and edit a comment.
Note:
Click the File tab, and then click New. In the Template Categories
section, click Network, and then double click the Basic Network Diagram
thumbnail. Save the drawing as Text and Data on Shapes.
In the Shapes window, click Computers and Monitors. The Computers And Monitors stencil opens.
Drag a PC shape onto the page.
Screen Tip

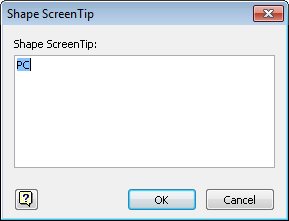
On the Insert tab, in the Text group, click the ScreenTip button. The Shape ScreenTip dialog box opens.

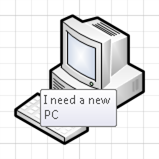
Type I need a new PC to overwrite the text in the dialog box, and then click OK.
Point to the PC and observe the pop-up text that you’ve created.

Drag a Laptop shape from the Computers and Monitors stencil onto the page.
New Comment

On the Review tab, in the Comments group, click the New Comment button.
Tip:
Comments are part of the review
feature set in Visio. Consequently, you will find comment buttons on the
Review tab and not on the Insert tab where you found ScreenTips.
Visio
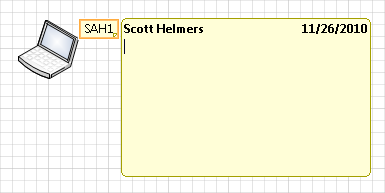
drops a comment indicator and an edit box for the comment body onto the
page. The indicator contains the author’s initials (taken from the
Visio settings) and a sequence number. In the following example, the
comment indicator shows SAH1.
The
comment edit box displays the author’s name and the current date. The
insertion point just below the author’s name indicates that you can
start typing the body of the comment.

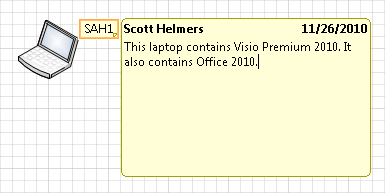
Type This laptop contains Visio Premium 2010.

Click
anywhere on the background of the page to close the comment edit box.
The border of the comment indicator has dimmed to show that it is not
selected.

Point to the comment SAH1 but don’t click the shape.
Visio
displays the author and the creation date of the comment. The pop-up
text remains on the screen only as long as you continue to point to the
indicator.

Click once on the comment SAH1.
Visio
displays the comment header as in the previous step but it also
displays the body of the comment in the minimum required space. The
comment body remains on the screen until you click elsewhere on the page
or press Esc.

Click anywhere outside the comment balloon to close it.
Double-click the comment SAH1, and type It also contains Office 2010.
Visio
opens the comment in edit mode so you can make changes to the text. The
comment body remains on the screen until you click elsewhere on the
page or press Esc.

Click anywhere outside the comment balloon to close it.
Warning:
Important
Visio placed the comment SAH1
near the laptop only because the shape was selected when you clicked
the New Comment button in Step 7. However, the shape and the comment are
not connected in any way, as the next steps in this exercise will
illustrate. If no shape is selected when you click the New Comment
button, Visio places the comment in the center of the drawing window.
Drag
the laptop to the left. Note that the comment indicator does not move.
Similarly, neither selecting nor deleting the laptop affects the
comment, and vice versa.

Right-click comment SAH1, and then click Delete Comment.
Note:
Save your changes to the Text and Data on Shapes drawing, and then close it.
Tip:
If your Visio diagram contains
more than one comment, you can navigate among them using the Previous
and Next buttons in the Comments group on the Review tab.
You can turn all comment indicators in your drawing on or off by clicking Show Markup in the Markup group on the Review tab.