For a different look, you can change the desktop background to display either a different image or a specific color.
Windows
7 comes with more than three dozen desktop background images, which
includes scenes of nature, architectural photos, fantasy characters, and
more. If none of the built-in desktop backgrounds appeal to you, you
can also use one of your own photos as the background.
You can also display multiple desktop images as a slide show.
Change the Desktop Background
1 Open the Personalization window.
2 Click Desktop Background.
The Desktop Background window appears.
3 Click the Picture location  and then click the background gallery you want to use.
NOTE
If you have your own image that you would prefer to use as the desktop background, click Pictures Library in the list. You can also click Browse and then use the Browse dialog box to select the file.
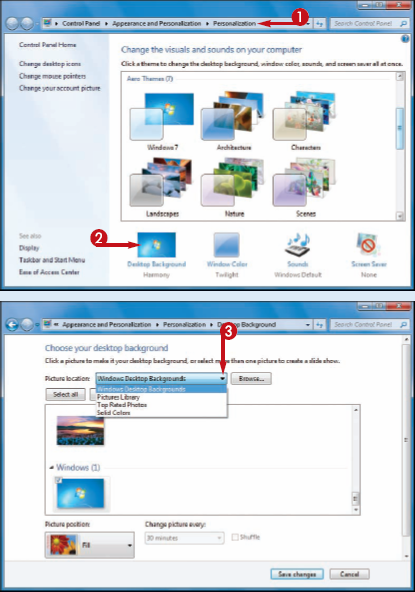
• Windows 7 displays the backgrounds in the selected gallery.
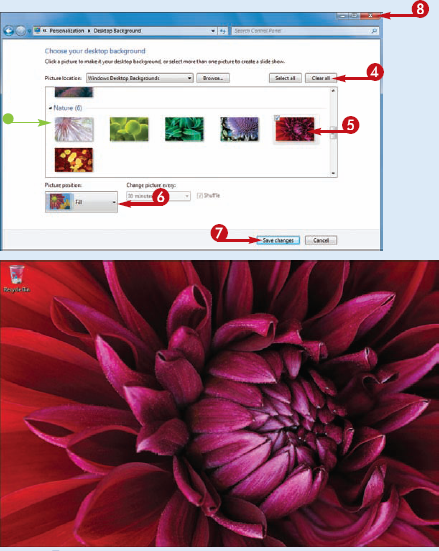
4 Click Clear all.
5 Click the image or color you want to use.
6 Click the Picture position  and then click the positioning you want.
NOTE
See the tip, below, for an explanation of each option.
7 Click Save changes.
8 Click the Close button ( ).
).
The picture or color you selected appears on the desktop.
What is the difference between the five Picture position options?
Fill:
Displays a single copy of the image extended on all sides so it fills
the entire desktop. As it extends the picture, Windows keeps the ratio
of width to height the same, so this usually means that part of the
image gets cut off.
Fit:
Displays a single copy of the image extended until either the width of
the picture fits the width of the screen, or the height of the picture
fits the height of the screen. Use this position if you want to display
all of the image without distortion and without cutting off any of the
image.
Stretch:
Displays a single copy of the image extended on all sides so it fills
the entire desktop. In this case, Windows does not keep the ratio of the
width to height, so your picture may end up a bit distorted.
Tile: Displays multiple copies of the image repeated so they fill the entire desktop. Choose this option for small images.
Center: Displays a single copy of the image in the center of the screen. This is a good choice for large images.
