Although the concepts are slightly more in depth than
what you’ve seen up until now, that’s exactly what you’re about to do.
Create a new solution and perform the same steps you did in the previous
section, except skip the extra game library project. So, create a new
game project, a new content pipeline extension project, and add a
reference to the extension project to your game’s content project. Later
in this section, you see why you don’t need to create the extra game
library project for this example.
Again, let’s start with what
your game project will do. Add the following classes that will represent
your level to your game project:
public class MyLevelObject
{
    public Model Model;
    public Vector3 Position;
    public Vector3 Rotation;
}
public class Level
{
    public List<MyLevelObject> LevelObjects;
    public Texture2D Background;
}
Although this still
isn’t a realistic object model that you would load a level into, it is
much closer than the previous example. The Level
object itself stores a texture that is used as the background of your
level, and a list of objects that describe the entities in your level.
In this case, each entity is a MyLevelObject that includes the Model that is used, along with its Position and Rotation like the previous example. Let’s write the game portion now, so add the following variables to your Game class.
Level mylevel;
Matrix view;
Matrix proj;
Notice that you don’t need the Model variable this time because it is stored inside the Level object. You also don’t have anything declared for your background texture, because this is also a part of the Level object. Create the following objects in your LoadContent overload:
view = Matrix.CreateLookAt(new Vector3(0, 10, 150), Vector3.Zero, Vector3.Up);
proj = Matrix.CreatePerspectiveFieldOfView(MathHelper.PiOver4,
    GraphicsDevice.Viewport.AspectRatio,
    1.0f, 1000.0f);
mylevel = Content.Load<Level>("mylevel");
At the end of this section,
the last line loads the whole level, including all of the models,
textures, and data. Before learning how to make this work, let’s finish
the game portion by replacing the Draw method with the following one:
protected override void Draw(GameTime gameTime)
{
    GraphicsDevice.Clear(Color.CornflowerBlue);
    spriteBatch.Begin();
    spriteBatch.Draw(mylevel.Background, GraphicsDevice.Viewport.Bounds,Color.White);
    spriteBatch.End();
    foreach (MyLevelObject myObject in mylevel.LevelObjects)
    {
        foreach (ModelMesh mesh in myObject.Model.Meshes)
        {
            foreach (BasicEffect effect in mesh.Effects)
            {
                effect.EnableDefaultLighting();
            }
        }
        myObject.Model.Draw(Matrix.CreateTranslation(
                myObject.Position) * Matrix.CreateFromYawPitchRoll(
                myObject.Rotation.X, myObject.Rotation.Y,
                myObject.Rotation.Z), view, proj);
    }
}
This is similar to the previous method, except you first use the Background
property of your level to render a texture covering the entire game.
You then make sure that each object in your level has the lighting
enabled, and then render each object based on the data found in your
level.
From here, things get quite a bit more esoteric. First, notice that the Level
object is declared in your Game project this time, rather than a shared
project that both the content pipeline extension and the game project
has access to. This is because there are certain types where you need
(or want) to have a different type of object used at build time than you
want to use at run time.
If you recall, your first content processor was eventually turned into a Texture2D in your game, but it started out as a TextureContent in the content pipeline. TextureContent is the build-time version of the Texture
runtime class. This is because there are things on the build-time
version of the class that make no sense in the runtime version (for
example, the conversion helper function you used earlier). Knowing this,
because your objects use these types, you also need build-time
versions, so declare your versions now in your content pipeline
extension project:
public class MyLevelObject
{
    public ModelContent Model;
    public Vector3 Position;
    public Vector3 Rotation;
    public string ModelFileName;
}
public class Level
{
    public List<MyLevelObject> LevelObjects;
    public TextureContent Background;
    public string BackgroundFileName;
}
Notice that this is almost
an exact duplicate of your runtime class, except the graphics objects
have been replaced with the build-time versions of themselves (in this
case, ModelContent and TextureContent). Each object also includes a new property that is a string representing the filename needed for each of the graphics objects. You see why this is needed in a few moments.
Before you create your
importer and processor for these objects, let’s create the actual data
you’ll use. Create a new file in your content project called mylevel.mylevel and include the following data:
glacier.jpg
depthmodel.fbx
10 10 10 0.3 0.2 0.1
environmentmapmodel.fbx
20 20 20 0.1 0.2 0.3
depthmodel.fbx
-50 -40 30 0.2 0.3 0.1
box.fbx
1.5 2.3 1.7 0.4 0.5 0.6
environmentmapmodel.fbx
40.2 70.1 -10.2 0.6 0.5 0.4
depthmodel.fbx
-10 10 -10 0.7 0.8 0.9
depthmodel.fbx
20 -20 20 0.9 0.8 0.7
environmentmapmodel.fbx
-30 30 -30 0.8 0.9 0.7
The
first line is the filename of the texture that is used as the
background for the level. Each pair of lines represents first the model
filename and then the data for that associated model. You can use any
valid model and texture filename here. Note, however, that these files
are expected to be in the same folder as the mylevel.mylevel
file, so if they aren’t, copy them there now (they are already in the
same folder in the example provided with the downloadable examples).
Next, add the ContentImporter class to your extension project:
[ContentImporter(".mylevel", DisplayName = "My Level Importer",
    DefaultProcessor = "MyLevelProcessor")]
public class MyContentImporter : ContentImporter<Level>
{
    public override Level Import(string filename,
        ContentImporterContext context)
    {
        Level level = new Level();
        level.LevelObjects = new List<MyLevelObject>();
        using (StreamReader reader = new StreamReader(File.OpenRead(filename)))
        {
            // The first line is the background texture
            level.BackgroundFileName = GetAbsolutePath(filename, reader.ReadLine());
            while (!reader.EndOfStream)
            {
                // After the first line, each line is first the model,
                // and then the model's data
                MyLevelObject info = new MyLevelObject();
                info.ModelFileName = GetAbsolutePath(filename, reader.ReadLine());
                // Followed by the position/rotation data
                string[] floats = reader.ReadLine().Split(' ');
                info.Position = new Vector3(float.Parse(floats[0]),
                    float.Parse(floats[1]), float.Parse(floats[2]));
                info.Rotation = new Vector3(float.Parse(floats[3]),
                    float.Parse(floats[4]), float.Parse(floats[5]));
                level.LevelObjects.Add(info);
            }
        }
        return level;
    }
    private string GetAbsolutePath(string input, string file)
    {
        return Path.Combine(Path.GetDirectoryName(input), file);
    }
}
First, notice that the attribute for your importer class has a new property added, the DefaultProcessor.
This is used to specify the name of the default processor to be used by
things that the importer will import. This is the name of the processor
you’ll write in a few moments.
There is also a helper
method included that converts the filename you used in the actual data
you created to the absolute location on disk by using the folder the
data file was found in. This is why you need to make sure the textures
and models your level needs are in the same folder as your level file
(or change this code so it knows where to find them).
Aside from that, this is almost
the same as your other importer except that you are not yet creating
the textures and models your level needs, but instead simply storing the
full filenames in the extra property. This is because you do that
portion in the processor. Because there’s nothing else new here, let’s
add the processor to this same code file now:
[ContentProcessor(DisplayName="MyLevelProcessor")]
public class MyContentProcessor : ContentProcessor<Level, Level>
{
    public override Level Process(Level input, ContentProcessorContext context)
    {
        Level level = new Level();
        level.LevelObjects = new List<MyLevelObject>();
        // Process the input, we'll need to create the texture that is specified
        ExternalReference<TextureContent> backgroundReference =
            new ExternalReference<TextureContent>(input.BackgroundFileName);
        // Now build and store it
        level.Background = context.BuildAndLoadAsset<TextureContent,
            TextureContent>(backgroundReference, "TextureProcessor");
        // Now load each of the models
        foreach (MyLevelObject obj in input.LevelObjects)
        {
            MyLevelObject newobj = new MyLevelObject();
            newobj.Position = obj.Position;
            newobj.Rotation = obj.Rotation;
            // Do the same thing we did for textures for model here
            ExternalReference<NodeContent> modelReference =
                new ExternalReference<NodeContent>(obj.ModelFileName);
            // Now build and store it
            newobj.Model = context.BuildAndLoadAsset<NodeContent,
                ModelContent>(modelReference, "ModelProcessor");
            level.LevelObjects.Add(newobj);
        }
        return level;
    }
}
This is different from anything you wrote previously, and there is quite a bit of stuff going on here. First, create the Level you’ll return and the LevelObjects that go with it. Next, load the file you know about for the background texture into an actual TextureContent object. To do this, create an ExternalReference object of the type you want to load—in this case, TextureContent. You can then use the BuildAndLoadAsset
helper method, which builds the asset specified in the external
reference, and then load its into the appropriate processed type, which
you then can store in your new Level object as the Background texture. By using the BuildAndLoadAsset helper method, this also adds the external file as a dependency of your Level file, which enables the content to be recreated if anything is modified.
After you load the TextureContent, you are ready to move on to the object list. Copy the Position and Rotation over, and then perform a similar operation to the Model as you did to the Background earlier. The major difference here is that the model is imported as a NodeContent object, and then processed into the ModelContent
you need rather than being imported and processed as the same type.
Then, add your new data into the list before finally returning the
level.
You might wonder, “Ok, I
have the importer and the processor written, now I can run my
application and see the work!” If you do that, you get an exception when
you try to load your level. It complains about not being able to find
the Level type. This is the reason your
first importer had the extra game library project that stored the type,
so both build time and runtime had access to it. However, you can
customize how your content assets are written out to disk by using a ContentTypeWriter. Add the following using clause at the top of your content pipeline project:
using Microsoft.Xna.Framework.Content.Pipeline.Serialization.Compiler;
Then, declare a new class that will be the writer for your content:
[ContentTypeWriter]
public class LevelContentWriter : ContentTypeWriter<Level>
{
}
This attribute tells the
system that this class should be checked before writing content, and if
the content you write is the appropriate type (the type specified in the
generic of the ContentTypeWriter class), then to use this class rather than the default writer. Because this is the writer for the Level class, anytime a Level asset is written, this class will be called instead. There are three methods that need to be overwritten for this class to work. Add the following:
public override string GetRuntimeReader(TargetPlatform targetPlatform)
{
    return "ContentImporter.LevelContentReader, ContentImporter";
}
public override string GetRuntimeType(TargetPlatform targetPlatform)
{
    return "ContentImporter.Level, ContentImporter";
}
protected override void Write(ContentWriter output, Level value)
{
    // Write the background first
    output.WriteObject<TextureContent>(value.Background);
    // Next write the count, so we know how many models there are
    output.Write(value.LevelObjects.Count);
    // Finally, write all the level objects
    foreach (MyLevelObject obj in value.LevelObjects)
    {
        output.WriteObject<ModelContent>(obj.Model);
        output.Write(obj.Position);
        output.Write(obj.Rotation);
    }
}
Because you have a
customized writer now, you need a customized reader. The first method
enables you to specify what to use as the reader for this type of
content. It expects you to return this as the assembly qualified name of
the reader class. In this case, the game project is called ContentImporter, and the namespace the reader class lives in (after you write in shortly) is also ContentImporter,
so this is the assembly qualified name of this type. If you aren’t sure
what the name of the type is, you can verify it by using the typeof(Type).AssemblyQualifiedName helper property on the appropriate type.
The next method is
also the assembly qualified name of a type, but this time it is the
runtime version of this content type. Because you can use the GetRuntimeType method to specify the type that you will load from the data, you don’t need to have the shared game library project.
Finally, you have to actually write the data, which is what the Write overload does. You simply write the Background
first, then the number of objects in your list, followed by each object
itself. Now, you’re ready to see the fruits of all this labor. All you
need now is the reader half of this and you’re done. Add the following
class back in your game project:
public class LevelContentReader : ContentTypeReader<Level>
{
    protected override Level Read(ContentReader input, Level existingInstance)
    {
        Level level = new Level();
        level.Background = input.ReadObject<Texture2D>();
        int count = input.ReadInt32();
        level.LevelObjects = new List<MyLevelObject>(count);
        for (int i = 0; i < count; i++)
        {
            MyLevelObject obj = new MyLevelObject();
            obj.Model = input.ReadObject<Model>();
            obj.Position = input.ReadVector3();
            obj.Rotation = input.ReadVector3();
            level.LevelObjects.Add(obj);
        }
        return level;
    }
}
As you see here, you create the new Level object, and then reverse what you did in the writer. You read the Background
first, followed by the number of items in the list, before finally
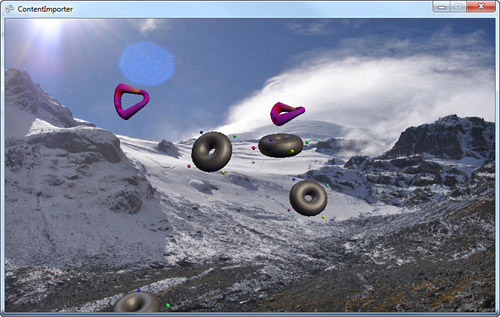
reading each list object and adding them to your new list. If you run
the application now, it builds everything up into your Level object, your scene renders on the screen much like Figure 1.
Combining What You Learned So Far
What
if you want to combine various importers and processors though? What if
you wanted to use the color inversion processor on your background
texture for your level? Luckily, you can do that, too! Add the final
version of the color inversion processor to your content pipeline
extension project:
[ContentProcessor(DisplayName = "InvertColorsProcessor")]
public class InvertColorsProcessor : ContentProcessor<TextureContent, TextureContent>
{
    public override TextureContent Process(TextureContent input,
        ContentProcessorContext context)
    {
        // Convert the input to standard Color format, for ease of processing.
        input.ConvertBitmapType(typeof(PixelBitmapContent<Color>));
        foreach (MipmapChain imageFace in input.Faces)
        {
            for (int i = 0; i < imageFace.Count; i++)

                PixelBitmapContent<Color> mip = (PixelBitmapContent<Color>) imageFace[i];
                // Invert the colors
                for (int w = 0; w < mip.Width; w++)
                {
                    for (int h = 0; h < mip.Height; h++)
                    {
                        Color original = mip.GetPixel(w, h);
                        Color inverted = new Color(255 - original.R,
                            255 - original.G, 255 - original.B);
                        if (ShouldCauseBlocks)
                        {
                            if ((h % BlockSize > (BlockSize / 2))
                                || (w % BlockSize > (BlockSize / 2)))
                            {
                                inverted = original;
                            }
                        }
                        mip.SetPixel(w, h, inverted);
                    }
                }
            }
        }
        return input;
    }
    [DefaultValue(false)]
    [DisplayName("BlockyInversion")]
    [Description("Should the inversion be done in blocks?")]
    public bool ShouldCauseBlocks
    {
        get;
        set;
    }
    [DefaultValue(20)]
    [DisplayName("BlockSize")]
    [Description("The size in pixels of the blocks if a blocky inversion is done")]
    public int BlockSize
    {
        get;
        set;
    }
}
Now you will want to include the same properties on your Level
processor, but also include another one to specify whether the level
background should be inverted or not. Add the following properties to
the MyContentProcessor class:
[DefaultValue(false)]
[DisplayName("ShouldInvertColors")]
[Description("Should the background texture be inverted?")]
public bool ShouldTexturesBeInverted
{
    get;
    set;
}
[DefaultValue(false)]
[DisplayName("BlockyInversion")]
[Description("Should the inversion be done in blocks?")]
public bool ShouldCauseBlocks
{
    get;
    set;
}
[DefaultValue(20)]
[DisplayName("BlockSize")]
[Description("The size in pixels of the blocks if a blocky inversion is done")]
public int BlockSize
{
    get;
    set;
}
To invert the background texture (if it was specified as such), add the following code to the beginning of the Process overload of your MyContentProcessor class:
string textureProcessor = ShouldTexturesBeInverted ?
    "InvertColorsProcessor" : "TextureProcessor";
OpaqueDataDictionary opaqueData = new OpaqueDataDictionary();
if (ShouldTexturesBeInverted)
{
    opaqueData.Add("ShouldCauseBlocks", ShouldCauseBlocks);
    opaqueData.Add("BlockSize", BlockSize);
}
First,
choose which processor should be used based on whether or not the user
has asked to have the textures inverted. Then, create a new OpaqueDataDictionary
that is used to store extra data for the processor if it is needed. Any
data in the dictionary is used to populate the properties of the
processor before it is executed. So if the user has asked to invert the
colors, you pass in the extra parameters specifying whether it should be
blocky or not, and by how much.
To update your building command to use these new properties, replace the first BuildAndLoadAsset method with the following:
level.Background = context.BuildAndLoadAsset<TextureContent,
    TextureContent>(backgroundReference, textureProcessor, opaqueData, null);
This passes in the correct
processor and opaque data depending on which options were specified.
Compile this now, and then change the properties of your level to allow
color inversion of the background. Compile and run to see that the
background image is now inverted!
The Content Manager
The ContentManager
class is part of the runtime portion of the Content Pipeline. It is the
class that you use to load the content. It also caches the content it
loads, so subsequent requests for the same piece of content simply
returns it again, so you don’t need to worry about it loading multiple
copies of the same thing. This also means that when you call Unload on a ContentManager, it destroys all the assets it has loaded in one swoop.
More importantly, you can create as many ContentManager classes as you want, and use them to control how your game manages asset lifetime. For example, to have one ContentManager that holds all of the user interface elements that are needed for menus, startup, and so on, use a separate ContentManager to hold the assets for your content that is part of the game and levels. Then, when a level is over, you can Unload the ContentManager and free up all the resources you were using.
Although all of the examples in this book use a single ContentManager
class (and the default game templates do as well), don’t assume that it
means you should use only one. More complex games should use several of
these and unload them at appropriate times.
