1. Problem
You need to pass data from one page to another.
2. Solution
You can use the QueryString collection provided by the NavigationContext property from the PhoneApplicationPage class.
3. How It Works
The source page that has to pass parameters to the destination page can use the URL parameters' syntax:
/Page.xaml?param1=value¶m2=value&...
After the page name, the
parameters' definition starts with a question mark and includes a series
of key/value pairs separated by the ampersand character.
To retrieve the parameters' values in the destination page, you have to use the QueryString collection provided by the NavigationContext property of the PhoneApplicationPage class.
4. The Code
To demonstrate navigation
between pages with the exchange of parameters, you have to create a new
Windows Phone 7 Silverlight application and call it NavigatingWitParamsApp. As you did in Recipe 2-1, add a new page and call it Page2.xaml.
In MainPage.xaml, you have to add three hyperlink buttons. You then define for each of them a Click event handler. You can take advantage of the TabIndexPage2. Let's see the XAML code of the MainPage page: property to set the value you want to pass to
<!--ContentPanel - place additional content here-->
        <Grid x:Name="ContentPanel" Grid.Row="1" Margin="12,0,12,0">
            <StackPanel Orientation="Vertical" >
<HyperlinkButton Content="Option 1" Click="HyperlinkButton_Click"
                                 TabIndex="1" />
                <HyperlinkButton Content="Option 2" Click="HyperlinkButton_Click"
                                 TabIndex="2" />
                <HyperlinkButton Content="Option 3" Click="HyperlinkButton_Click"
                                 TabIndex="3" />
            </StackPanel>
        </Grid>
In the code of the Click event handler, you can call the Navigate method, passing the parameter that represents the index of the pressed hyperlink button:
private void HyperlinkButton_Click(object sender, RoutedEventArgs e)
        {
            HyperlinkButton hb = sender as HyperlinkButton;
            string url = string.Format("/Page2.xaml?ID={0}", hb.TabIndex);
            this.NavigationService.Navigate(new Uri(url, UriKind.Relative));
        }
The sender object passed to the Click event handler represents the hyperlink button that raised the event. You can cast it to a HyperlinkButton object so you can use its TabIndex property and pass it to the Page2 page.
In the Page2.xaml file, you add a TextBlock control that will show a message indicating which button has been pressed in the MainPage page. As you can see in the following code, it is worth noting the PhoneTextTitle3Style static resource that is part of the theme resources for Windows Phone (see Recipe 3-5).
<!--ContentPanel - place additional content here-->
        <Grid x:Name="ContentPanel" Grid.Row="1" Margin="12,0,12,0">
            <TextBlock x:Name="lbText" Style="{StaticResource PhoneTextTitle3Style}" />
        </Grid>
In the Page2.xaml.cs file, you have to add the Page_Loaded event handler, where you will retrieve the parameter value passed by the source page.
private void PhoneApplicationPage_Loaded(object sender, RoutedEventArgs e)
        {
            lbText.Text = string.Format("You clicked the option number {0}",
                                        this.NavigationContext.QueryString["ID"]);
        }
The Loaded event is raised when the page is fully created and every control is loaded. So you are sure here that the TextBlock is ready to show the Text property you set to the message. The event handler name must be specified in the XAML code of Page2.xaml as well:
<phone:PhoneApplicationPage
    x:Class="NavigatingWithParamsApp.Page2"
    xmlns="http://schemas.microsoft.com/winfx/2006/xaml/presentation"
    xmlns:x="http://schemas.microsoft.com/winfx/2006/xaml"
    xmlns:phone="clr-namespace:Microsoft.Phone.Controls;assembly=Microsoft.Phone"
    xmlns:shell="clr-namespace:Microsoft.Phone.Shell;assembly=Microsoft.Phone"
    xmlns:d="http://schemas.microsoft.com/expression/blend/2008"
    xmlns:mc="http://schemas.openxmlformats.org/markup-compatibility/2006"
FontFamily="{StaticResource PhoneFontFamilyNormal}"
    FontSize="{StaticResource PhoneFontSizeNormal}"
    Foreground="{StaticResource PhoneForegroundBrush}"
    SupportedOrientations="Portrait" Orientation="Portrait"
    mc:Ignorable="d" d:DesignHeight="768" d:DesignWidth="480"
    shell:SystemTray.IsVisible="True" Loaded="PhoneApplicationPage_Loaded">

. . .
5. Usage
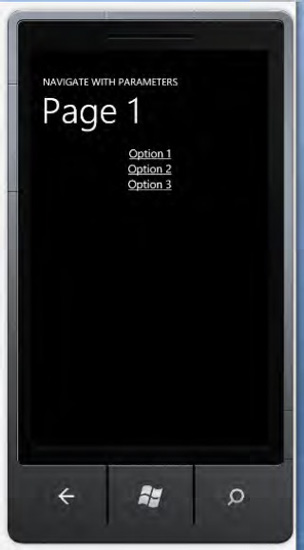
From Visual Studio 2010, make
sure your target is Windows Phone 7 Emulator and press Ctrl+F5. The
emulator will start, briefly showing the splash screen and then the main
page (see Figure 1).
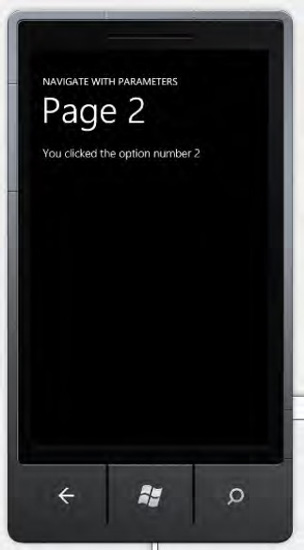
Select one option of your choice, and the application will show the Page2 page with a message telling which option you selected. For example, in our case we clicked Option 2; Figure 2 shows the related message.