1. Problem
You have BizTalk solution
artifacts that should be grouped together for ease of management and
maintenance. Specifically, you would like to group BizTalk Solution
components so that you can easily deploy those components to another
environment as well as start and stop the components together as a
whole.
2. Solution
You can use a BizTalk
application to group and manage BizTalk solution artifacts. As outlined
in the following steps, the process involves creating the new
application, configuring it, and then adding components. After creating
the BizTalk application, you can import BizTalk MSI files and bindings
and add previously created BizTalk assembly DLLs, scripts, and
resources. The instructions in this solution describe the process for
adding a BizTalk assembly DLL that contains multiple schemas.
Open the BizTalk Administration Console.
In the left pane, right-click the Applications folder, and choose New => Application. This launches the Application Properties dialog box, as shown in Figure 1.
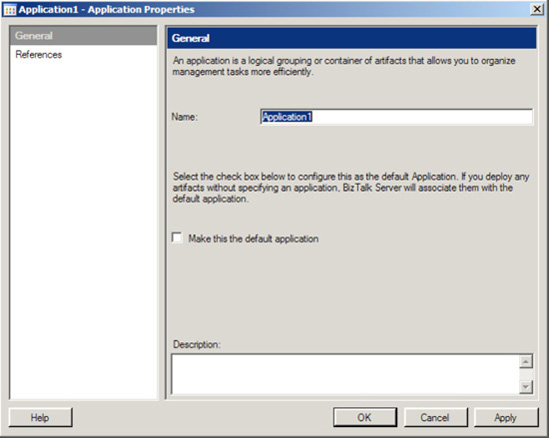
In
the Application Properties dialog box, make the following settings, and
then click the OK button to create the new BizTalk application.
Enter the name of the application that you are creating.
Specify
if this application is the default application. Identifying your
application as the default application is significant when deploying new
BizTalk artifacts from Visual Studio. Unless you specify an application
in Visual Studio, your BizTalk artifact deploys to the default BizTalk
application. A BizTalk artifact that does not specify a deployment
application name will be grouped in your newly created default
application.
Identify
any application references. Identifying application references allows
you to share resources across applications. For example, if you have a
common set of shared schemas, maps, or pipelines, you can specify them
as part of an application reference and not need to make multiple copies
of those components for each BizTalk application.
After
the application is created, verify that the artifacts have been bound
appropriately. Right-click the application and choose Start.
NOTE
When you start a BizTalk
application, you have the choice of enlisting and starting all
orchestrations, send ports, send port groups, receive locations, host
instances, and resuming suspended instances.
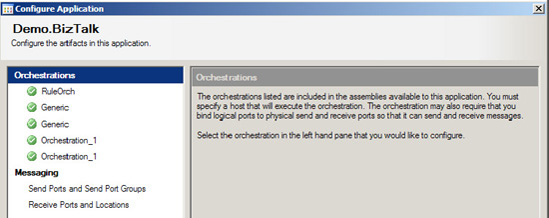
To
configure your application, from the BizTalk Administration Console,
right-click it, and choose Configure. You will be presented with a
Configure Application dialog box, shown in Figure 2.
Here, you can configure binding, host, role links, and messaging/port
settings for your application. Click OK after completing your
configuration.
From the newly created application, right-click and choose Add => BizTalk Assemblies. This launches the Add Resources dialog box, shown in Figure 3.
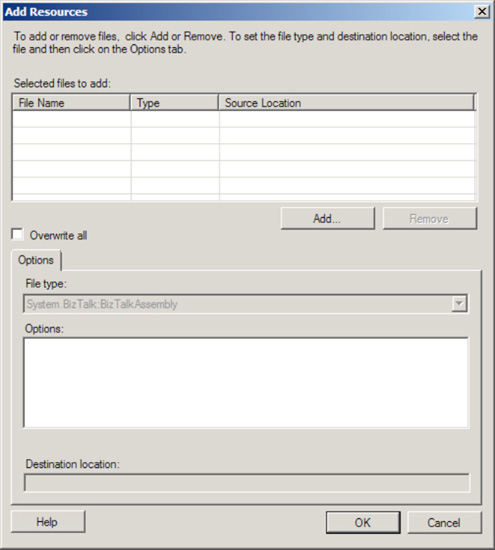
Click
the Add button to identify the assemblies to add to the BizTalk
application. You can add assemblies (BizTalk or custom), scripts,
bindings, COM objects, and other objects to your BizTalk application.
This dialog box includes the following settings:
Overwrite all:
This flag indicates whether to overwrite an existing resource in the
Management database with the resource specified in the application. If
you do not specify this flag and you have a resource that contains the
same name, the process will fail when trying to add the object.
Options:
Depending on the type of resource being added, you have different
options. For example, if you are adding an assembly to your project, you
also have the option to add the assembly to the Global Assembly Cache
(GAC), make the resource visible to COM, and register the component as a
serviced component. Remember any assembly you wish to add to the GAC
must be signed with a strong name key (this can most easily be done
through the project properties in Visual Studio).
Dependencies: You will receive a list of dependencies if you choose to add an assembly (BizTalk or custom) to your BizTalk application.
Destination location:
This is the location or path where the resource file will be copied
when the application is installed. You may specify an absolute,
relative, or UNC path. The default path copies the resource file to the
application installation folder.
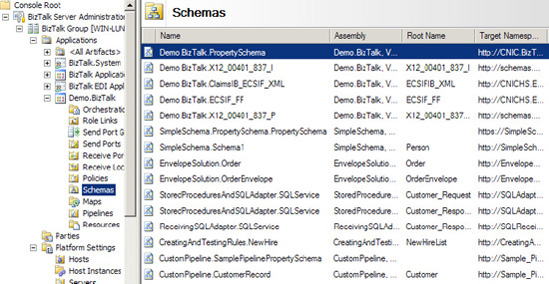
When you have selected the resources to add to you BizTalk application, click the OK button. Figure 4
shows an example of a BizTalk application with a schema resource added.
Notice that BizTalk automatically manages the placement of the resource
into the correct folder location within the BizTalk application.
3. How It Works
BizTalk applications
represent a powerful concept in organizing BizTalk artifacts into
logical groupings. You can group like or related artifacts together in a
BizTalk application. Once BizTalk artifacts are grouped logically, it
is possible to export the application to another BizTalk environment.
The concept of applications simplifies management, troubleshooting, and
deployment of BizTalk artifacts.
The monitoring tools that
are included in the BizTalk Administration Console take advantage of the
BizTalk application concept. Multiple BizTalk solutions can be managed
through logical application groupings.
BizTalk is set up with a
default application container under which all BizTalk artifacts are
deployed to by default. When you upgrade a previously created BizTalk
solution, the artifacts will initially be placed in the default
application. Additionally, in the following situations, BizTalk
artifacts will be placed in the default application:
When you deploy BizTalk artifacts from Visual Studio without specifying an application
When you use BTSDeploy to deploy BizTalk artifacts (because this tool was created for a previous version of BizTalk)
When you use BTSTask without specifying an application name
NOTE
If you perform automated deployment, make sure to use the BTSTask tool instead of the deprecated BTSDeploy tool. With BTSTask, you can specify the application under which your BizTalk artifacts are deployed. If you continue to use the BTSDeploy tool, your BizTalk artifacts will be deployed to the default BizTalk application.
Consider using a separate BizTalk application in the following situations:
When sharing BizTalk assemblies across multiple applications: In this situation, group BizTalk assemblies in a separate application.
When sharing a deployed web site:
The best approach here is to implement the shared web site in a
separate application. When uninstalling a BizTalk application that
contains a web site, the virtual directory of that web site will be
removed even if it is currently being used. Any other application
sharing that web site will encounter exceptions if that web site is
removed.
When sharing a policy across multiple applications:
In this situation, create a separate application for that policy. When
you stop a BizTalk application that includes a policy, the policy is
undeployed. If another application is referring to the undeployed
policy, you will encounter exceptions.
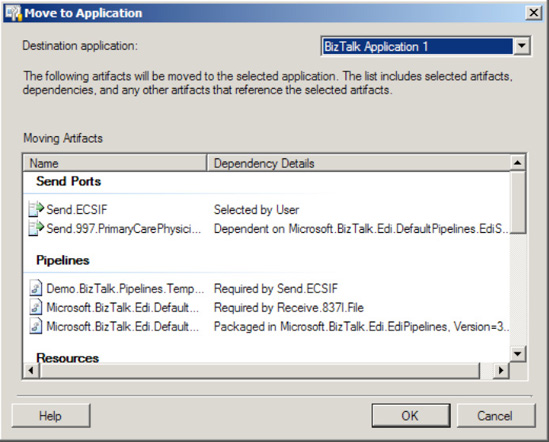
You can move
artifacts between BizTalk applications in the same BizTalk group by
selecting an application resource, right-clicking, and choosing Move To
Application from the context menu. This will launch the Move to
Application dialog box (see Figure 5),
where you can choose a new BizTalk application. If you need to move
artifacts to another BizTalk application in a different BizTalk group,
you must export the artifact and then import it into the other BizTalk
group's application.