5. Creating a Profile Page
After you create the BDC
Model, you then need to create a profile page for each ECT, which you
can use to view an instance of an ECT. On SharePoint 2010, it is easy to
create a profile page using either SharePoint Designer or the Central
Administration website. The following procedure explains how you can
create an external data action named View Profile that will be added to
any instance of an ECT pointing to the profile page. This external
action is the default action for the ECT, so when users click any
external data item, they will be redirected to the profile page.
To create or update a profile page, follow these steps.
Open a browser and go to the SharePoint Central Administration website.
Under Application Management, click Manage Service Applications.
On
the Service Applications page, click the name of the Business Data
Connectivity Service where the ECT is defined to display the BCS
Application Information page shown earlier in Figure 18-5.
On
the Service Application Information page, in the View group on the Edit
tab, select External Content Types from the drop-down menu, as shown
earlier in Figure 18-7.
Select the ECT for which you want to create a profile page, and in the Profile Page group on the Edit tab, click Create/Upgrade.
You will see a dialog box with information concerning the create/upgrade profile page process. Click OK.
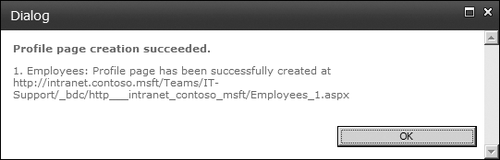
The Profile Page Creation Succeeded dialog box appears, as shown in Figure 10. Click OK.
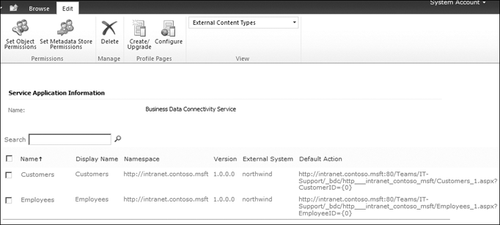
The External
Content Types view of the Service Application Information page refreshes
and the link to the newly created profile page is listed in the Default
Action column of the ECT, as shown in Figure 11.
Note:
If a profile page already
exists, clicking the Create/Upgrade icon will re- create the profile
page, overwriting the previous one, unless you have changed the site
that is hosting the profile pages. Any customizations you made to the
previous profile page will be lost. If you created your own custom
external action and defined it as the default action, then the profile
page created by this procedure will become the default action.
Note:
When a SharePoint 2010 site is an
upgraded SharePoint Server 2007 site that includes BCS data, profile
pages, and actions, then the first time you complete the preceding
procedure, you will create a new profile page. The previous profile page
will not be overwritten, and the action for that profile page will be
renamed to View Profile (SharePoint Server 2007).
Note:
To create a profile page for
SharePoint Foundation, you will need SharePoint Designer or a developer
to create the external action using the procedure outlined in the next
section.
6. Creating External Data Actions
Actions provide a link to the external data
source. Actions are URLs that are usually defined in the BDC Model on
an ECT basis. You can add more actions, modify existing actions, or
delete existing actions after you have imported the BDC Model, and you
can do this without having to delete the application and re-import the
BDC Model. To add actions, follow these steps.
Open a browser and go to the SharePoint Central Administration website.
Under Application Management, click Manage Service Applications.
On
the Service Applications page, click the name of the Business Data
Connectivity Service where the ECT is defined to display the BCS
Application Information page that was shown earlier in Figure 18-5.
On
the Service Application Information page, in the View group on the Edit
tab, select External Content Types from the drop-down menu, as shown
earlier in Figure 18-7.
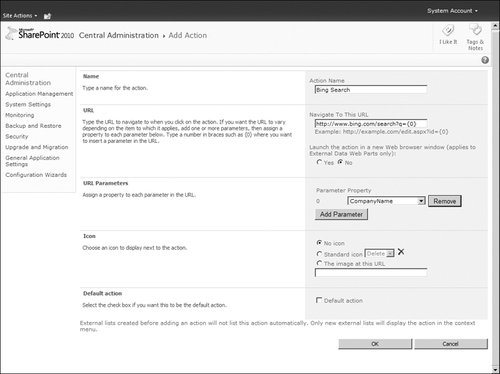
From the drop-down menu for the ECT for which you want to add a new action, click Add Action.
On the Add Action Web page shown in Figure 12,
type a name for the action, type the URL, specify whether to launch the
action in a new browser window or not (default), add parameters to the
URL if required, and add the icon to display next to the action. You can
choose from the Delete, Edit, or New actions, or you can choose your
own image.
Note:
New actions added to an
ECT are not available on existing External Lists created from that ECT.
Only new External Lists created from the ECT will display the action.
Wherever an instance of an ECT is displayed, the actions will be visible and presented as a drop-down list, as shown in Figure 13.
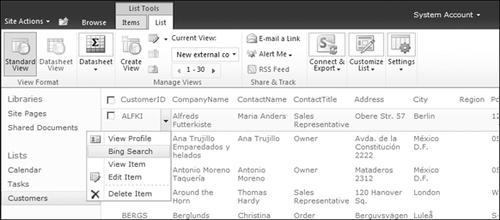
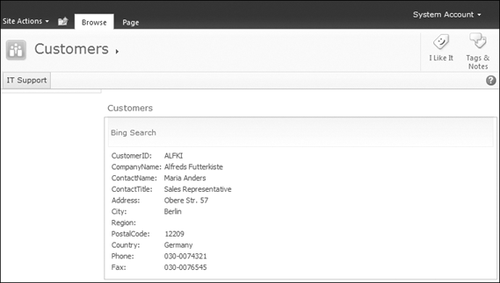
When the View Profile action is selected, the profile page is displayed, as shown in Figure 14.
The profile page generated by SharePoint Designer and the Central
Administration website consists of two Web Parts: the Business Data Item
Builder Web Part, which has a Web Part connection to the Business Data
Details Web Part.
Although
actions are limited to a URL, you can open a client application from a
URL. Two ways you can do this are by writing a Web Part that opens the
client application or by writing an Internet Explorer pluggable protocol
handler.
