Understanding Security Template Settings That Affect Network Security
Each
security template can potentially have hundreds of settings that affect
everything from password policy to group membership to permissions on
files. All the settings can affect local and network security. Although
all the settings and their importance cannot be listed here, you should
be aware of the settings specific to network security access and
protocols. Table 5 lists the settings and the area within the security template where they are located.
Table 5. Security Options for Improving Network Security
| Setting | Template Location | Description |
|---|
| Access this computer from the network | User Rights | This setting determines which users and computers can access this computer. |
| Add workstations to a domain | User Rights | By default, all domain users have the right to add 10 computers to a domain. |
| Logon rights (multiple settings) | User Rights | This
setting includes several logon rights, such as the right to log on
locally, and the opposite, the right to deny logon locally, for example. |
| Digitally encrypt or sign secure channel data (multiple settings) | Security Options | This
setting controls how secure channel data crosses the network. You want
the most secure, but you must sometimes relax settings to get
connectivity. For example, downlevel computers might not be able to
communicate using the same security settings as Windows Server 2003. |
| Allow anonymous (multiple settings) | Security Options | This setting determines which types of anonymous connections and anonymous access are allowed. |
| Do not store LAN Manager hash value on next password change | Security Options | Because the new password hash for the change is not stored, a computer that can use only LM will not be able to authenticate. |
| LAN Manager authentication level | Security options | This
setting determines which versions of the LM protocol are accepted. The
insecure version, LM, is not allowed by default; instead, computers must
use NTLM, NTLMv2, or Kerberos. |
| Minimum Sessions security (two settings) | Security Options | This setting determines whether message integrity, confidentiality, and encryption are required. |
Applying the Principle of Least Privilege
One of the most important concepts that should guide your development and implementation of security policy is the principle of least privilege.
Using this principle means that no employee and no user of information
systems has more privileges or access to information and resources than
they need to do their job. This principle includes removing privileges
and access when employees change jobs within the organization or when
they leave the company. The principle of least privilege also means that
visitors to the organization or to any information resources—such as
the public, contractors, temporary workers, partner representatives, and
so on—should be treated in the same manner. No one, and that includes
system administrators and IT workers, should have any more access or
rights than they need to do their job.
There are many ways
to implement and follow this maxim. The ways can be categorized
according to those that are possible using security templates and those
that require other mechanisms to implement. This subject is broad, and
the following lists are by no means meant to be comprehensive. Instead,
they are meant to teach the paradigm.
Security Template Least Privilege Opportunities
Develop a strong password policy to keep unauthorized individuals off systems.
Assign
user rights sparingly. Reduce rights, especially access and logon
rights, as much as possible. Set different rights on computers with
different roles.
Use security options to block access and restrict activity.
Use file and Registry ACLs.
Use the Restricted Groups section to force and limit membership in sensitive groups.
Use the Services section to disable services and restrict who can manage them.
Develop
a baseline plan for every computer role and implement using templates
that are imported into Group Policy Objects (GPOs) on representative
organizational units (OUs).
Apply a comprehensive auditing strategy.
Nonsecurity Template Least Privilege Opportunities
Group users by role so that privileges and permissions can be granted by role.
Configure
ACLs for files, folders, Registry keys, directory objects, and printers
to allow only the exact access any group of users needs.
Physically protect servers. Allow access only to authorized personnel and screen this authorization.
Review audit logs and other logs looking for needs to restrict further access.
Use Web proxies to limit user access to external resources.
Use firewalls to limit access to internal networks.
Practice: Creating and Using the Security Configuration And Analysis Console
Security templates are
useful tools in network security management. An easy way to work with
them is to create a console that includes access to them, as well as a
way to apply them and analyze the resulting security policy. You can
perform this task by creating a console and adding the Security
Templates snap-in and the Security Configuration And Analysis snap-in.
Exercise 1: Create the Console: Apply Default Templates
In this exercise, you
create a console within which you can view, configure, or copy security
templates, add a new folder to hold a different location for templates,
and apply a security template to a computer. Working with the templates
in the console will not change security on the computer.
▸ To create a Security Configuration And Analysis console
1. | From the Start menu select Run, type MMC, and click OK.
|
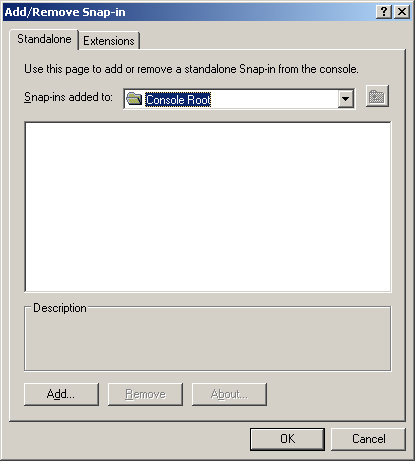
2. | From the File menu, select Add/Remove Snap-In.
|
3. | In the Add/Remove Snap-In dialog box, click the Add button, as shown in Figure 1.
|
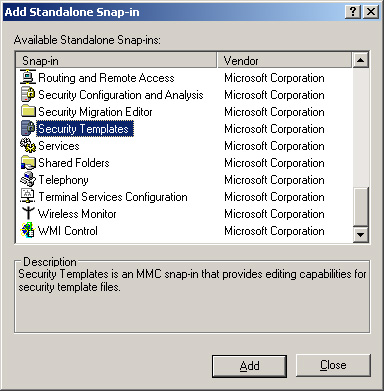
4. | From the Add Standalone Snap-In dialog box, select Security Templates. Then click Add, as shown in Figure 2.
|
5. | Select the Security Configuration And Analysis snap-in, click Add, and then click Close.
|
6. | Click OK to add the snap-in to the console.
|
7. | To save the console, from the File menu select Save As. Type Security Configuration Management. Then click Save.
|
▸ To prepare a location for custom security templates and add it to the console
1. | In Windows Explorer, create a new folder named Custom Templates.
|
2. | Open the Security Configuration Management console.
|
3. | Right-click Security Templates, and from the shortcut menu select New Template Search Path.
|
4. | Select the Custom Templates folder and click OK.
|
Note
Best
practices recommend never modifying default templates. Instead, new
templates or copies of current ones are placed in a separate location
and then used to create custom templates. Consequently, you always have
the default templates, and because custom templates are stored
separately, it is easier to copy them and store originals in a safe
place. |
The new folder appears in the Security Configuration Management console, as shown in Figure 3.

Exercise 2: Create Custom Templates
In
this exercise, you develop your own custom templates. You select a
default template that is close to the template you need, copy it, and
then make adjustments to the copy. The Securews.inf template has some
setting changes that strengthen network communication security.
1. | In the Security Templates console, right-click the Securews.inf security template and select Save As.
|
2. | Browse to the Custom Templates folder created previously.
|
3. | Type test1 for the new template name and click Save.
|
▸ To modify a template
1. | Expand
the Custom Templates folder in the Security Configuration Management
console. You might need to refresh the console to see the Test1
template.
|
2. | Expand the Test1 template sections.
|
3. | Expand the Local Policies node and select Security Options, as shown in Figure 4.

|
4. | In the details pane, scroll to the Network Access and Network Security sections and note the settings.
Note that the policy setting is Not Defined.
|
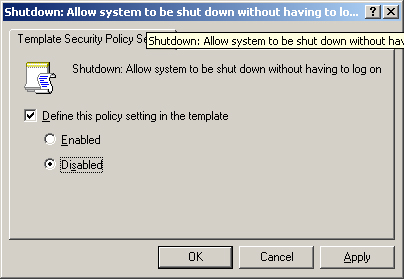
5. | Double-click the policy, Shutdown: Allow System To Be Shut Down Without Having To Log On.
The Shutdown: Allow System To Be Shut Down Without Having To Log On dialog box appears, as shown in Figure 5.
|
6. | Select the Define This Policy Setting In The Template check box if it is not already selected, and then click Disabled.
|
7. | Click OK.
Note The
settings and techniques that are available will vary depending on the
setting. Many settings first require you to select Define This Policy
Setting in the template before changing any specific settings using Add
buttons, text boxes, drop-down lists, and option buttons. |
|
8. | Right-click the template name and click Save to save the changes to the template.
|
▸ To modify a template by editing its Inf file
1. | In Windows Explorer, browse to the Custom Template folder.
|
2. | Double-click the Test1 template to open it in Notepad.
|
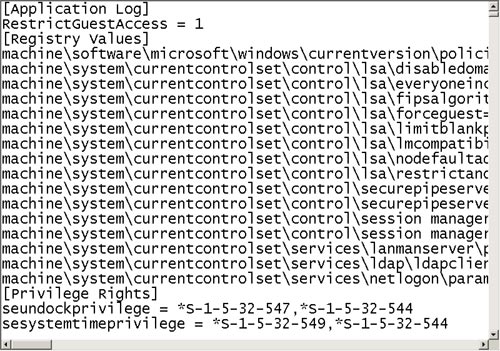
3. | Examine the [Registry Values] section, as shown in Figure 6.
|
In this section, you can edit or add Registry values that will then be applied when the template is applied.
▸ To apply the template
1. | Create a rollback template by using this command:
secedit /generaterollback /cfg test1.inf /rbk test1rollback.inf
/log test1rollback.log
Using the Rollback command creates a template that can be used
to roll back the security settings to the way they were before the
Test1.inf template is applied. The Test1rollback.inf template is made
first, then the Test1.inf template is applied.
Rollback
is not supported for file and Registry security. That is, any
permissions edited in these sections of the template file will not be
reversible by applying the rollback template.
|
2. | Open the Security Configuration Management console.
|
3. | Right-click the Security Configuration And Analysis node in the console and select Open Database.
A database is not created automatically, so the first step is to create one.
|
4. | In the File Name text box, type the name for the new database and click Open.
Since a rollback template has been made in step 1, the template
designed to make changes we want is applied next. If later, it is found
that this template is incorrect, the rollback template can be used to
return things to the way they were before.
|
5. | In the Import Template dialog box, select the Test1.inf template and click Open, as shown in Figure 7.

|
6. | Right-click Security Configuration And Analysis and select Configure Computer Now.
|
7. | Click OK when asked to confirm the location of the error log.
The error log is also a good source of information about which templates were applied and when.
|
8. | Wait for the configuration to complete, and close the console without saving it.
|
Exercise 4: Recover from the Application of a Bad Template
You
could change the security settings and find that the computer has been
rendered inaccessible on the network, or that security has been changed
to make the computer less secure than is required. If a rollback
template was made before the template was applied, you can roll the
system back to a previous security state. If you need to recover
Registry and file system permissions to an installation state, you can
do so by applying one of the default installation templates. If this is
not necessary, simply apply the rollback template.
In this exercise, you restore security configuration settings by applying a rollback template.
1. | Open the Security Configuration Management console created in Exercise 1.
|
2. | Right-click Security Configuration And Analysis and select Import Template.
|
3. | In the Import Template dialog box, shown in Figure 8, select the Test1rollback.inf template.

|
4. | Select the Clear This Database Before Importing check box, and click Open.
If the check box is not cleared, the information in both templates is applied.
|
5. | Right-click Security Configuration And Analysis and select Configure Computer Now.
|
6. | Click OK to approve the error log file.
|
7. | Close the console.
|
Exercise 5: Monitor Security Compliance
Security
policies are often implemented by configuring security on systems and
then they are ignored. When problems occur, security settings are often
changed, and the changes are forgotten as well. To inspect systems for
this type of change, in this exercise you use the Security Configuration
And Analysis snap-in to compare the current settings to the template
created to match security policy.
1. | Open the Security Configuration Management console.
|
2. | Right-click Security Configuration And Analysis and select Import Template.
|
3. | Select the Test1.inf template, and then click Open.
|
4. | Right-click Security Configuration And Analysis and select Analyze Computer Now.
|
5. | Click OK to approve the error log path.
When the analysis is complete, you can examine in the console the database settings and differences against policy.
|
6. | Open each node and inspect the details pane, as shown in Figure 9, for changes.

In the details pane, changes are marked with a red x.
Note that the Database Setting column and the Computer Setting column
are shown so that you can determine the exact differences, and also note
where items are not analyzed and might have to be inspected manually.
|
7. | Close the console. |
