Deploying RD Gateway
A number of requirements must be met before the RD
Gateway role service can be installed. Additionally, it is highly
recommended that the following task be completed:
Next, use the following steps
to install and configure the RD Gateway role service on a machine that
already has the RD Web Access and RD Connection Broker role services
installed:
1. | Log on to
the desired server with local administrator privileges.
| 2. | Click Start, and then click Run.
| 3. | In the Run dialog box, type in ServerManager.msc
and click OK.
| 4. | Under
Roles Summary, select the Remote Desktop Services option.
| 5. | Under Role Services, select the Add Role Services task.
| 6. | On the Select Role Services page, select the Remote
Desktop Gateway role service.
| 7. | When prompted with the Add Roles Wizard dialog box,
click the Add Required Role Services button (any missing required role
services or features for the RD Gateway role service will now be added).
| 8. | On the Select Role Services page, click Next.
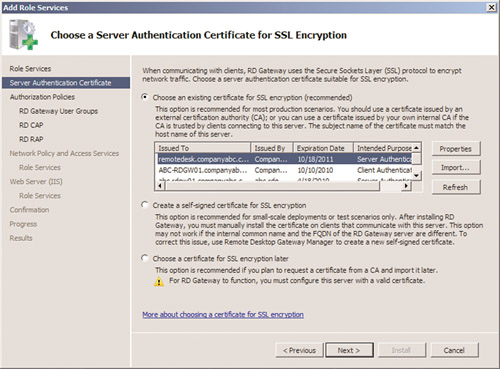
| 9. | On the Choose a Server Authentication Certificate for
SSL Encryption page shown in Figure 16, choose one of
the following certificate options:
Choose an Existing
Certificate for SSL Encryption (Recommended) Create a Self-Signed
Certificate for SSL Encryption Choose a
Certificate for SSL Encryption Later
| 10. | On the
Create Authorization Policies for RD Gateway page, select the Now
option, and click Next.
| 11. | On the Select User Groups That Can Connect Through RD
Gateway page, click the Add button and define the local or domain groups
that are allowed to connect through RD Gateway, click OK, and then
click Next.
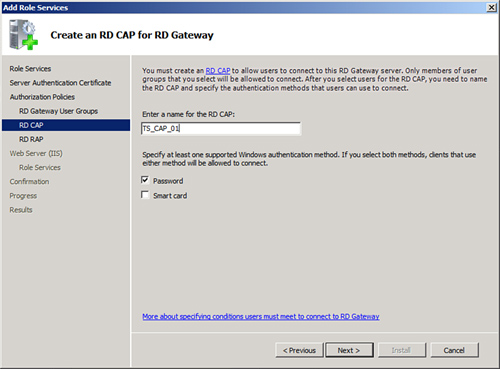
| 12. | On the
Create an RD CAP for RD Gateway page shown in Figure 17, either accept
the default RD CAP name or define a new one. Then select the supported
Windows authentication methods, and then click Next.
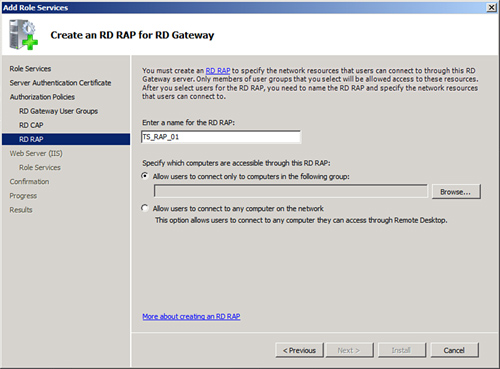
| 13. | On the
Create an RD RAP for RD Gateway page shown in Figure 18, either accept
the default RD RAP name or define a new one. Then select the Allow Users
to Connect to Any Computer on the Network option. Or, if security needs
are greater, use the Allow Users to Connect Only to Computers in the
Following Groups option.
| 14. | Click
Next.
| 15. | On the
Network Policy and Access Services page, click Next. This page will be
displayed if the NPS role is not installed beforehand.
| 16. | On the Select Role Services page, click Next.
| 17. | On the Web Server (IIS) page, click Next. This page
will be displayed if the Web Server role is not installed beforehand.
| 18. | On the Select Role Services page, click Next.
| 19. | On the Confirm Installation Options page, verify the
information presented and click Install.
| 20. | When the installation is finished, review the
Installation Results page, and then click Close.
|
To test RD Gateway, use the
following steps to configure a Remote Desktop Connection client:
1. | Log on to
the desired client.
| 2. | Click Start, click Run, type in mstsc, and
click OK.
| 3. | After the
Remote Desktop Connection client has loaded, click Options.
| 4. | Select the Advanced tab, and then click the
Settings button.
| 5. | In the
Connection Settings dialog box, select the Use These RD Gateway Server
Settings option.
| 6. | Set the
server name equal to the FQDN of the RD Gateway server.
| 7. | Unselect the Bypass RD Gateway Server for Local
Addresses option.
| 8. | Now,
select the General tab, enter in the name of the RD Session Host server,
and click Connect.
| 9. | When prompted, provide the Remote Desktop credentials,
and click Submit.
| 10. | When
prompted for the RD Gateway credentials, provide the correct
credentials, and click Submit.
| 11. | When connected to the specified RD Session Host server,
the connection through the RD Gateway is complete. |
|
