Although a typical Exchange Server 2010 installation,
where the Hub Transport, Client Access, and Mailbox server roles are
deployed on a single server, will be appropriate in many circumstances,
there will be some circumstances where you want to customize your
Exchange deployment. This may be because you want to deploy only one
role on a server. Alternatively, you may wish to remove a role that has
already been deployed to a server to improve the performance of other
hosted server roles. In some cases, you may not wish or may not be able
to perform the installation of Exchange Server 2010 yourself.
1. Installing
Exchange Server 2010
Although in previous lessons
Active Directory was prepared prior to attempting to install Exchange
Server 2010, it is possible to have Active Directory prepared as a part
of the setup process on the first Exchange Server 2010 server deployed
in the forest. When you take this approach, the user account used to
deploy Exchange Server 2010 must be a member of the Enterprise Admins,
Schema Admins, and Domain Admins groups as well as a member of the local
Administrators group on the server that will host Exchange. When you
perform this type of deployment, you also need to install Exchange in
the same site and domain as the computer that hosts the Schema Master.
In general, it is better to perform environmental preparation steps
separately so that you can ensure that changes replicate successfully
before attempting to deploy the first Exchange server in your
organization.
Consider the following factors when installing
Exchange:
You must deploy
the Mailbox and Hub Transport roles in each Active Directory site for
email messages to flow correctly.
You must deploy at least one client access server in
each Active Directory site that has a mailbox server.
You can install the
Mailbox, Hub Transport, Client Access, and Unified Messaging roles or a
combination thereof on a single host.
You cannot deploy the Edge Transport role on the same
server as other roles.
1.1. Delegate
Permission for Exchange Server Setup
In general, a user must be
delegated the Organization Management role before being able to deploy
Exchange Server 2010 in an existing Exchange Server 2010 organization.
In some circumstances, it is necessary for an administrator at a remote
branch office to install Exchange Server 2010. Rather than adding this
user to the Organization Management role group, you can configure
delegated setup so that the configured account is able to install a
single specified Exchange server in the domain. This allows the local
administrator to complete the designated task without conferring
unnecessary administrative privileges.
It is not possible to use
delegated setup to install the first server running Exchange Server 2010
in the domain. The first server in the domain must be installed using a
user account that is a member of the Organization Management role group
as well as the local Administrators group.
Administrators who are
members of the Delegated Setup role group are able to deploy Exchange
Server 2010 if the server that will function as the Exchange host has
been provisioned by a member of the Organization Management role group.
Members of the Organization Management role group can provision servers
using the command
Setup.com /NewProvisionedServer:ServerName
Members of the Delegated
Setup role are unable to uninstall an Exchange Server. It is possible to
uninstall or remove Exchange Server 2010 only by using an account that
is a member of the Organization Management role as well as the local
Administrators group on the host server.
Note:
DELEGATED SETUP
To learn more about
delegated setup, consult the following documentation on TechNet: http://technet.microsoft.com/en-us/library/bb201741.aspx.
1.2. Deploy
Exchange Using Setup.exe
There are two general ways in
which a user with appropriate permissions is able to install Exchange
Server 2010. The first is to run setup.exe from within an appropriately
configured Windows Server 2008 or later host by double-clicking on the
executable file. Setup.exe is also run automatically when you insert the
Exchange Server 2010 installation media. The second option is to run
setup.com from an elevated command prompt. You will learn about this
option later in the lesson.
Prior to installing
Exchange Server 2010, you must choose which Exchange Language Options
are going to be installed. You can choose to install all languages from
the language bundle or install only
languages that are included with the Exchange Server 2010 installation
media. Once this is done and you have agreed to the License Agreement
and determined whether you want to forward error data to Microsoft, you
are given the option between performing a typical Exchange Server
installation and performing a custom Exchange Server installation. When
you perform a typical installation, the Hub Transport, Client Access,
and Mailbox server roles are installed on the host server as well as the
Exchange Management Tools.
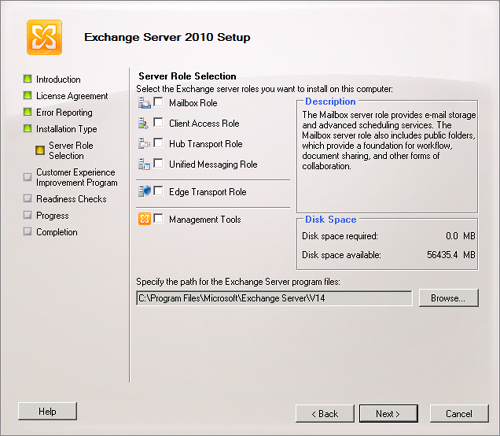
If you select the custom
option, you are able to install the Unified Messaging role as well as
the Hub Transport, Client Access, and Mailbox server roles or a
combination of those roles. You are also able to select the Edge
Transport server role for deployment, though you cannot deploy this role
with other roles, such as the Mailbox and Client Access server roles.
The custom role selection screen is shown in Figure 1.
If you have chosen to install
the Mailbox role, you will be asked whether there are any client
computers that are running Outlook 2003 or Entourage in the
organization. In case the computers that use this software are present
in your organization, it is necessary for setup to create a public
folder database to allow these computers to connect to Exchange. If
there are no client computers that use this software in your
organization, it is not necessary to create a public folder database. If
you select the no option and it becomes necessary to support computers
running these software packages at some point in the future, you can
create a public folder database as necessary.
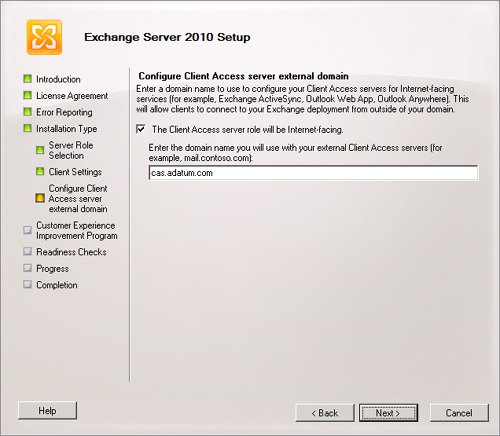
If you have chosen to install
the Client Access server role, setup will ask you whether you want to
configure the Client Access server with an Internet facing address, as
shown in Figure 2. Once you have completed this step, you
will be queried as to whether you wish to participate in the Customer
Experience Improvement Program. This program collects information about
how Exchange is used in your organization and assists Microsoft in
determining which features of Exchange should be prioritized for future
development.
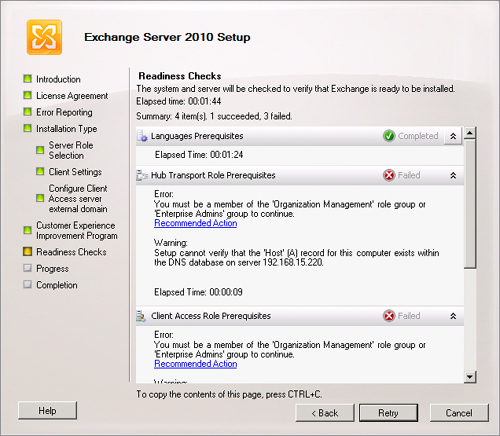
The Exchange Server 2010 setup
routine then performs a set of readiness checks based on the roles that
you have chosen to install on the server. If these readiness checks
complete successfully, you can proceed and install Exchange Server 2010.
If the readiness checks fail, as shown in Figure 3, you must address the specified issues. In some
cases, it will be possible to click Retry and have the readiness check
occur again. In other cases, it may be necessary to log out or even
reboot the host computer before Exchange Server 2010 setup can continue.
Note:
INSTALL EXCHANGE SERVER 2010
To get a more detailed
overview of the process of installing Exchange Server 2010, consult the
following article on TechNet: http://technet.microsoft.com/en-us/library/bb125143.aspx.
1.3. Command-Line
Installation
You can use setup.com from
an elevated command prompt to deploy and remove Exchange Server 2010
roles. The setup.com command-line utility has many options, though the
options that you are most likely to be tested on in the 70-662 exam
involve installing, adding, or removing roles. You can specify roles
using the following terms:
For example, the command
Setup.com /mode:install /role:Mailbox,HubTransport
accomplishes the same thing as the command
Setup.com /mode:install /r:M,H
The
/mode:uninstall option removes a role or the Exchange if no specific
roles are selected. You can use setup.com to specify the location of a
local directory that hosts updates, install language packs, and specify
installation options, such as whether Exchange supports legacy Outlook
clients.
Note:
SETUP.COM
OPTIONS AND UNATTENDED INSTALLATION OF EXCHANGE SERVER 2010
Although
performing an unattended installation of Exchange Server 2010 is beyond
the scope of the 70-662 exam objectives, you can find out more
performing unattended installations as well as a list of setup.com
options at the following address: http://technet.microsoft.com/en-us/library/aa997281.aspx.
1.4. Adding and
Removing Roles
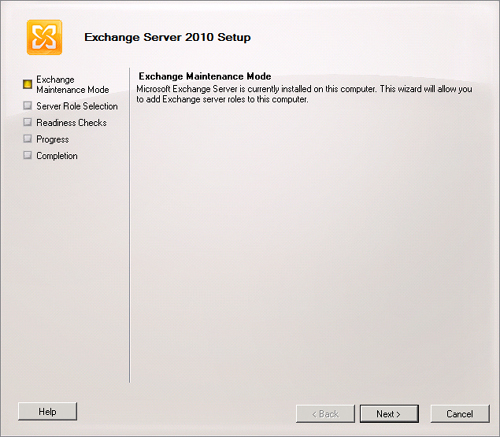
To add or remove roles
from a computer running Exchange Server 2010 after setup has completed,
you need to use either the Programs and Features item in Control Panel,
which puts Exchange setup into maintenance mode, as shown in Figure 4, or setup.com /mode:uninstall from
an elevated command prompt. As you learned earlier, the user account
used to uninstall or modify Exchange must be a member of the
Organization Management role as well as a member of the local
Administrators group on the host server.