1. | Click the Project tab, and then click the Create A New Composition button ( ) in the Project panel. ) in the Project panel.
|
2. | In the Composition Settings dialog box, name the composition Final Comp, and choose NTSC DV from the Preset menu. Then click OK.
|
3. | In the Composition panel, choose 1 View from the Select View Layout pop-up menu.
|
4. | Choose
Custom View 1 from the 3D pop-up menu at the bottom of the Composition
panel so you can see the backdrop from an angle other than a flat,
forward view.
|
5. | Choose Layer > New > Solid.
|
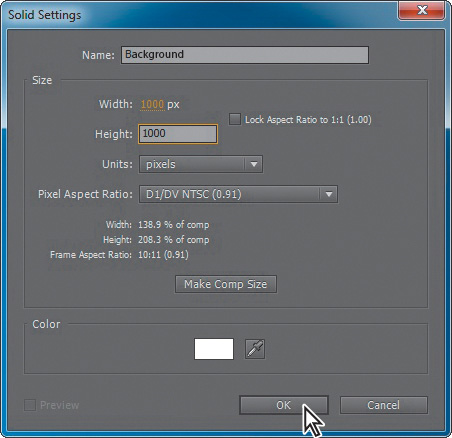
6. | In the Solid Settings dialog box, name the layer Background, set the Width and Height to 1000 pixels, and click OK.
|
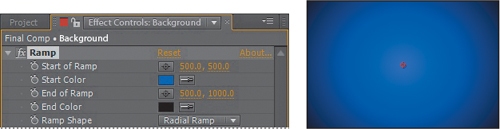
7. | With the Background layer selected in the Timeline panel, choose Effect > Generate > Ramp. The layer becomes a gradient.
|
8. | In the Effect Controls panel, change the Start Of Ramp value to 500, 500. Then change the Start Color to a dark blue (R=36, G=77, B=254) and the End Color to black (R=0, G=0, B=0). Choose Radial Ramp from the Ramp Shape menu.
 |
9. | Select
the Lock switch for the Background layer to prevent accidental changes
to it. There’s no need to convert this layer to a 3D layer, because it
will be an infinite distance from the animated 3D objects.
|
10. | Press Ctrl+Y (Windows) or Command+Y (Mac OS) to create a new solid layer.
|
11. | In the Solid Settings dialog box, name the layer Ground, and confirm that both the Width and Height are 1000 pixels. Then click OK.
|
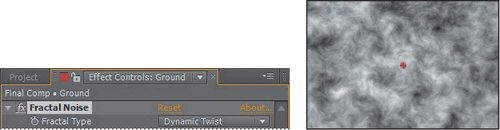
12. | With the Ground layer selected in the Timeline panel, choose Effect > Noise & Grain > Fractal Noise.
|
13. | In the Effect Controls panel, choose Dynamic Twist from the Fractal Type menu.
 |
14. | In the Timeline panel, select the 3D Layer switch ( ) for the Ground layer. ) for the Ground layer.
|
15. | With the Ground layer selected, press R to reveal the Rotation properties, and change the X Rotation value to 90 degrees.
|
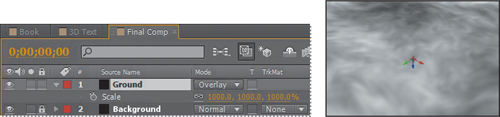
16. | Press S to reveal the Scale property. Change the Scale values to 1000, 1000, 1000.
|
17. | Click the Toggle Switches/Modes button at the bottom of the Timeline panel to display the Modes column.
|
18. | For the Ground layer, choose Overlay from the Mode menu.
 |
19. | Press S to close the Scale property, and then lock the Ground layer. |
