1. Installing Additional Server Behaviors
Although Dreamweaver's
standard server behaviors perform many important functions, they're just
the tip of the iceberg in terms of what's possible. You can add
additional server behaviors — whether created by Adobe, yourself, or a
third party — at any time. Although you can transfer files to the
appropriate places in the Dreamweaver Configuration folder, most custom
server behaviors rely on the Extension Manager for installation.
The
Extension Manager is an auxiliary program that installs files compressed
in the Adobe Extension Program format; such files carry an .mxp file extension. To access the Extension Manager, choose Commands => Manage Extensions or Help =>
Manage Extensions. The Extension Manager displays all the extensions —
including server behaviors — installed in your system. It also includes
information about each extension, such as its type and creator.
The Web offers numerous
sources for MXP files, but perhaps the best known is the Dreamweaver
Exchange, located on the Adobe site. After you've downloaded the file,
you can install it by following these steps:
From Dreamweaver, choose Commands => Manage Extensions to open the Extensions Manager.
|
Dreamweaver need not be open
for you to install an extension — just double-click the MXP file to
invoke the Extension Manager and begin the installation process.
However, if you have multiple Adobe products on your system, it's better
to open the Extension Manager before beginning the installation.
|
|
From the Extension Manager, choose File =>
Install Extension or use the keyboard shortcut, Ctrl+O (Command+O). You
can also click the Install New Extension button on the Extension
Manager's toolbar.
Use the Select Extension To Install dialog box to locate the desired MXP file.
When
you've located the file, click Install (Open). As part of the
installation process, Dreamweaver displays the Adobe Extensions
disclaimer.
Click
Accept in the Adobe Extensions Disclaimer dialog box to continue.
Dreamweaver continues to install the extension, and alerts you if a
problem is encountered or if the procedure was successful.
Dreamweaver notifies you if the installed extension requires you to restart Dreamweaver before it can be used.
After the server behavior
has been properly installed, it appears in the standard list found under
the Add (+) button of the Server Behaviors panel, and it can be applied
like other server behaviors. Any special requirements or directions are
noted in the bottom pane of the Extension Manager.
One of the wonders of
Dreamweaver is the capability to extend every piece of the program. This
includes making new server behaviors and editing existing ones. Out of
the box, Dreamweaver allows you to edit only those server behaviors
you've personally created. Editing is controlled by an XML attribute in
the .edml file for each individual server behavior. You can gain access to these server behaviors by changing that XML attribute.
Before you continue, please
understand that many of the Dreamweaver server behaviors are extremely
complex and may not work correctly if edited using the Server Behavior
Builder. Instead of editing, I suggest that you create a new server
behavior, and copy an existing server behavior to make sure you don't
break anything beyond repair.
To show a server behavior in the Server Behavior Builder, follow these steps:
Locate the necessary server behavior .edml file, which is located in your Configuration directory. The default location is Adobe Dreamweaver CS5\Configuration\{Datasources or Server Behaviors}\{server model}\{server behavior name}.edml. For this example, open the Datasources\ASP_Vbs\Request Variable.edml file.
The first line of the .edml file should look like this:
<group serverBehavior="Dynamic Data.htm" hideFromBuilder="true">
Change hideFromBuilder="true" to hideFromBuilder="false".
The Request Variable server behavior is now available in the edit list of the Server Behavior Builder.
2. Creating Custom Server Behaviors
Dreamweaver
provides a very sophisticated tool for creating custom server behaviors,
the Server Behavior Builder. With the Server Behavior Builder, you can
modify an existing server behavior you've created or create a new one
from scratch. You can use the Server Behavior Builder in any server
model configuration supported by Dreamweaver.
The Server Behavior Builder breaks up any server behavior into discrete segments called code blocks. Each code block is surrounded by the delimiters for the particular server model: <%...%> for ASP; <cftag>...</cftag> for ColdFusion; and <?...?>
for PHP. Each code block may contain one or more user-supplied
parameters. The user enters the parameters in a dialog box; the Server
Behavior Builder even creates the dialog box for you.
The Server Behavior Builder
can also control the positioning of any individual code block. On the
server side, code is executed from the top of the page to the bottom,
and it is often critical that a particular code segment follows another
to be processed properly.
You have the option of
modifying an existing server behavior, modifying a copy of an existing
server behavior, or creating an entirely new server behavior. The
process is about the same for all three methods:
Choose your server behavior. If it already exists, select it from the list; if it's new, give it a name.
Work
in the Server Behavior Builder to modify and create code blocks and
parameters. The Server Behavior Builder is also used for code block
positioning.
Set up
the dialog box for any parameters. The Generate Server Behavior Dialog
Box command enables you to determine the type and order of any parameter
elements.
To modify an existing server behavior, follow these steps:
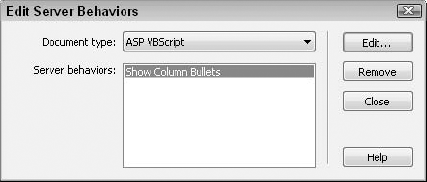
From
the Server Behaviors panel, click the Add (+) button and select Edit
Server Behaviors from the list. The Edit Server Behaviors dialog box,
shown in Figure 1, appears.
If you want to create a new server behavior, select New Server Behavior instead of Edit Server Behaviors and skip to Step 4.
From the Document Type list, select the type of code you want to modify.
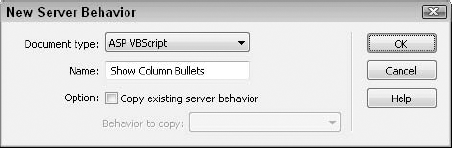
From
the Server Behaviors list, select the specific server behavior you want
to adapt. Dreamweaver posts a warning that if you are modifying a
server behavior, the Server Behaviors panel may not be able to identify
any instances of it already inserted into the current page. In this
situation, it is strongly recommended that you choose New Server
Behavior (see Figure 2) instead and create a different server behavior based on an existing server behavior.
After selecting the desired server behavior, the Server Behavior Builder opens, as shown in Figure 3.
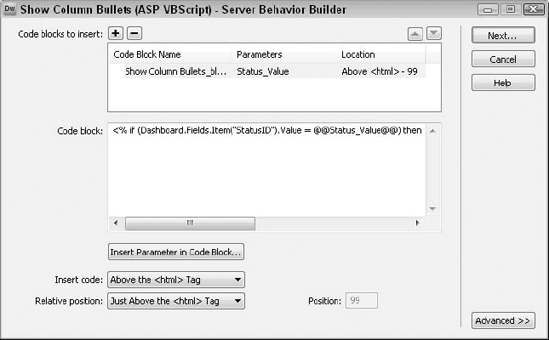
Highlight the code block you want to change.
Modify the code as desired in the Code Block area.
To
insert a new parameter, place your cursor in the Code Block area where
you want to place a variable and click Insert Parameter In Code Block.
|
To replace a value with a variable, select the value in the Code Block before clicking Insert Parameter in Code Block.
|
|
Enter
a unique name for the variable in the Parameter Name field of the
Insert Parameter In Code Block dialog box. Click OK when you're
finished. The new parameter is inserted in the following format: @@parametername@@.
Determine the positioning of the code by first choosing an option from the Insert Code list: Above The <html> Tag, Below The </html> Tag, Relative To A Specific Tag, or Relative To The Selection.
If you've chosen Insert Code: Relative To A Specific Tag, select the tag name from the Tag list that appears.
From the Relative Position list, select the option best suited for the code block.
If you've chosen Relative Position: Custom Position, enter a numeric value in the Custom Position field.
|
Positioning of code blocks is
very important. In particular, make sure you don't insert code that
depends upon a recordset above the code that creates that recordset.
|
|
Repeat Steps 4 through 11 for every code block you need to modify.
Click
the Advanced button, and choose how you want the server behavior to be
displayed in the Server Behaviors panel. You can add or remove
parameters to customize the display. If you don't want it to show in the
Server Behaviors panel at all, clear the Identifier checkbox.
In the Code Block area, choose which code block you want Dreamweaver to select when it chooses from the Server Behaviors panel.
Click Next to proceed. If there are parameters in your server behavior, the Generate Behavior Dialog Box dialog box appears.
Set the position of your parameters by selecting an item in the list and using the up and down arrows.
Set the type of control for the parameter by choosing the down arrow next to the Display As column.
Dreamweaver offers 17 controls to choose from:
Recordset Menu
Recordset Field Menu
Editable Recordset Menu
Editable Recordset Field Menu
CF DataSource Menu
Connection Menu
Connection Table Menu
Connection Column Menu
Text Field
Dynamic Text Field
URL Text Field
Numeric Text Field
Recordset Fields Ordered List
Text Field Comma Separated List
List Menu
Checkbox
Radio Group
NOTE
If you choose List Menu, you must manually open the created server behavior file to populate the list menu.
The Text Field control is the default.
Click OK when you're finished.
Dreamweaver builds the new or modified server behavior and includes it in the Server Behaviors panel.
