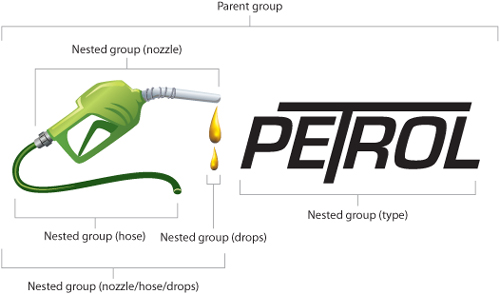
Creating groups is a way to organize the
elements in a file. Most importantly, groups allow you to easily select
or work with several objects that may belong to a single design element.
You can also nest groups, meaning you can have groups within other
groups. For example, you might have a logo that consists of an icon and a
type treatment that has been converted to outlines. You can group the
objects that make up the icon, and you can put the items that make up
the type treatment into a separate group. You can then create an overall
larger group that contains the other groups within it.
When
you think of groups in this way, it’s simply a matter of labeling
certain objects that belong together. But in reality, a group is more
than just a concept—a group is actually an entity itself. A group
exists, just as an object does, only we don’t see it. Illustrator refers
to a group as a container—something
that contains the objects within it. This introduces two important
concepts: The container itself can have attributes applied to it, and
the container can affect the way the grouped objects interact with each
other and other art elements in your file.
Adding a Soft Drop Shadow to a Group
Let’s take a look at a simple example using the Drop Shadow effect you just learned about in the previous section:
1. | Start with a set of several overlapping shapes, and create an exact copy of that set of shapes.
|
2. | Select one set of shapes, and choose Object > Group to create a group that contains the set of objects.
At this point, you’re looking at two design elements, each identical in
appearance, but one is a group while the other is just several
individual objects (Figure 2).

|
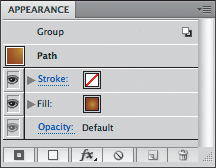
3. | Using the Selection tool, select the set of individual objects, and look at the Appearance panel.
The target for your selection is listed as Path with Mixed Appearances (because each shape is filled with a different color).
|
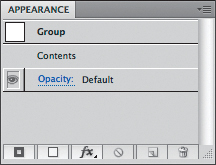
4. | Select the grouped objects, and again, take a look at the Appearance panel. The target is now listed as Group.
This is actually the smart targeting in Illustrator at work—by selecting
the group, Illustrator didn’t target the individual paths within the
group; instead, the group becomes the target. When the group is
targeted, the Appearance panel displays the word contents, which are the paths that are found in the group (Figure 3).
|
You learned that appearances
aren’t applied to a selection; rather, they are applied to the target.
Keeping that in mind, let’s apply the Drop Shadow effect to these two
sets of objects. Select each set of objects, and apply the Drop Shadow
effect. You’ll notice that when the drop shadow is applied to the set of
individual objects, each object appears with its own shadow. However,
the grouped objects appear with a single unified drop shadow—as if all the objects were really one single shape (Figure 4).
This happens because the group was the target, so the drop shadow was
added to the group, not to the paths. You can clearly see evidence of
this by using the Direct Selection tool to select just one of the shapes
within the group and then copying and pasting that shape into a new
document. You’ll notice that in the new document the shape doesn’t have a
drop shadow at all.

Let’s take this concept, that a group is a container,
one step further. Say you have a group of objects and you apply a drop
shadow. As you’ve already learned, the drop shadow is applied to the
group. But what happens to the drop shadow if you then choose Object
> Ungroup? By ungrouping the objects, you’re deleting the container.
And it was the container that had the Drop Shadow effect applied to it,
not the objects themselves. So if you ungroup the objects, the drop
shadow simply disappears.
Adding a Stroke to a Group
To strengthen your understanding of how groups work
in Illustrator, let’s explore another example using a group of objects.
You already know that a group can have attributes applied to it, as
evidenced by the drop shadow you applied earlier. You also know you can
apply multiple attributes to objects. Using this knowledge, you can add a
stroke to a group:
1. | With the Selection tool, select the group, and take note that the group is the target in the Appearance panel.
|
2. | Click
the Add New Stroke button in the Appearance panel to add a stroke to
the group, and just to make it easier to see, change the stroke weight
to 4 pt.
The stroke is applied across all paths within the group (Figure 5).

|
It’s interesting to note that all
the objects in the group exhibit the appearance of the stroke, even
objects that appear beneath other objects in the stacking order. A close
examination of the stacking order in the Appearance panel reveals why:
the contents of the group are drawn before
the stroke is painted. At the group level, all objects are considered
as they are combined (as you saw with the drop shadow example), so the
stroke is applied equally to all paths. Dragging the stroke to appear beneath
the contents in the Appearance panel stacking order will result in a
stroke that appears only around the perimeter of the group (Figure 6).

You can clearly see how groups can have attributes
applied to them and how they can control how grouped objects interact
with each other. In this context, you begin to see that grouping objects
is more than just making files easier to manage. Creating groups can
have a significant impact on the appearance of your art. Likewise, simply ungrouping art can alter the appearance of your file completely.
Tip
The current target is also displayed on the far left side of the Control panel. |
The obvious questions you should be asking are “How
do I know when I’m applying an attribute to an object versus a group?”
and “How can I tell whether ungrouping something will alter the
appearance of my file?” The answers lie in the all-important Appearance
panel, which tells you what is targeted and what attributes and effects
are applied (Figure 7).
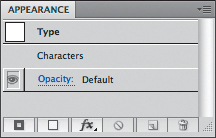
Type is a special kind of object in Illustrator—it’s
actually a group. The Type object is the container, and the actual text
characters are like the objects inside a group. You can see this by
looking at—that’s right—the Appearance panel. Select a point text object
with the Selection tool, and the Appearance panel shows Type as the target. Switch to the Type tool and select the text, and the Appearance panel shows Characters as the target.
When you select a Type object with a selection tool,
the smart targeting in Illustrator automatically targets the Type
container. You can see Characters
listed in the Appearance panel, and double-clicking the Characters
listing automatically switches to the Type tool and highlights the text
on your artboard (Figure 8). The target is now Characters, and you can see the Fill and Stroke attributes.