Working with Scanners
and Digital Cameras
The ability to store,
modify, and access digital content is one of the main features of
Windows Vista. Scanners and digital cameras are two ways in
which users can add digital images to their computer. A scanner is a
device that is typically used for capturing physical content ranging
from documents to photographs. Software and hardware work together to
create digital picture files that are stored on computers. Digital
cameras provide a similar function for taking photographs and then
storing them on internal media, which can then be transferred to a
computer.
Installing
Scanners and Cameras
You typically install
digital cameras and scanners by using a universal serial bus (USB) or
FireWire connection. From a hardware standpoint, the computer must
support the appropriate connection type, either internally or through an
expansion card. In most cases, Windows Vista is able to detect
automatically when you connect one of these devices to the computer.
Windows automatically launches a process for detecting the hardware and
attempting to install the appropriate drivers. This is the preferred
method for configuring cameras and scanners.
In some cases,
Windows Vista might not include the drivers that are required for a
particular device. Sometimes, additional software is also required to
provide the necessary functionality. For example, some scanner
manufacturers use their own software for configuring capture settings.
To view and configure these devices manually, click the Scanners And
Cameras link in the Hardware And Sounds Control Panel window. Figure 7
shows the main dialog box.
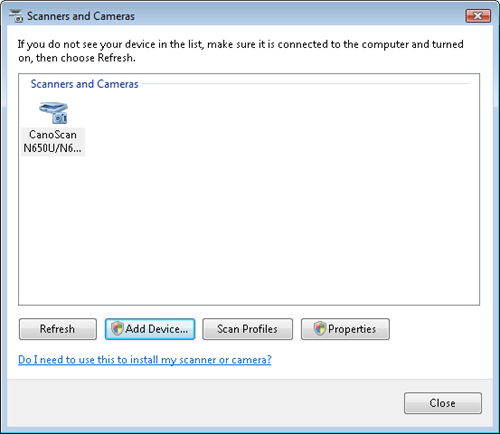
Click Add Device to start the process of finding
the appropriate drivers. The first step in the process provides a list
of manufacturers and models that are currently supported by the system.
If the desired model is not listed, users can click Have Disk to provide
the location of the drivers.
Using a Scanner
After the
appropriate device drivers have been installed, users are able to use
them to transfer data to the computer. The process can vary depending on
the capabilities of the device. For scanners, the most common operation
is to scan a new document using the Windows Fax and Scan application.
Clicking the New Scan button displays a dialog box for specifying scan
settings. More details about using this application are provided later
in this lesson.
Using a Digital
Camera
Because they are
portable devices, digital cameras are configured most commonly with
builtin internal memory, a removable media card, or both. There are two
main ways in which pictures can be transferred from a digital camera to
the computer. The first is by directly connecting the digital camera to
the computer. As long as the camera device drivers are installed, it is
automatically detected. Generally, users can access their pictures by
opening the Computer item in the Start menu. The storage from the
digital camera device appears as if it were a removable media device.
Many cameras create some type of folder structure within which pictures
are stored. They also use a unified format for the photo files
themselves. You can move or copy the files from the device as if you are
accessing a standard hard disk drive.
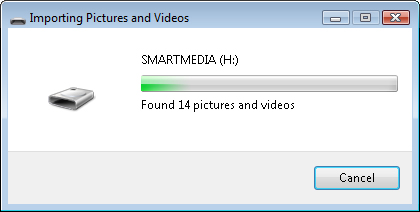
It is also possible
to use the Windows Photo Gallery application to import pictures from a
digital camera. To do this, open the application and, from the File
menu, select Import From Camera Or Scanner. Figure 8
shows an example of the available options. When the files are being
transferred, you also have the option of adding a tag, so you can
identify the pictures easily later.
The
other method of transferring pictures from a digital camera involves
the use of a media card reader device. Media card readers are sometimes
installed in desktop and laptop computers. They are also available as
add-in devices for desktop computers (they often fit into an available
drive bay) or as a USB-connected device. Most media card readers support
a wide variety of media formats, such as Compact
Flash, Secure
Digital, and Smart Media.
Transferring data by
using this method involves removing the storage card from the camera and
placing it in the media reader. The media should then appear in Windows
Explorer, enabling files to be moved and copied. The advantage of using
a media card reader is that it is often more convenient to insert a
storage card into a reader than it is to connect the camera physically
to the computer, using a cable. Additionally, this method saves battery
power on the camera because no additional power is required while files
are being read and written.
