1. ASP.NET and Session State
Since its inception, ASP.NET has supported session state. When session state is turned on, ASP.NET creates a new Session object for each new request. The Session object becomes part of the context (and is available through the page). ASP.NET stamps the Session object with an identifier (more on that later), and the Session object is reconstituted when a request comes through containing a valid session identifier. The Session
object follows the page around and becomes a convenient repository for
storing information that has to survive throughout the session, not
simply for the duration of the page.
The Session
object is a dictionary of name/value pairs. You can associate any
Common Language Runtime (CLR)-based object with a key of your choosing
and place it in the Session
object so that it will be there when the next request belonging to that
session comes through. Then, you can access that piece of data using
the key under which it was stored. For example, if you want to store
some information provided by the user in the Session object, you can write code like this:
void StoreInfoInSession()
{
   String strFromUser = TextBox1.Text;
   Session["strFromUser"] = strFromUser;
}
To retrieve the string during the next request, use code like this:
void GetInfoFromSession()
{
   String strFromUser = Session["strFromUser"] ; // NOTE: may be null
   TextBox1.Text = strFromUser;
}
The brackets on the Session object indicate an indexer. The indexer is a convenient syntax for expressing keys—both when inserting data into and retrieving data from the Session object. Do note, however, that if the key you provide doesn't map to a piece of data in the session dictionary, the Session object will return null. In production code, it's always wise to check for a null value and react accordingly.
Managing session state in ASP.NET
is extraordinarily convenient. In ASP.NET, session state can live in a
number of places, including (1) "in proc"—in the ASP.NET worker process,
(2) on a separate state server running a Windows Service process, and
(3) in a Microsoft SQL Server database.
First, start by getting a taste of using session state right now.
2. Introduction to Session State
To understand how session
state works, this exercise involves creating a Web site with a page
that stores a value as a member variable and as an element of session
state. It illustrates the difference between page state during a request
and session data that persists beyond a request.
Trying session state
Create a new Empty ASP.NET Web Application. Name it SessionState.
In
the default page (Default.aspx), drag a text box to enter a value that
will be stored in session state. Add a label to identify the TextBox, too, as shown here:

Drag two buttons and a label onto the form. The first button is for adding data to the session string. The second is to show the session state. Set the Text property of the first button to Add String To Session State. Then, give the button the value AddStringToSessionState
as an ID and double-click it in the Designer to insert an event handler
in the code-behind file. This button ultimately adds the string from
the text box to the page's session state. Doing so can help you
distinguish the buttons later on. It doesn't matter what you name the
second button (I used the text "Just Submit" and kept the default ID).
The first button submits the string to the server to be saved in a local
field (for now), and the other button simply performs a postback. This
way, you can see the ephemeral nature of page member variables. Name the
label LabelShowString. You use it to display the value of the string.
Add a string variable member to the page named sessionString. In the Page_Load handler, set the text box on the page to the value of the string. Then, turn your attention to the event handler for the SubmitString button. Have the handler take the Text property from the TextBox1 and store it in the page member variable. Then, set the LabelShowString label text to the value of the string like so:
public partial class _Default : System.Web.UI.Page
{
  string sessionString;
  protected void Page_Load(object sender, EventArgs e)
  {
    this.LabelShowString.Text = this.sessionString;
  }
  protected void AddStringToSessionState_Click(object sender, EventArgs e)
  {
    this.sessionString = this.TextBox1.Text;
    this.LabelShowString.Text = this.sessionString;
  }
}
    }
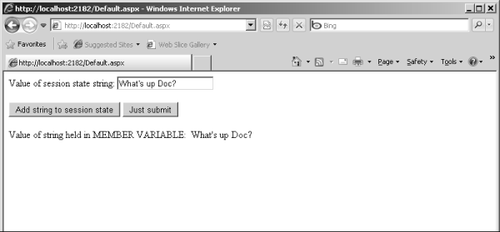
Now
run the program. Type a string into the text box and click Add String
To Session State. When the post goes to the page, the page will show the
string in the label like this:
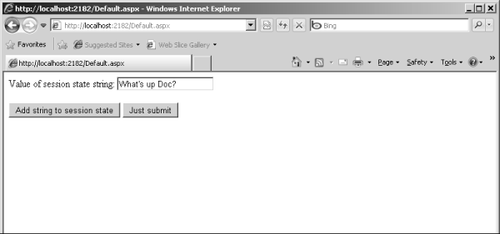
Now click the Just Submit button. What happens? Remember, Page_Load simply looks at the value of the sessionString
member variable and stuffs it into the label. Pages (and HTTP handlers
in general) are very short-lived objects. They live for the duration of
the request and then are destroyed—along with all the data they hold.
The sessionString member variable evaporated as soon as the last request finished. A new sessionString member variable (which was empty) was instantiated as soon as the page was re-created:
You take the data from the text box and store it in a member variable in the Page class. The lifetime
of the page is very short. The page lives long enough to generate a
response, and then it disappears. Any state you store as data members in
the page disappears too. That's why, when you click the Just Submit
button, you don't see the string displayed. You do
see the string when you click Add String To Session State because the
member variable survives long enough to support the button's Click event handler.
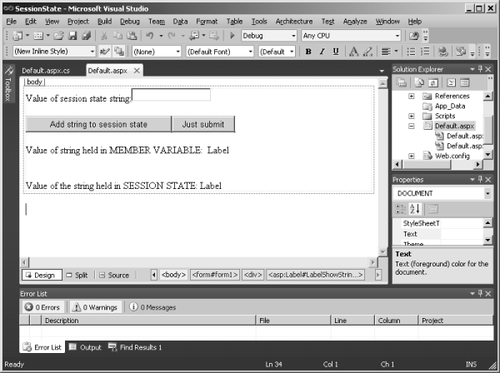
Using session state is a way to solve this issue. To show this, add a new label named LabelShowStringAsSessionState to the page. This one will show the data as retrieved from the Session object:
Write code to store the string in session state. Have the AddStringToSessionState take the text from TextBox1 and store it in the Session object. Then, update the Page_Load method to display the value as it came from session state, as shown in bold type in the following code:
public partial class _Default : System.Web.UI.Page
{
  string sessionString;

  protected void Page_Load(object sender, EventArgs e)
  {
    this.LabelShowString.Text = this.sessionString;
    this.LabelShowStringAsSessionState.Text =
     (string)this.Session["sessionString"];
  }

  protected void AddStringToSessionState_Click(object sender, EventArgs e)
  {
    // store in member variable
    this.sessionString = this.TextBox1.Text;

    // store in session state
    this.Session["sessionString"] = this.TextBox1.Text;

    // show member variable
    this.LabelShowString.Text = this.sessionString;

    // show session state
    this.LabelShowStringAsSessionState.Text =
     (string)this.Session["sessionString"];
  }
}

    }
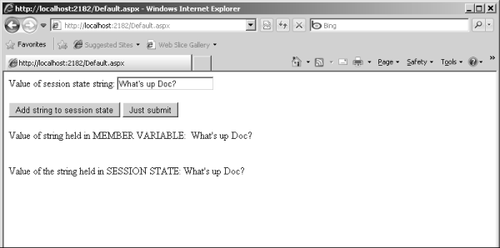
Run the program. Type in a string and click the Add String To Session State button. Both labels should contain data. The LabelShowString label holds data because the SubmitString handler made the member variable assignment. The LabelShowStringAsSessionState label also shows data because the handler stored that text in session state:
Now click the Just Submit button and see what happens:
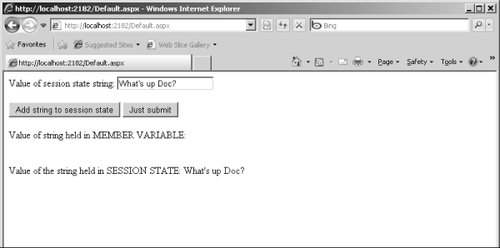
In this case, the page was simply submitted, causing only the Page_Load to be executed. Page_Load displays both the sessionString member variable (which is empty because it lives and dies with the page) and the data from the Session object (which lives independently of the page).
