Logo
programming4us
programming4us
programming4us
programming4us
Home
programming4us
XP
programming4us
Windows Vista
programming4us
Windows 7
programming4us
Windows Azure
programming4us
Windows Server
programming4us
Windows Phone
 
programming4us
Windows 7

Advanced Windows 7 Programming : Working in the Background - DEVELOPING TRIGGER-START SERVICES (part 2)

- Free product key for windows 10
- Free Product Key for Microsoft office 365
- Malwarebytes Premium 3.7.1 Serial Keys (LifeTime) 2019
3/8/2014 8:19:35 PM

3. Configuring the TriggerStartService Example

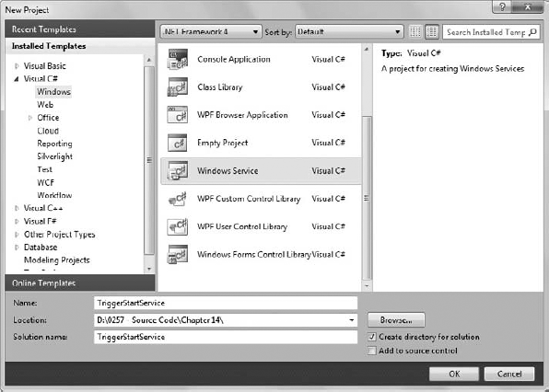
The TriggerStartService example begins with a Windows service, so you'll select the Windows Service template in the Windows folder of your favorite language, as shown in Figure 1. Of course, the Windows Service template is only the starting point.


Now that you have a Windows Service project to use, you can begin configuring it. The following steps will get you started:

  1. Right-click the Service1.CS entry in Solution Explorer and choose Rename from the Context menu. Change the filename to TriggerStartService.CS. The filename change is necessary to ensure you don't end up with a service named Service1 installed on the system.

  2. Right-click the project entry in Solution Explorer and choose Add => Existing Item from the Context menu. You'll see an Add Existing Item dialog box.

    Figure 2. Add the ServiceNative.CS file to your application.
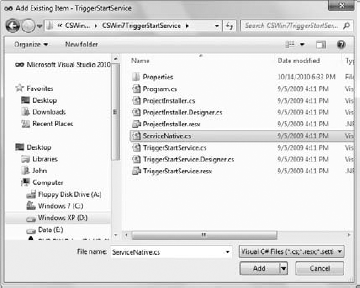
  3. Locate the ServiceNative.CS file on your hard drive, as shown in Figure 2. Adding this file provides P/Invoke support for the trigger-start features found in AdvAPI32.DLL.

  4. Right-click anywhere in the Design View window and choose Add Installer from the Context menu. The installer makes it possible to install the service on Windows later. You'll see several new files added to the project. Finally, you'll see a ProjectInstaller Design View window open.

  5. Right-click the ProjectInstaller.CS file entry in Solution Explorer and choose Rename from the Context menu. Rename the installer to TriggerStartServiceInstaller.CS.

  6. Select serviceInstaller1 in the Design View window.

  7. Change the (Name) property to TriggerStartServiceInstall, as shown in Figure 3.

    Figure 3. Set the service installer name and the installed name of the service.
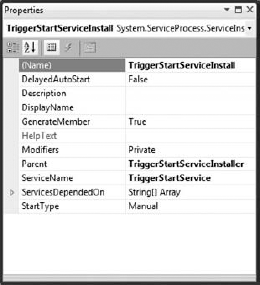
  8. Change the ServiceName property to TriggerStartService, as shown in Figure 3.

  9. Select the serviceProcessInstaller1 entry in the Design View window.

  10. Change the Account property to LocalSystem.

Other -----------------
- Advanced Windows 7 Programming : Working in the Background - ADVANTAGES OF WORKING IN THE BACKGROUND
- Microsoft Visio 2010 : Importing Graphics (part 6) - Importing AutoCAD Drawings - Manipulating an Imported AutoCAD Drawing and Adding Furniture
- Microsoft Visio 2010 : Importing Graphics (part 5) - Importing AutoCAD Drawings - Inserting an AutoCAD File
- Microsoft Visio 2010 : Importing Graphics (part 4) - Adding Excel Charts to Your Diagrams, Importing Vector Graphics
- Microsoft Visio 2010 : Importing Graphics (part 3) - Adding Clip Art to Your Diagrams
- Microsoft Visio 2010 : Importing Graphics (part 2) - Using Images as Shapes in Visio - Handling Bitmaps and Jaggies
- Microsoft Visio 2010 : Importing Graphics (part 1) - Using Images as Shapes in Visio - Working with Images
- Microsoft Visio 2010 : Using Special Shape Features (part 2) - Control Handles , Hyperlinks, Action Tags
- Microsoft Visio 2010 : Using Special Shape Features (part 1) - Right-Click Actions,Shape Data Fields
- Microsoft Visio 2010 : Working with Text (part 3) - Text Resizing Behavior
 
 
Top 10
- Microsoft Visio 2013 : Adding Structure to Your Diagrams - Finding containers and lists in Visio (part 2) - Wireframes,Legends
- Microsoft Visio 2013 : Adding Structure to Your Diagrams - Finding containers and lists in Visio (part 1) - Swimlanes
- Microsoft Visio 2013 : Adding Structure to Your Diagrams - Formatting and sizing lists
- Microsoft Visio 2013 : Adding Structure to Your Diagrams - Adding shapes to lists
- Microsoft Visio 2013 : Adding Structure to Your Diagrams - Sizing containers
- Microsoft Access 2010 : Control Properties and Why to Use Them (part 3) - The Other Properties of a Control
- Microsoft Access 2010 : Control Properties and Why to Use Them (part 2) - The Data Properties of a Control
- Microsoft Access 2010 : Control Properties and Why to Use Them (part 1) - The Format Properties of a Control
- Microsoft Access 2010 : Form Properties and Why Should You Use Them - Working with the Properties Window
- Microsoft Visio 2013 : Using the Organization Chart Wizard with new data
 
programming4us
Windows Vista
programming4us
Windows 7
programming4us
Windows Azure
programming4us
Windows Server