To translate text, OneNote 2010 offers translation services in the Research task pane as well as a little device called the Mini Translator. To translate
text with the Mini Translator, all you have to do is select the text,
hover the pointer over the text, and read the translation in the
Microsoft Translator toolbar. However, you have to do some setup work
before you can use the Mini Translator.
You can translate text not just from English to a foreign language but also from one foreign language to another.
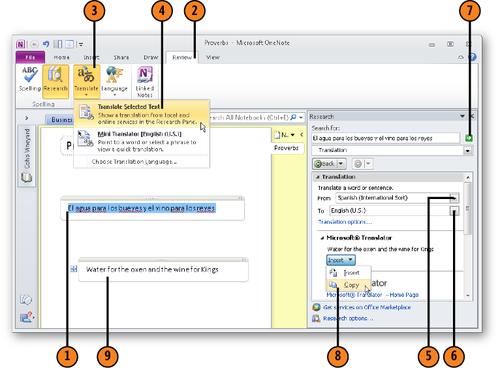
1. Translate a Word, Phrase, or Passage with the Research Task Pane
Drag
to select the word, phrase, or passage you want to translate (if you
want to translate a single word, you need only to click it).
Choose Translate Selected Text on the button’s gallery.
On the From menu in the Research task pane, choose the language in which the text you selected is written.
On the To menu, choose the language to which you want to translate the text.
Click the Start Searching button (this green button is located to the right of the Search For text box).
Open the Insert menu and choose Copy to copy the translation to the Clipboard.
Right-click on the OneNote page and choose a Paste option on the shortcut menu to paste the translation into a note.
Tip:
A fast way to translate text is to select it,
right-click it, and choose Translate on the shortcut menu. OneNote
translates the text using the previous From and To options you
selected. Choose different From and To options if necessary and then
click the Start Searching button to complete the translation.
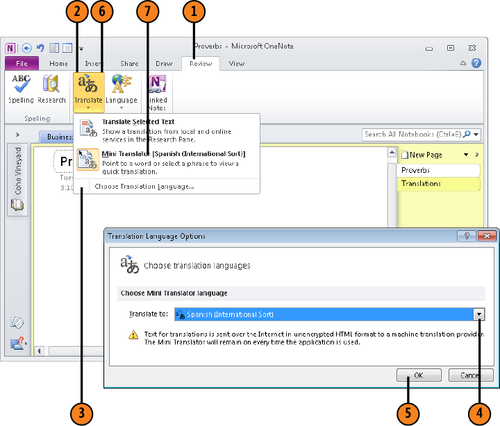
2. Get Ready to Use the Mini Translator
Choose the Choose Translation Language option on the button’s gallery.
In the Translation Language Options dialog box, choose the language to which you will translate text when using the Mini Translator.
Choose Mini Translator on the button’s gallery (if necessary because the option isn’t selected yet).
Note:
Try This!
Click the Translation Options link in the Research
task pane. Doing so opens the Translation Options dialog box, in which
you can see all the available language pairs (the To and From
translation options). If the To and From language pair you need isn’t
in the Research task pane, select it in this dialog box so you can
translate text to and from the languages of your choice.
Warning:
To use the Mini Translator, the Mini Translator
option must be selected (you see this option when you click Translate
on the Review tab). This button is a toggle. You can tell when it is
selected because it is highlighted.
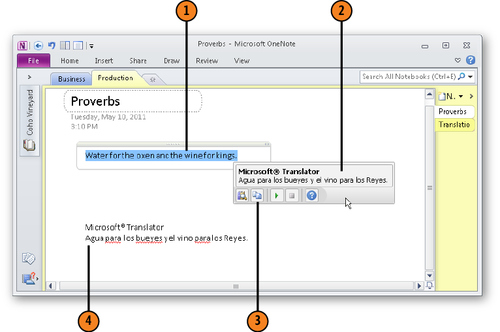
3. Use the Mini Translator
Select the text you want to translate.
Hover the pointer over the text, and when you see the Microsoft Translator toolbar, move the pointer onto the toolbar so you can read the translation.
Right-click on the OneNote page and choose a Paste option on the shortcut menu to paste the translation into a note.
Note:
Try This!
Click Play in the Microsoft Translator toolbar to hear a translation of the text.
