After you’ve finished a workbook, you might
consider adding an invisible digital signature—an electronic, secure
stamp of authentication on a workbook. Before you can add a digital
signature, you need to get a digital ID, or digital certificate,
which provides an electronic way to prove your identity. A digital
certificate checks a public key to validate a private key associated
with a digital signature. To assure a digital signature is authentic,
it must have a valid (non expired or revoked) certificate issued by a
reputable certification authority (CA), and the signing person must be
from a trusted publisher. If you need a verified authenticate digital
certificate, you can obtain one from a trusted Microsoft partner CA. If
you don’t need a verified digital certificate, you can create one of
your own. If someone modifies the file, the digital signature is
removed and revoked. If you’re not sure if a workbook is digitally
signed, you can use the Signatures task pane to view or remove valid
signatures.
Create an Digital ID
- 1. Click the File tab, click Info, click the Protect Workbook button, and then click Add a Digital Signature.
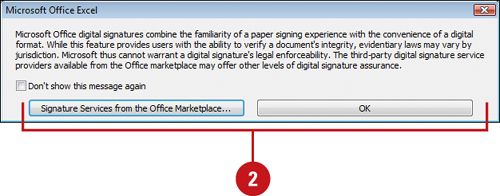
- 2. If an alert message appears, click Signature Services from the Office Marketplace to open an informational Web site where you can sign up for a digital certificate, or click OK to create your own.
If you don’t want to see this dialog box again, select the Don’t show this message again check box.
 - 3. If necessary, click OK and verify your Rights Management account credentials using your .NET password.
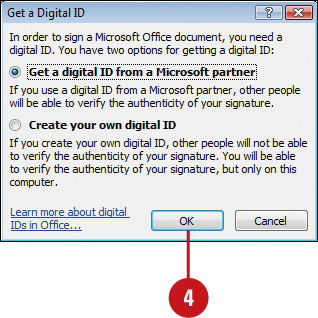
- 4. If you don’t have a digital ID, click the option to get an ID from a Microsoft Partner or create your own, and then click OK.
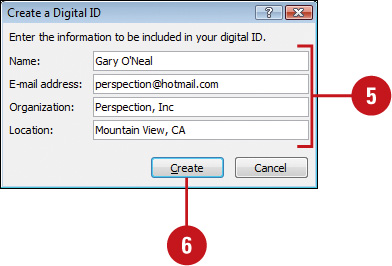
- 5. Enter your name, e-mail address, organization name, and location.
- 6. Click Create.
You can sign a workbook, or click Cancel.
Add a Digital Signature to a Workbook
- 1. Click the File tab, point to Prepare, and then click Add a Digital Signature.
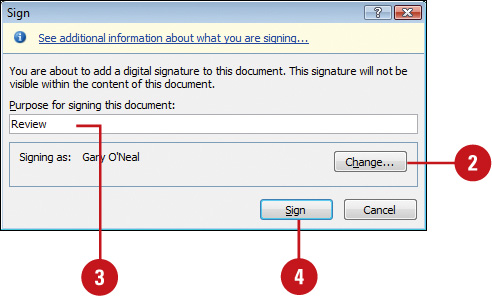
- 2. To change the digital signature, click Change, select the one you want, and then click OK.
- 3. Enter the purpose for signing this workbook.
- 4. Click Sign.
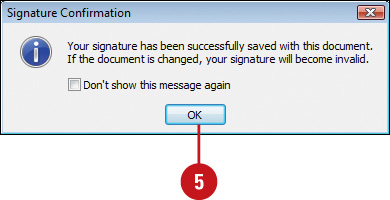
- 5. If necessary, click OK.
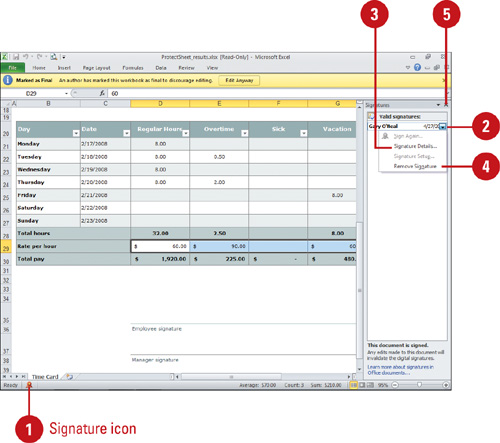
View or Remove Signatures
- 1. Click the Signature icon on the Status bar, or click the File tab, click Info, and then click the View Signatures button.
The Signatures task pane appears, displaying valid signatures in the
workbook. Invalid signatures are no longer automatically removed.
- 2. Point to a signature, and then click the list arrow.
- 3. To see signature details, click Signature Details, select a signature, click View, click OK when you’re done, and then click Close.
- 4. To remove a signature, point to a signature, click the list arrow, click Remove Signature, click Yes, and then if necessary click OK.
- 5. Click the Close button on the task pane.
|
