Windows Vista included a useful Windows Recovery
Environment (Windows RE) that would provide you with a selection of
tools for fixing a non-booting PC, accessing System Repair, and the
like. There was just one problem: it wasn't installed on the PC hard
drive by default, so you had to know to install it or be sure to carry
around a copy of the Windows Vista Setup disc with you just in case.
(You can also access the Windows RE from the Windows Setup disc.)
In Windows 7, Microsoft turns
it up to 11 by preinstalling Windows RE right on the PC's system disk.
So anytime there's a problem, you can optionally boot into this
environment to fix things.
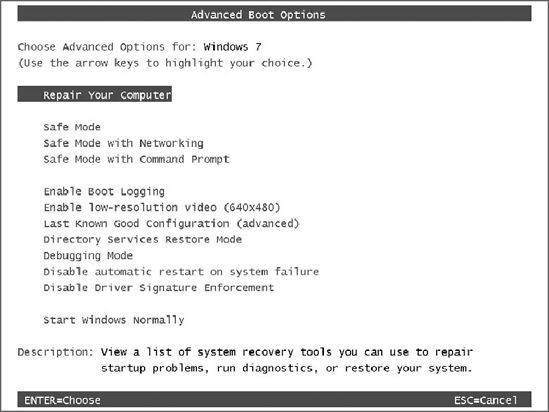
To access the Windows 7
Recovery Environment, reboot your PC and after the BIOS has completed
its thing, press and hold the F8 key. (You must do this before the
"Starting Windows" animation appears.) You will see the screen displayed
in Figure 1.
NOTE
In case it's not
obvious, you may occasionally still need to access the Windows RE from
the Windows 7 Setup disc. That's because the PC may literally get into a
state where even the Recovery Environment can't boot from the hard
drive. It's rare but it happens.
1. Looking at the Repair Tools
You can choose
from a variety of system troubleshooting options here, but the first,
and selected, option, Repair Your Computer, will get the job done.
Select this. After a few "loading" screens (including, curiously, a
screen displaying the progress bar that appeared when Windows Vista
booted), you are asked to select a keyboard input method (this typically
has the correct option pre-selected) and then you are asked to log on
with a valid administrator-class account.
Once this is completed, you are presented with the System Recovery Options screen shown in Figure 2.
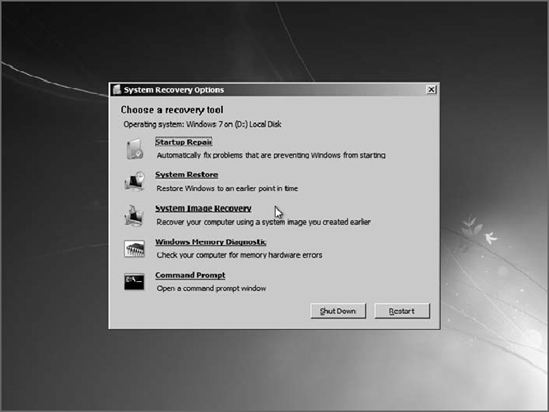
From here, you can access the following options.
Startup Repair:
This tool can help you automatically repair problems that prevent
Windows from booting correctly. We examine this tool in the next
section.
System Restore: This provides a way to access System Restore from outside of Windows.
System Image Recovery:
This helps you use a previously saved system image to completely
reinstall the PC and return it to an earlier state.
Windows Memory Diagnostic:
This link triggers a reboot so that a special memory diagnostic program
can run as the PC boots. This tool is useful if you're worried that
some sporadic stability problems may be caused by memory issues.
Command Prompt.
Advanced users and system administrators can access a standard Windows
command prompt to run command-line programs on the PC's hard drive.
2. Using Startup Repair to Fix a Non-Booting PC
If you choose the option
titled Startup Repair, the Startup Repair utility will open and scan
your PC for boot-related issues (see Figure 2). If it finds any, it fixes them automatically. If not, it simply provides a message to that effect.
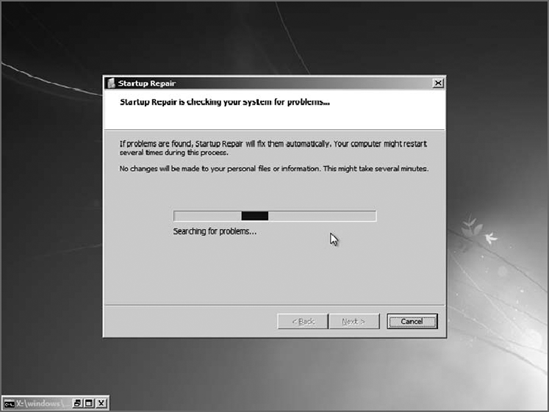
And ... that's it. That's literally all it does.
NOTE
We accessed the Startup
Repair tool manually here in order to explain its user interface and
functionality, but you won't typically need to do this: if your PC
doesn't boot properly for some reason, Startup Repair will run
automatically and fix the problem and then boot right into Windows 7.
And if you happen to walk away from the computer at that time, you may
not even realize it happened.
