1. Problem
You need to implement drag-and-drop in your Silverlight Windows Phone 7 application.
2. Solution
You have different options
here, including using the gestures and techniques explained in the
previous recipes. However, this time we suggest another solution to
accomplish drag-and-drop or other gestures management: GestureListener, provided by the Silverlight for Windows Phone 7 toolkit.
3. How It Works
You can download the Silverlight for Windows Phone 7 toolkit from CodePlex at http://silverlight.codeplex.com. This toolkit provides the GestureService class, which exposes the GestureListener property. You can use this property to specify the gesture you want to manage in your application. Indeed, GestureListener
provides a public event for each gesture supported by the phone, plus
two more events indicating when the gesture begins and when the gesture
is completed.
3.1. The Code
To demonstrate the drag-and-drop function in a Silverlight Windows Phone application, we have created the GesturesWithToolkit
project. You are going to create an application in which a rectangle
can be dragged around the screen. When the drag is completed, the code
checks whether the rectangle has been dropped over another rectangle.
Create a new Visual Studio 2010 Silverlight Windows Phone application called GesturesWithToolkit. Add a reference to the Microsoft.Phone.Controls.Toolkit assembly. You should find it in the %Program%\ \Microsoft SDKs\Windows Phone\v7.0\Toolkit\Nov10\Bin directory.
In MainPage.xaml, you have to add a new namespace declaration to use the toolkit.
<phone:PhoneApplicationPage
    x:Class="GesturesWithToolkit.MainPage"
    xmlns="http://schemas.microsoft.com/winfx/2006/xaml/presentation"
    xmlns:x="http://schemas.microsoft.com/winfx/2006/xaml"
    xmlns:phone="clr-namespace:Microsoft.Phone.Controls;assembly=Microsoft.Phone"
    xmlns:shell="clr-namespace:Microsoft.Phone.Shell;assembly=Microsoft.Phone"
    xmlns:d="http://schemas.microsoft.com/expression/blend/2008"
    xmlns:mc="http://schemas.openxmlformats.org/markup-compatibility/2006"
    xmlns:toolkit="clr-
namespace:Microsoft.Phone.Controls;assembly=Microsoft.Phone.Controls.Toolkit"
. . .
Then you have to add the GestureService tag between the tags of the control used to manage the gestures. For example, we added those tags to the Rectangle control defined inside Canvas. The GestureListener
tag enables us to define which gestures can be managed by our
application specifying which is the related event handler. We have
specified to retrieve DragStarted, DragDelta, and DragComplete events.
The two rectangles are placed into a Canvas control at fixed positions. The dragable rectangle has the ZIndex property greater than the other rectangle, so it will not disappear under the dragged rectangle when they overlap.
. . .
<!--ContentPanel - place additional content here-->
        <Canvas x:Name="ContentPanel" Margin="12,0,12,0">
            <Rectangle Fill="Red" x:Name="rSource" Width="100" Height="100" Grid.Row="0"
                       Canvas.Left="0" Canvas.Top="160" Canvas.ZIndex="1">
<toolkit:GestureService.GestureListener>
<toolkit:GestureListener DragStarted="GestureListener_DragStarted"
DragDelta="GestureListener_DragDelta"
DragCompleted="GestureListener_DragCompleted" />
</toolkit:GestureService.GestureListener>
            </Rectangle>
            <Rectangle Fill="Yellow" x:Name="rTarget" Height="100" Width="460"
                       Canvas.Left="0" Canvas.Top="660" Canvas.ZIndex="0" />
        </Canvas>
. . .
In the MainPage.xaml.cs file, we implemented the code to respond to the gesture events. In the GestureListener_DragStarted
event handler, we simply inform the application that a drag operation
has started. This is informs the other event handlers to accomplish
their operation only when a drag is started. Despite the name, the CaptureMouse
method is used to capture the tap on the control that uses it. So, the
controls will receive tap and drag information whether or not the user's
finger is in control's borders.
The GestureListener_DragDelta
event handler is used to paint the rectangle to the newer coordinates.
Those are calculated by adding the actual Left and Top rectangle
positions in the Canvas to the VerticalChange and HorizontalChange values provided by the DragDeltaGestureEventArgs parameter.
private void GestureListener_DragStarted(object sender,
                                                 DragStartedGestureEventArgs e)
        {
            Rectangle rect = sender as Rectangle;
            _isDrag = true;
            rect.CaptureMouse();
        }

        private void GestureListener_DragDelta(object sender, DragDeltaGestureEventArgs e)
        {
            if (_isDrag)
            {
                Rectangle rect = sender as Rectangle;
                rect.SetValue(Canvas.TopProperty,
                       (double)rect.GetValue(Canvas.TopProperty) + e.VerticalChange);
rect.SetValue(Canvas.LeftProperty,
                       (double)rect.GetValue(Canvas.LeftProperty) + e.HorizontalChange);
            }
        }
Finally, in the GestureListener_DragCompleted
event handler, we inform the application that the drag operation has
ended. Moreover, we check whether the two rectangles have collided by
calling the CollisionDetected method. If the rectangles have collided, we will show a MessageBox message informing the user that a collision between rectangles has been detected.
private void GestureListener_DragCompleted(object sender,
                                                   DragCompletedGestureEventArgs e)
        {
            Rectangle rect = sender as Rectangle;
            _isDrag = false;
            rect.ReleaseMouseCapture();

            if (CollisionDetected())
                MessageBox.Show("Collision detected!");
        }
The CollisionDetected
method simply checks the vertical position of the rectangle adding to
the position the rectangle's height. If this value is equal to or
greater than the vertical position of the destination rectangle, then a
collision is detected and the method returns a Boolean true value.
private bool CollisionDetected()
        {
            double rSourcePos = rSource.Height +
                               (double)rSource.GetValue(Canvas.TopProperty);
            if (rSourcePos >= 660)
                return true;
            else
                return false;
        }
4. Usage
From Visual Studio 2010, press Ctrl+F5 and wait for the emulator to start. The application shown in Figure 1 displays.
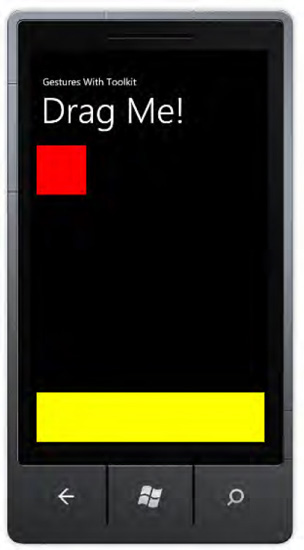
Now you can press and hold the
left mouse button and start to move it around the screen emulator. When
you drop the red rectangle over the yellow one, you will see a message
appear onscreen, as shown in Figure 2.

