5 . Add a certificate to the Client Access Server role
When the Exchange Server 2010
Client Access Server role is installed, a self-signed certificate is
installed automatically, primarily for testing purposes. However, as
soon as the installation is finished, a real certificate should be
acquired and installed. Exchange Server 2010 uses a Unified Messaging
certificate, which holds besides its Subject Name other names as well,
called the Subject Alternative Names (SAN). For example, the Subject
Name could be webmail. yourdomain.com and Subject Alternative Names could be autodiscover.yourdomain.com and mail.yourdomain.com.
To request a
certificate you can either use the Exchange Management Console or the
Exchange Management Shell. When using the Exchange Management Console
(after all, we are Windows administrators, right?) use the following
steps:
Log on to the Exchange Server 2010 Client Access Server and open the Exchange Management Console.
In the navigation pane, expand "Microsoft Exchange On-Premises."
In the navigation pane, click on "Server Configuration."
In
the top half of the middle pane you'll see your Exchange Server,
including your Edge Transport Server, and in the bottom half you'll see
the corresponding certificate. This is the self-signed certificate
that's created during the installation of your Exchange server.
In
the actions pane click on "New Exchange Certificate," and the New
Exchange Certificate wizard is shown. Enter a Friendly Name, for example
"Exchange Server". Click Next to continue.
The next page is the Exchange Configuration where you can determine the usage of the certificate. Select the following services:
Client Access Server (Outlook Live)
Client Access Server (Exchange ActiveSync)
Client Access Server (Web Services, Outlook Anywhere and Autodiscover).
In
all three options, enter the external hostname for your organization.
In the last option also select "Autodiscover used on the Internet" and
select the proper URL. The default is the Long URL like autodiscover.yourdomain.com. Click Next to continue.
In
the Organization and Location page you have to enter your company
specific details like Organization, Organizational Unit, Country, etc.
In the Certificate Request File Path click Browse to enter a location
for the Certificate Request File. Enter a filename like c:\Exch-Cert.req
and click Save. Click Next to continue.
On
the Certificate Configuration page check your certificate request
details and, if all is OK, click New to generate the request file.
On
the completion page you'll see the PowerShell command that was used for
generating this certificate request. If needed you can use CTRL-C to
copy the contents of this page to the server's clipboard. Click Finish
to continue.
You can find the file c:\Exch-Cert.req on your server. This file looks something like this:
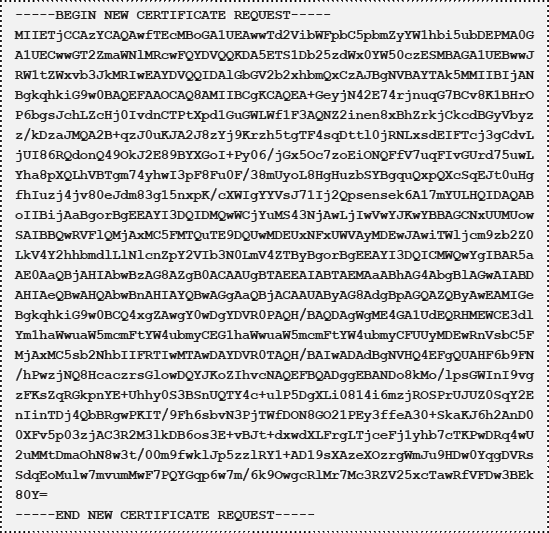
To request a new certificate,
you have to submit this file to your Certificate Authority. Microsoft
has a list on their support website of supported vendors who can supply
Unified Communications certificates: HTTP://TINYURL.COM/CERTVENDORS.
On the Exchange
Certificates tab in the Exchange Management Console, you'll see a new
entry, and the parameters you entered in the previous step can be
identified here.
When you receive the certificate from your authority follow these steps:
Save the certificate on the hard disk of your server.
In
the Exchange Management Console, on the Exchange Certificates tab,
right-click the new certificate and select "Complete Pending Request."
Browse to the file you stored in Step 1 on the hard disk.
Follow the wizard to complete the certificate request and finish the installation.
In
the Exchange Management Console, on the Exchange Certificates tab
select the original, self-signed certificate, right-click it, and select
Remove to remove this certificate from the Exchange Server 2010 server.
Using Internet Explorer open Outlook Web App (using HTTPS://LOCALHOST/OWA)
and check the new certificate. Never mind the error message you will
receive, this is because the name "localhost" is not in the certificate.
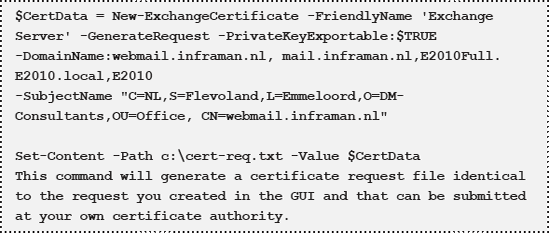
You can also use the Exchange Management Shell to request a new certificate:
Log on to the Exchange Server 2010 server with domain administrator credentials and open the Exchange Management Shell.
Since
the –Path option is no longer supported in Exchange Server 2010 you
first have to use a variable and in Step 2 you have to write the actual
file:
A certificate will be sent by
your certificate authority that can be imported on the Client Access
Server by using the Import-ExchangeCertificate commandlet in the
Exchange Management Shell. The output of this commandlet can be piped
into the Enable-ExchangeCertificate to enable the certificate after
importing it:
Log on to the Exchange Server 2010 server with domain administrator credentials and open the Exchange Management Shell.
Enter the following command:

The Client Access Server
role is responsible for handling all client requests with respect to
mailbox access. This means Outlook Web App, POP3 and IMAP4, Outlook
Anywhere and ActiveSync all have to be configured on the Client Access
Server role. New in Exchange Server 2010 is the fact that the Client
Access Server now also handles all MAPI requests. So Outlook clients no
longer connect to the Mailbox Server role directory, but rather to the
Client Access Server. This functionality is called "RPC Client Access."
The codename for this was "MAPI on the Middle Tier" or MoMT.
In this section, I will
briefly focus on Outlook Web App, Outlook Anywhere and ActiveSync. A
prerequisite for proper functioning of these services is that a valid
Unified Communications certificate from a trusted vendor, with proper
Subject Alternative Names is installed as described in Section 2.7.5.
Since the Client Access Server is on the same box as the Mailbox
Server, no special configuration is needed for the MAPI clients.
Log on to the Exchange Server 2010 server with domain administrator credentials and open the Exchange Management Console.
In the navigation pane expand "Microsoft Exchange On-Premises."
In the navigation pane expand "Server Configuration."
Click on "Client Access."
In
the lower part of the results pane you can select the tabs for Outlook
Web App, Exchange ActiveSync, Offline Address Book Distribution and POP3
and IMAP4. From here, you can now configure the various aspects of the
Client Access Server.
Outlook Web App
To configure Outlook Web App select the Outlook Web App tab, right-click on OWA (Default Website) and select its properties.
In
the External URL field, enter the URL that users will use when
connecting to the OWA site from the Internet. Make sure that this name
corresponds to the name used in the certificate you installed in the
previous section.
Click OK to close the properties page.
Exchange ActiveSync
On the Exchange ActiveSync tab, right-click the Microsoft-Server-ActiveSync and select its properties.
In
the External URL field, enter the URL that users will use when
connecting to the OWA site from the internet. Make sure that this name
corresponds to the name used in the certificate you installed in the
previous section.
Click OK to close the properties page.
NOTE
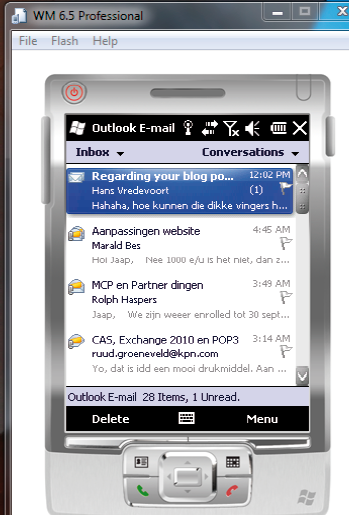
Testing
your Exchange Server 2010 ActiveSync setup is always difficult. To
avoid needing a real mobile device you can use an emulator for testing
purposes. Microsoft has several emulators available on the Microsoft
download site, and you can download the Windows Mobile 6.5 emulator
here: HTTP://TINYURL.COM/WINMOB6. Just
install it on your computer or laptop, connect it to your local network
adapter and start configuring the device. When you have the proper
connectivity you can even test it from home – this works great!
Outlook Anywhere
Outlook Anywhere uses
the HTTP protocol to encapsulate RPC information for sending between the
Outlook client (version 2003 and 2007) and the Exchange Server 2010
server. For this service to run properly the RPC over HTTP Proxy service
has to be installed on the Client Access Server. This can be achieved
either by adding this as a feature via the Server Manager, or by
entering the following command on a PowerShell Command Prompt:

Open the Exchange Management Console.
In the navigation pane, expand "Microsoft Exchange On-Premises."
In the navigation pane, expand "Server Configuration."
Click on "Client Access" and select your Client Access Server.
In the Actions pane, click on "Enable Outlook Anywhere."
On
the Enable Outlook Anywhere page enter the External host name. Make
sure that this name is also available in the certificate you created on
the previous Paragraph. Select the authentication methods used by
clients, i.e. Basic Authentication or NTLM authentication. For now leave
these settings on default and click Enable to continue.
This
will activate the Outlook Anywhere service on this service, and it may
take up to 15 minutes before the service is actually usable on the
Client Access Server. Click Finish to close the wizard.
