Most artwork is made from a collection of smaller
overlapping parts. In fact, some artwork includes hundreds, even
thousands, of smaller brush strokes or paths. You can make your life a
little easier by grouping the related parts of an object so that you can
work with them as a single unit.
The following are a few benefits of grouping objects:
Grouping protects the integrity of the drawing by keeping its parts in their correct position relative to its other parts.
Grouping
creates a nicely organized Group object in the Layers panel. You can
rename the group in the Layers panel for better organization.
Tip
If your drawings include lots
of smaller parts or paths, you can group them, select the group, and use
the Heads-Up Display (HUD) to create an optimized graphic.
Grouped
objects have their own set of properties in the Properties panel, which
makes it easier to size, position, and transform the drawing. For
example, you can change its opacity, rotate the drawing, or apply
filters.
You can use the Select tool to select, transform, size, and position the group as a single unit.
You
can always select the parts within a group by using the Direct Select
tool, or by selecting their individual rows in the Layers panel.
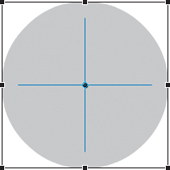
Group objects
The
panel you’re creating includes the rounded Panel Header and Header
Overlay rectangles. You’ve already aligned these objects perfectly, so
let’s go ahead and group them. That’ll make it easier to position them
at the top of the panel. While we’re at it, let’s also group the ellipse
and lines used to make the close button. This will make rotating,
sizing, and positioning these parts a lot easier too.
1. | Select the Panel Header and Header Overlay rectangles.
|
2. | Choose Modify > Group.
The two gradient rectangles are grouped and share one set of selection handles.
|
3. | In the Layers panel, rename the group Panel Header.
|
4. | Select the Ellipse shape and the two lines.
|
5. | Choose Modify > Group.
|
6. | In the Layers panel, rename the group Close.
|
Transform shapes
Let’s use the Transform tool to rotate the close button and turn the plus sign into an X for “close.”
1. | In the Layers panel, select the Close group.
|
2. | Select the Transform (Rotate) tool in the Tools panel.
Transform handles appear around the group.

|
3. | Position the pointer over the selected shapes.
The pointer changes to the Transform tool.
Note
You can also use the transform
tool to resize or rotate other objects, such as a bitmap image or vector
drawing that you’ve imported.
|
4. | Drag to rotate the selected shapes by 45 degrees.
The Rotation value changes in the Properties panel.
|
5. | In the Properties panel, make sure the Rotation value is exactly 45 or -45 to turn the crossed lines into an X.
|
Size and position objects
With
our shapes grouped, we can move and size them as single drawings. Let’s
start by putting the header at the top of the panel, just inside the
outline of the panel background. After that, we’ll reduce the size of
the close button and place it where it belongs, at the top of the panel.
1. | Using
the Select tool (dark arrow), drag the grouped Panel Header to position
it at the top inside the Panel Background rectangle.

|
2. | Select the Close group in the Layers panel.
|
3. | Hold
down the Shift key, then drag a corner selection handle to reduce the
size of the Close group. Make it small enough to fit in the upper-right
corner of the panel header. It doesn’t need to be exact.
Tip
You can press the arrow keys
to move an object 1 pixel at a time. Holding down Shift when you press
the arrow keys moves the object 10 pixels at a time.
|
4. | Position the Close group in the upper-right corner of the panel.

|