3. Deleting a
Volume
Deleting
a volume is easy—and irreversible. All data is lost in the process, so
be sure you have backed up or no longer need whatever the volume
currently contains. Then right-click the volume and choose Delete
Volume. The volume reverts to unallocated space, and if it happens to
have been the last volume on a dynamic disk, the disk itself is
converted to basic.
4. Converting
a FAT32 Disk to NTFS
To convert a FAT or FAT32
disk to NTFS, use the command-line Convert
utility. The essential syntax is
convert d: /fs:ntfs
where d is the drive letter you want to convert.
For information about optional parameters, type convert /? at the command prompt.
|
The process of shrinking a volume in Windows 7 can be
frustrating, especially
after you've used that volume for any length of time. Even though Disk
Management reports ample unused space on the disk, you might find
yourself able to shrink the volume by only a small amount. In one recent
example, we were working with a 366-GB disk that reportedly had 287 GB
of free space. Disk Management, however, reported that it could shrink
the volume by only 172 GB. So how do you make use of the extra space?
Carefully. Try the following steps in order, checking after each one and
stopping when you find that enough space is available:
Start by
disabling System Restore on the volume. (Right-click Computer, and
choose Properties. Click System Protection, select the drive on which
you want to disable System Restore, and then click Configure. In the
System Protection dialog box, click Turn Off System Protection.) This action deletes
all existing volume shadow copies on the volume and often frees up a
significant amount of space. Temporarily configure the volume to use
no page file. Be sure to reset the page file
after you complete the disk shrink operation. Use a third-party
defragmenter to reorganize data files, and choose the option to move the
Master File Table (MFT) to the beginning of the volume. (You must use a
third-party tool for this task; the Windows 7 Defrag tool doesn't offer
this capability.) If the MFT is in the middle of the volume, you will
be unable to take advantage of any shrink space between it and the end
of the data area.
If none of these steps
give you as much space as you were looking for, choose the most drastic
option: make an image backup of the current volume. After verifying that the image is
good, delete the volume and restore it from the image file. Immediately
after completing the restore, attempt to shrink the volume again; you
should find that virtually all free space is available for you to use.
|
The Convert utility can do its work within Windows if the drive to
be converted is not in use. However, if you want to convert the system
volume or a volume that holds a page file, you might see an error
message when you run Convert. In that case, you must schedule the
conversion to occur the next time you start Windows. After you restart
the computer, you'll see a prompt that warns you that the conversion is
about to begin. You have 10 seconds to cancel the conversion. If you
allow it to proceed, Windows will run the Chkdsk utility and perform the
conversion automatically. During this process, your computer will
restart twice.
Warning:
Converting your system drive to NTFS makes it impossible to
restore a previously installed operating system that requires FAT32,
such as Windows 9x. The Convert utility warns
you about this fact in no uncertain terms. If you have set up your
system using a multiboot configuration so that you can continue to run
Windows 9x,
do not convert the system drive to NTFS; doing so will make it
impossible to start your previous Windows version.
5. Assigning
or Changing a Volume Label
In Windows 7, as in
previous versions of Windows, you can assign a descriptive text label to
any volume. Assigning a label is purely optional, but it's a good
practice, especially if you have a multiboot system or if you've set up
separate volumes to keep your data organized. You can use Data as the label for
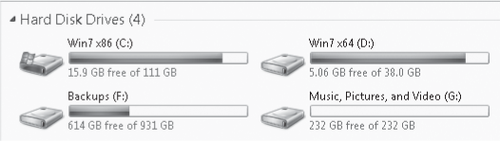
your data drive, MusicVolume
labels appear in the Computer window alongside the drive letter for a
volume, as in the example shown here: for the drive that holds your collection of digital tunes,
and so on.
You can enter a
volume label when you format a new volume. Or you can do it at any time
afterward, by right-clicking a volume (in Disk Management or in Windows
Explorer), choosing Properties, and entering text in the edit field near
the top of the General tab.
6. Assigning
and Changing Drive Letters
You can assign one and
only one letter to a volume. For all but the following volumes, you can
change or remove the drive letter at any time:
To change a
drive-letter assignment, right-click the volume in Disk Management and
choose Change Drive Letter And Paths. (You can do this in either the
graphical or tabular pane.) To replace an existing drive letter, select
it and click Change. To assign a drive letter to a volume that currently
has none, click Add. Select an available drive letter from the Assign
The Following Drive Letter list, and then click OK twice.
Windows 7, unlike
Windows Vista, does not display empty drives by default. If your
computer has a set of drives for memory cards, you're accustomed to seeing those
drives listed in Windows Explorer whether the drives are empty or not.
If you want to put things back the way they used to be, open Windows
Explorer, choose Tools, Folder Options (start by pressing Alt if the
menu bar isn't visible), click the View tab, and then clear Hide Empty Drives
In The Computer Folder.
