Logo
programming4us
programming4us
programming4us
programming4us
Home
programming4us
XP
programming4us
Windows Vista
programming4us
Windows 7
programming4us
Windows Azure
programming4us
Windows Server
programming4us
Windows Phone
 
programming4us
Windows 7

Microsoft Excel 2010 : Protecting and Securing a Workbook - Adding Password Protection to a Workbook

- Free product key for windows 10
- Free Product Key for Microsoft office 365
- Malwarebytes Premium 3.7.1 Serial Keys (LifeTime) 2019
5/27/2014 1:04:43 AM
You can assign a password and other security options so that only those who know the password can open the workbook, or to protect the integrity of your workbook as it moves from person to person. At times, you will want the information to be used but not changed; at other times, you will want only specific people to be able to view the workbook. Setting a workbook as read-only is useful when you want a workbook, such as a company-wide bulletin, to be distributed and read, but not changed. Password protection takes effect the next time you open the workbook.

Add Password Protection to a Workbook

1. Open the workbook you want to protect.

2. Click the File tab, and then click Save As.

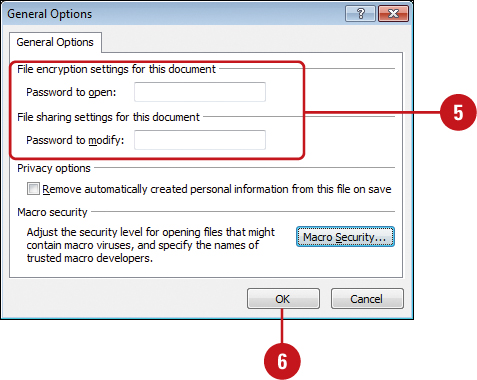
3. Click Tools, and then click General Options.

4. Type a password in the Password to open box or the Password to modify box.

Important

It’s critical that you remember your password. If you forget your password, Microsoft can’t retrieve it.

5. Select or clear the Remove automatically created personal information from this file on save check box.

6. To set macro security options in the Trust center, click Macro Security.

7. Click OK.

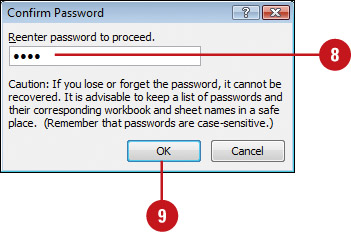
8. Type your password again.

9. Click OK.

10. If you entered passwords for Open and Modify, type your password again, and then click OK.

11. Click Save, and then click Yes to replace existing workbook.

For Your Information: Using a Strong Password

Hackers identify passwords as strong or weak. A strong password is a combination of uppercase and lowercase letters, numbers, and symbols, such as Grea8t!, while a weak one doesn’t use different character types, such as Hannah1. Be sure to write down your passwords and place them in a secure location.


Open a Workbook with Password Protection

1. Click the File tab, click Open, navigate to a workbook with password protection, and then click Open.

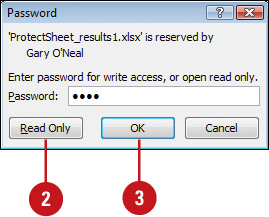
2. Click Read Only if you do not wish to modify the workbook, or type the password in the Password dialog box.

3. Click OK.

Change or Remove the Password Protection

1. Click the File tab, click Open, navigate to a workbook with password protection, and then click Open.

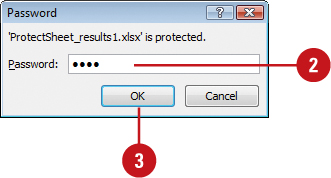
2. Type the password in the Password dialog box.

3. Click OK.

4. Click the File tab, click Save As, click Tools, and then click General Options.

5. Select the contents in the Password to modify box or the Password to open box, and then choose the option you want:

  • Change password. Type a new password, click OK, and then retype your password.

  • Delete password. Press Delete.

6. Click OK.

7. Click Save, and then click Yes to replace existing workbook.
Other -----------------
- Microsoft Excel 2010 : Protecting and Securing a Workbook - Adding Security Encryption to a Workbook
- Microsoft Excel 2010 : Protecting and Securing a Workbook - Locking or Unlocking Worksheet Cells
- Microsoft Excel 2010 : Protecting and Securing a Workbook - Protecting a Worksheet - Apply a Password to a Worksheet
- Microsoft Excel 2010 : Protecting and Securing a Workbook - Inspecting Workbooks
- Working in the Background : WORKING WITH THE NETWORK LIST MANAGER
- Working in the Background : IMPLEMENTING APPLICATION RESTART AND RECOVERY
- Working in the Background : PROVIDING POWER MANAGEMENT (part 2) - Detecting a Change in Monitor State
- Working in the Background : PROVIDING POWER MANAGEMENT (part 1) - Getting the Power Management State
- Automating Windows 7 Installation : Customizing Images Using Deployment Image Servicing and Management (part 3) - Servicing the Operating System in an Image , Committing an Image
- Automating Windows 7 Installation : Customizing Images Using Deployment Image Servicing and Management (part 2) - Mounting an Image , Servicing Drivers in an Image
 
 
Top 10
- Microsoft Visio 2013 : Adding Structure to Your Diagrams - Finding containers and lists in Visio (part 2) - Wireframes,Legends
- Microsoft Visio 2013 : Adding Structure to Your Diagrams - Finding containers and lists in Visio (part 1) - Swimlanes
- Microsoft Visio 2013 : Adding Structure to Your Diagrams - Formatting and sizing lists
- Microsoft Visio 2013 : Adding Structure to Your Diagrams - Adding shapes to lists
- Microsoft Visio 2013 : Adding Structure to Your Diagrams - Sizing containers
- Microsoft Access 2010 : Control Properties and Why to Use Them (part 3) - The Other Properties of a Control
- Microsoft Access 2010 : Control Properties and Why to Use Them (part 2) - The Data Properties of a Control
- Microsoft Access 2010 : Control Properties and Why to Use Them (part 1) - The Format Properties of a Control
- Microsoft Access 2010 : Form Properties and Why Should You Use Them - Working with the Properties Window
- Microsoft Visio 2013 : Using the Organization Chart Wizard with new data
 
programming4us
Windows Vista
programming4us
Windows 7
programming4us
Windows Azure
programming4us
Windows Server