| |
|
|
|
Planning for the Installation of Windows 7 : Local Installation
|
|
|
|
|
|
|
|
|
5/10/2011 5:58:09 PM
|
|
Installing one or two
systems manually is no big deal, but if you have to install 5, 50, or
more, you'll want to automate the process. For the most part, the
installation of Windows 7 is straightforward with few surprises. The
biggest challenge may come if you have to change partitions on the hard
disk or add additional disk drivers.
Exercise 1 will walk you through the steps needed to install Windows 7 from the installation DVD.
Place
the Windows 7 installation DVD in the DVD drive and boot the system.
After a moment, the Install Windows screen will appear, as shown in the
following graphic.
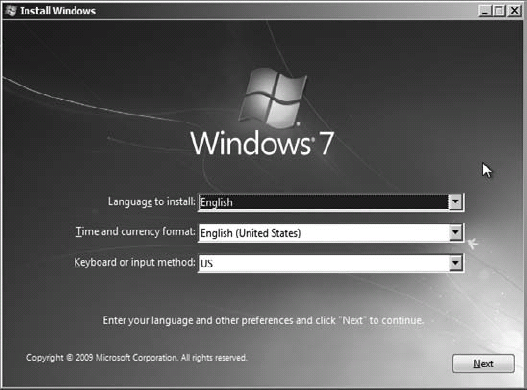
Although
it looks like you have minimal choices here, you can press Shift+F10 to
access the command line from this menu Select the appropriate Language To Install, Time And Currency Format, and Keyboard Or Input Method, and click Next. Review the license terms, and select I Accept The License Terms. Click Next. Select
Custom (Advanced) to install a new copy of Windows. If an existing
version exists that can be upgraded to Windows 7, you can select
Upgrade. Select the partition where you want to install Windows. Notice
that you can create additional partitions from this screen. However, if
you start with anything other than a single precreated partition,
Windows will create a partition labeled System Reserved of about 100 MB,
as shown in the following graphic. This partition includes the Windows
Recovery Environment (WinRE) and ensures that all Windows features can
work correctly. Also, once it's created, you can't get rid of the
partition without reinstalling the OS. If
you don't want this partition added, you must format the entire drive
as a single partition before starting the installation. You can do so by
accessing the command prompt by pressing Alt+F10 at the Install Now
page and using DiskPart. You can later shrink the volume to create
additional partitions.
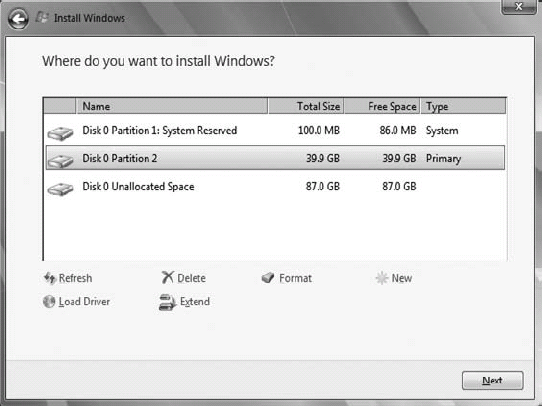
Notice that
you can also delete, extend, and format partitions from this page. You
can also load a driver from this page if your hard drive isn't
recognized. Beware though—if you repartition the drive, you'll lose
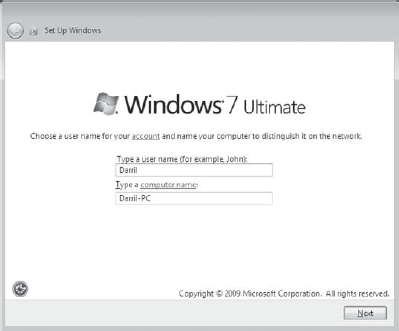
access to data that would normally be stored in the Windows.old folder after the installation. Once you have selected the partition, click Next. The installation will take several minutes to complete, but it will be automated from this point. When
the installation completes and reboots, you will be prompted to type a
user name, as shown in the following graphic. As you enter the user
name, the computer name will be created by appending the user name with
-PC. You can accept this computer name or type in a different computer
name. Click Next once you're satisfied with the user name and computer
name.
The
Set A Password For Your Account page screen prompt will appear. This
password is for the account you created in the previous step. You need
to type in a password, retype the same password for confirmation, and
type a password hint. Once you've entered this information, click Next. Enter
the product key for your edition of Windows on the Type Your Windows
Product Key screen. The check box Automatically Activate Windows When
I'm Online is checked by default. Leave it checked and click Next. You'll
be prompted to configure the computer for automatic updates. The Use
Recommended Settings selection will automate the download and
installation of updates, but you can choose Only Install Important
Updates or set it to ask you later. Select one of the choices. Choose your time zone on the time zone and clock screen. Make sure the time and date are accurate, and click Next. Select Work Network as the computer's current location. The Windows 7 desktop will appear. The installation is complete.
|
|
|
|
|
|
|
|
|
|
|
|
|
|
|
| |
|
|
