Some large programs let you choose how you
want to install the program. For example, you may be given options to do
a Minimum Install, Typical Install, or Complete Install. You might do a
Minimum or Typical installation to conserve disk space, but later
discover you need a feature that only the Complete install would have
provided.
Sometimes a program might become corrupted
and not work properly anymore. That can happen when you inadvertently
delete a file that the program needed. Or it might be caused by some
minor glitch that compromised a file that the program uses.
The first step to changing or repairing a program is to get to the Programs and Features applet in Control Panel. Here's how:
Click the Start button and choose Control Panel.
In the category view, click Programs.
Click Programs and Features.
You can also get to Programs and Features from the keyboard. Press  , type fea, and choose Programs and Features from the Start menu.
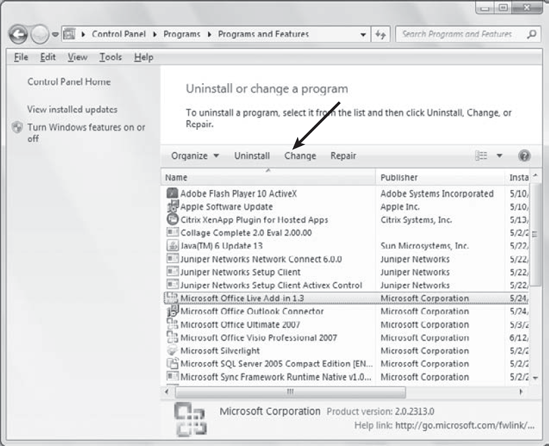
The page that opens lists all of your installed application programs. (It doesn't include programs that come with Windows 7.)
Not all programs offer change or repair options. To
see what options an installed program offers, right-click the program
name. Or, click the program name and take a look at the buttons above
the list of program names. Things you can do with that program will be
listed in a toolbar above the list. For example, in Figure 1, I clicked Microsoft Office Live Add-in, which offers options to Uninstall, Change, or Repair.
In most cases, you'll need the CD (or DVD) from which
you originally installed the program to change or repair the program.
If you have the CD handy, go ahead and put it in the CD drive. If
AutoPlay asks what you want to do with the disk, choose Take No Action.
If the installation program opens automatically, just cancel or close
that program.
NOTE
Changes you make to a program affect all users.
Therefore you must know the password for an Administrator account on
your computer to change or repair programs.
Exactly how things play out from here will vary from
one program to the next, so I can only provide some general guidelines
and examples. But all you really have to do is make your selections and
follow the instructions on the screen. For example, to repair a
corrupted program, click the Repair button and do whatever the resulting
instructions tell you to do.
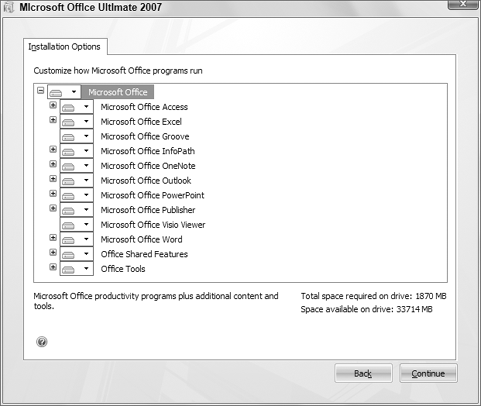
The Change option for a program is generally for
adding components you didn't install the first time around, though you
can also remove any components you don't need. The exact process will
vary from one program to the next, but a typical approach is to list all
program features in a hierarchical tree, like the example in Figure 2.
NOTE
Don't use Programs and Features to change
settings within a program. Instead, use the program's Options or
Preferences dialog box. Open the program as you normally would and look
through its menus for a Tools or Preferences option. Or search that
program's help for the word preferences or options.
